Showing posts with label Giddy Up Friday. Show all posts

Friday, February 10, 2012

Giddy-Up Friday: Valentine Sudoku Printables

I am feeling the love tonight! Are you? If not, these Valentine Sudoku Printables by Kid Giddy can help you out with that!

I have made some other versions, the Basic Shape Sudoku and the Halloween Sudoku, and had to offer some some really cute "Conversation Heart" versions too. I didn't have a chance to get to the Level 3, but will do that soon.

So if you haven't done so already, click on the pictures to get to the google docs to print off the PDFs. Follow the directions and you're on your way to feeling the love! If you have any questions, let me know and I'll be sure to respond. Have a wonderful, LOVING weekend and Happy Valentine's Day next week!


Thanks for stopping by. Be sure to click that follow button, to stay up to date on all my happenings and awesome news, or the pin it button, to share the love (of course)!


Friday, January 20, 2012

Giddy Up Friday: Snow People Chess Set, Crafts n' things

Pin It

When I was younger, I remember going to visit my Great-Grandmother at her house. (I was young - I thought it was her house, but many years later found out it was not her house but my mother's Aunt's house). For the sake of the memory, I still call it her house. I remember in the front room a little table, with a checker board painted right on it. It was a small round table, just big enough for the board and some chess pieces (again from memory). I've always had a love of chess since learning it, but honestly don't play it all that often. I can beat my husband any time while playing Othello, but he often check mates me in Chess! Regardless of wether I win or lose, I still love the game. I love the pieces and I love the challenge and strategies.


When I went to visit my dad in Utah one summer, I went to his office at BYU and saw some chess pieces made from steel. There they were, lined up along the top of a desk or windowsill. They struck me as simple and beautiful, and I have wanted them ever since.


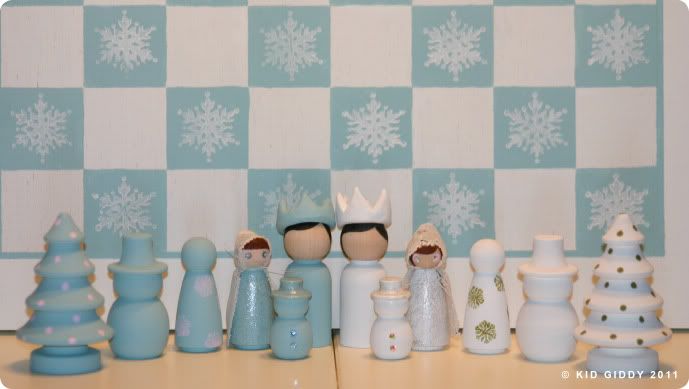
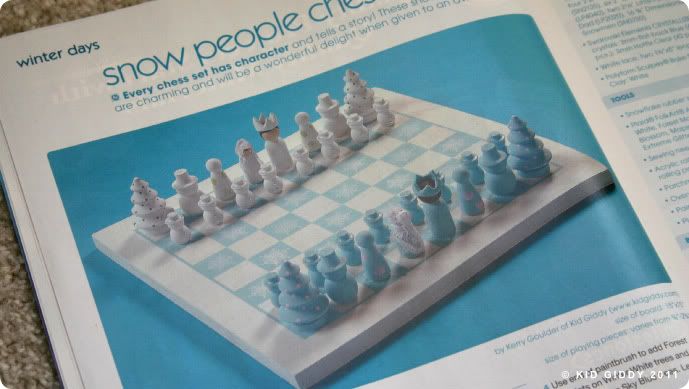
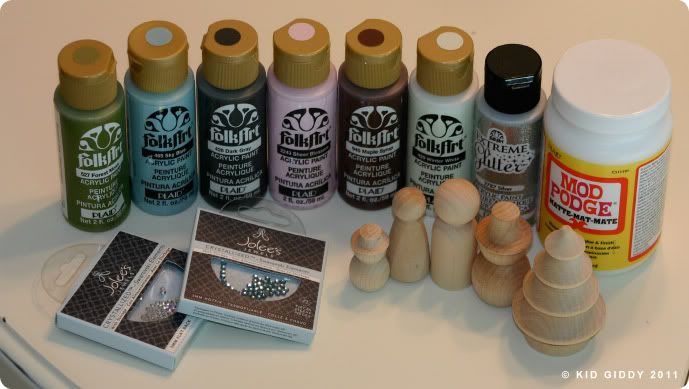
I don't have a machine that can turn a bar of steel into amazing chess pieces, but I had a vision of creating a kingdom of winter chess pieces with the wooden trees and snowmen that you'd find in any hobby store. I will be the first to admit that painting and stamping is not my go to medium, but once in a while I am smitten with an idea and must tackle it head on! You can find all the information for this project in the current Feb 2012 Crafts 'n things Magazine! (You'll even see it on the front cover in the top corner!) I hope you enjoy making your own set! If you have children, invite them to help or let them make their own! Here's what you'll need!...I bought all of my own supplies and got all the wooden pieces from a place online called craftparts.com. (I was not paid to say that)! Since crafts parts is no longer selling the tiny snowmen, you can also try this other website.

T-minus 5 days until I leave for the ever fun Craft and Hobby convention. Stress is high and there's still so much to do! Thanks for visiting, and it's almost time for that Anna Griffin pattern giveaway I mentioned last week! Be sure to keep your eyes peeled for that post!

Have a wonderful week and come find me if you are attending CHA, I'd love to meet you! You can tweet me @kidgiddy to find me!


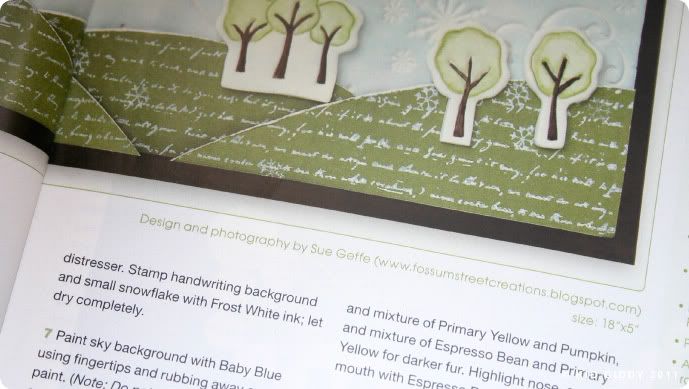
(PS...have you seen what my twin sister Sue, has been up to lately? Here's her latest project featured in the beginning of the same issue! - it's only a sneak peak - so you'll have to get the copy and check it out!)

Friday, July 15, 2011

Giddy Up Friday: Craft Cabinet Organization

My little girls love to create just as much as I do. My oldest daughter has been drawing since she was only 14 months old on a Magna Doodle, no joke! My youngest daughter caught wind of the fun and started, just around 2 years old. It's been non-stop creating ever since. We learned early on that we needed a place where they could keep their coloring books and crayons, magna doodles, etc.  A place they could easily get to, without getting into the wrong things or getting hurt! Enter in the creation of the "craft cabinet".
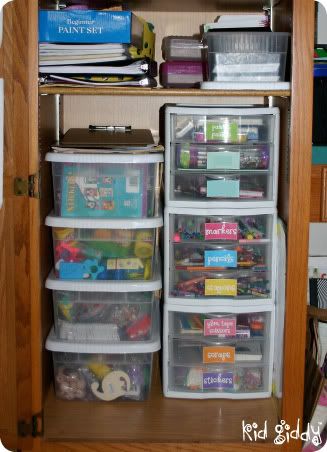
This is the finished result
Their "craft cabinet" has been a great source of inspiration and has always been filled to the brim. We have filled it, emptied it, cleaned it and reorganized it, over and over many times. Finally we came up with a much better system that has kept it cleaner more times than not. Everything has a place and everything must be in that place or there is weeping and frustration from all members of the family when something can't be found.

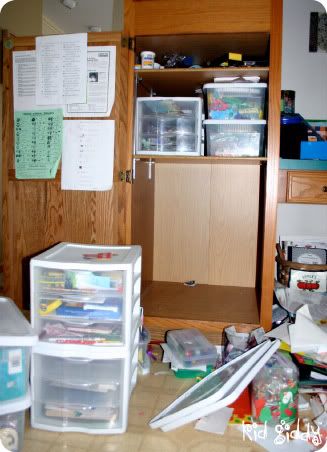
These photos document the clean out process from last year! It's a very "Clean Sweep" style of organizing. The cabinet (in our needing to be remodeled kitchen) is used for their crafting supplies and measures 22"W x 23"D x 38"H total. A small space, organized really well, can house a ton of craft supplies! I promise! So here goes....
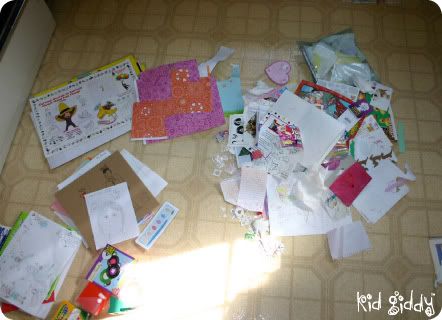
Clean Sweep - take everything out first!
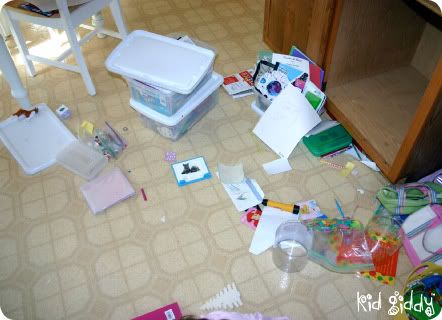
Here's the panoramic view of the mess we created...
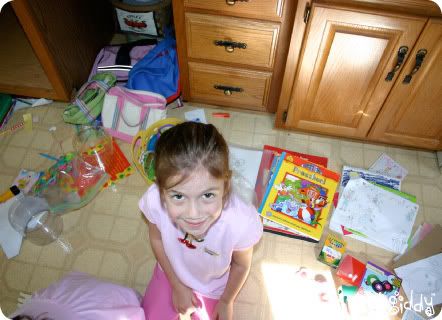
Here's Elephant joining in the sorting process!
I'm amazed at how much was eventually crammed in there!
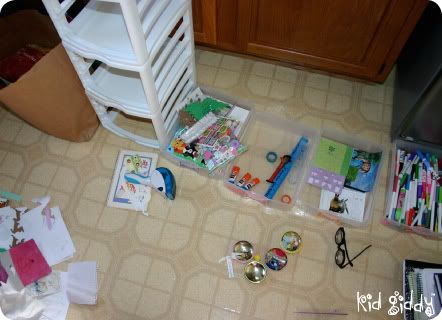
All of the drawers were removed and emptied. Then sorted by labels.
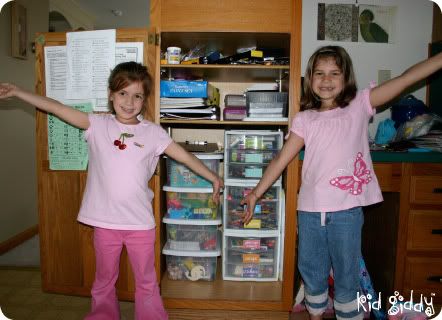
Monkey & Elephant show off our amazing results!
We had the 4 larger bins already, as well as the 3 drawer pieces, but adding the labels, changing the layout a little and moving up the middle shelf level, helped tremendously. Although these pictures were from October of last year, I'm happy to say - it still looks this good!

In the bins, we have:
1) All play-doh
2) Coloring books (now for guests) or notebooks (which they use more often)
3) Wooden objects, googly eyes and other beading or fun kid projects
4) Felt, PomPoms, Pipe Cleaners, Foam stickers, etc.

The bins are standard plastic containers and the 3 Drawer units are 8 1/2 x 11. I have since bought them a standard 12 x 12 Scrapbooking tote, since the scrapbooking pads don't fit into either the bins or drawers.

I'm sharing the labels I made for the drawers, in a color version and in a black and white version (if you'd like to color your own). I used clear packing tape to "laminate" them and then stuck them to the inside of the drawers, where the handle of each drawer creates a curve. I only used 9, but I have added more so you can pick and choose which you need or prefer to use! Click on the image below to get to the Google Doc to download the PDF.


I hope you enjoy them. Let me know if I'm missing a really important label and I'll add some more later. Have a great weekend!

Saturday, April 2, 2011

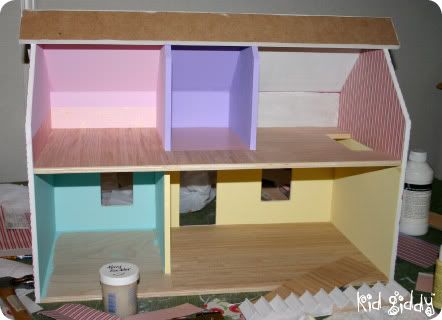
Giddy-Up Friday: Doll House Update

Yep - it's Saturday...I'm not going crazy - well maybe in my own way right now I am...but I know it's Saturday and not Friday! I just wanted this post to be a part of Giddy-Up Friday as the original Doll House post is/was!

A blog reader was just asking for photos of my daughter's doll house that I started ages ago...and have yet to finish. But I do have some photos to share!
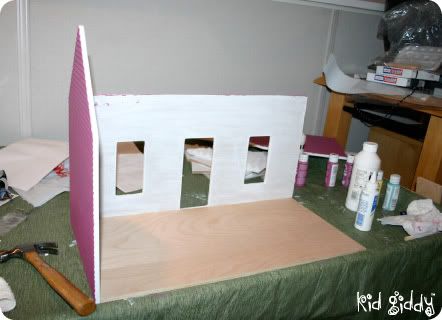
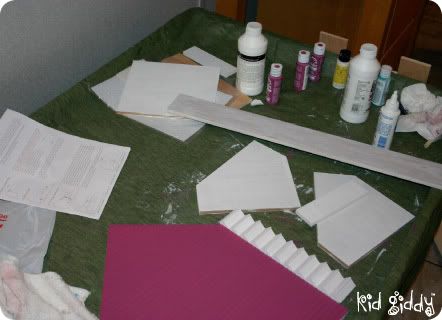
Now that everything is painted - let's get started!
And we have walls...
Using Cherry Scrapbook paper and it's coordinating pattern for the "play room"
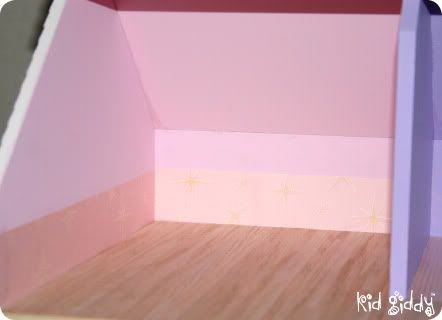
Sparkling scrapbook paper works wonders on walls!
We love multi-colored stairs! (and a shingled roof!)
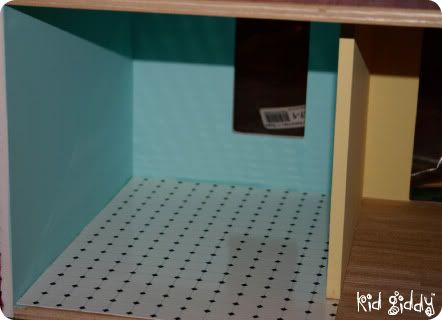
The Kitchen tiles are in. (Tile - it's one big sheet!) lol!
I'm sure when I have a moment to breathe again - I will finish it. Hopefully she won't be full grown by then with children of her own to play with it! : (

If you are looking to buy your own doll house kit and DIY, you should totally check out Earth & Tree Miniatures! They have so many to choose from and are in NH! That's where I've gotten both of my girls houses. This one up above is called the "Littleton" for your reference. The guy there makes all the designs and cuts them and packages them next door to the shop! If you are ever near by...you should stop in and visit them! Tell them Kid Giddy sent you (no not really - but it was fun to say)! Have an awesome "conference" weekend!

Friday, March 4, 2011

Giddy up Friday: Gnome Sweet Gnomes!

My daughter's and I just returned home from watching the awesome and adorable Gnomeo and Juliet movie! We've been waiting so long to see it and since Daddy is on a business trip - I planned to take them to do a fun thing to keep them from getting too sad...this was the PERFECT pick me up!
As soon as we got in the car, we began chatting about our favorite scenes! We then moved right onto:
"When we get home....I'm going to draw a picture of my OWN gnomes!" exclaimed Elephant!
"Yeah, and I'm going to draw some too", replied Monkey! and she continued with "Ph and Mommy, can we play with the clay and make some clay Gnomes?"
To which I most certianly replied with, "well....YEAH!!!, totally!"
So we bust out the sculpey and made these....They were so much fun and are sure to come to life when we leave the house! If you make some - drop me a link, I'd love to see your Gnomes - I'm obsessed! Have a great weekend!

Friday, February 25, 2011

Giddy-Up Friday: Photo Booth Magic

There's just something magical about a photo booth! It certainly isn't the lighting or the lack of Photoshop to adjust the picture to my liking and rid any and all imperfections! But every chance I get to hop into a booth and snap a few random pictures to capture the joy or chaos of a moment...is nothing less than magic! Move over kiddos I'm coming in! In this instance my girls and I were buying new vest and coats (on sale) at LL Bean's since they grew out of their old ones!
If you can't find a photo booth near you....try setting up your camera on a tripod, in a really crammed space and take some of your own random and silly photo booth style pictures! Have an awesome weekend! See you Monday for my trip to CHA day 3!

Friday, December 3, 2010

Giddy-Up Friday: My First Craft Fair

Wow - am I tired. I'm typing this while waiting for the Polar Express to come on at which point I just might fall asleep after losing so much sleep this past week preparing for my first craft fair!
When I was little my mom and my grandmother would set up booths and sell at craft fairs in Eastern Long Island NY and my twin sister and I would roam around looking for inexpensive shell creatures to buy. I don't remember much else about the fairs - the prep work, the set up the clean up all that, and I certainly don't recall if I thought "someday I want to do my own craft fair"!? But going to the craft fairs with "Mom and Granny", left a sizable impression on me and now in my "older" age (since I'm not 10 anymore)...I knew it was something I wanted to experience with my own craft business.
So back in September or October my husband got an email at his office, about this craft fair today and it took me all of about 5 minutes to commit to doing it! Since then I've been sewing non-stop and had so much stuff! I was worried I wouldn't have enough. Sure there's things I would've done different, but all in all it was a great experience and I'm pretty sure I'll be looking for my next one very soon! (I'd also like to thank everyone that stopped by my table and to those that made a purchase too - you guys rock!!)
Have a great weekend. Enjoy the pictures. All my new items will be listed in my Etsy shop next week. My hedgehog tutorial will be up Monday I hope (if not monday - def. next week at some point!). I have a couple of custom orders to get working on too!  Thanks everyone!

Thursday, November 4, 2010

Giddy-Up Friday: Jessie The Cowgirl Halloween Costume

Maybe it's my love of Texas or our love of Toy Story and my own personal obsession (ok - not that bad!)...of sweet cowgirl Jessie...that made my oldest daughter want to be Jessie this year for Halloween! YeeHaw!!!


SO while one girls is a sweet little garden gnome, my other is a ride 'em cowgirl! I just couldn't say no and wasn't about to spend $20 or $30 on a cheaply made costume for my sweet Jessie! If you'd like to make a Jessie costume, here's how I made it even though Halloween is now past...Giddy-up!

The Shirt:

It started with a handed down white shirt and some bright yellow fabric! 
 
I added a 1/2" twill ribbon along the bottom edge, and a thin rope to create the loopy loops (those were hard to sew).
 
I loosely cut each panel and then pinned them to the shirt, and then sewed it right up against the seam. There is a back panel too, but you just can't see it and I didn't photograph it.


The Sleeve:

To make the sleeves, trace the sleeve of the white shirt to get the right size and curve. Then stitch with Red thread, a series of decorative loops. Open up the sleeve and lay it flat. Lay the yellow cuff face down along the edge. Line it up by finding your center folds. Stitch 1/4" all the way around the cuff. (it will make the sleeve look longer, because it is going to be folded up and over the white sleeve at the end)
 
Once the cuff is sewn all the way around, sew the raw edges, right sides together. 
After you have sewn the edge, you need to make some covered buttons (follow directions on packaging) and then sew it on the inside of center fold of the yellow sleeve cuff. 
Now all you have to do is simply turn it right side out.


The Chaps:

 
A pair of $5 jeans with cow print fabric! I cut 4 panels and sewed 2 panels, turned them right side out and top stitched them. Then I laid each leg down (flipped up over the waist) handstitched them to the jean leg, and then flipped it back down and top stitched it (by hand also).
 
I used brown flannel (that was the only brown solid material I had) and used a piece of scrap leather for the "buckle". I'll post another picture of the finished belt and buckle in the near future!

 
Here's my horrible attempt at a hat...I used a hat box top for the measurement and Pellon stablizer for the hat.
 
I think I used a 3 or 4" height for the hat top, that I added it by machine after cutting out the center. I later attached the top by hand (ugh!) and then used a red fabric spray paint (double ugh!) to the top and ran out by the time I was ready to paint the underneath. (triple ugh!).  So I attached red fleece to the bottom (another picture that will be added later).

 
Just an FYI...I bought the wig. It was the only thing I bought. It was called a "Rag Doll Wig" if you ever need to look for one. I took the ponytails out and put the braids in with yellow scrunchies (I didn't have yellow bows). As I'm sure you can tell from my captions above...I wish I had found a hat...but searched high and low and just couldn't find one! Such a bummer! I will add photos later of the shirt sleeves, the finished belt...and another finished picture of the hat - since that was a last minute finish...and still never got to put the white rope loop around the edge!


So that's it and I guess I'll be seeing ya'll on the next post! Giddy up!


http://kidgiddy.us2.list-manage1.com/subscribe?u=9ea4c419178a2e61b529af8aa&id=975aef860e

Disclaimer...All of the pieces above were made without a pattern.  So technically these are Kid Giddy Original patterns and therefore cannot be created for resale purposes. I am sharing this tutorial out of the kindness of my heart to satisfy all the Jessie Cowgirl loving children out there. You can use this tutorial to make a costume for yourself or your child. So PLEASE do not copy this and sell it for your own use! Likewise, please do not copy the tutorial by retaking all of your own photos and posting it on your blog as your own. I've seen it happen - so please give credit where credit is due. Thanks!