
Showing posts with label Teacher. Show all posts

Thursday, August 24, 2023

QuiltCon 2024 - I'm Teaching!

Hey everyone, I'm very belatedly sharing the big news that I'm teaching at QuiltCon 2024 in Raleigh, NC again and I would love for you to join me! I first taught at QuiltCon in 2022 and absolutely loved the amazing energy of all my students and the fun of sharing what I do. Are you coming? If so, here is some information about my classes so you can sign up for one, two or all three of them!

The Say it Ain't Sew Quilt classes are bound to be tons of fun. The messages you can create are endless and the font pattern is a mix of patchwork sewing, foundation paper piecing and curves. The pattern comes with all the details to create numbers and punctuations as well, which means you can use the patterns for memories, milestones and so much more! The pattern provides instructions for the regular font, and an elongated font as well. Say it ain't so? Oh yes, it's true! Bonuses galore! These Say It Ain't Sew classes (Thursday 6 - 9pm and Sunday 9 - 12pm) are 3 hours each, but we will stay busy with all the different techniques, tips and tricks! Use class code FPP003 to find them in the QuiltCon search bar. 

The Multiply Your Quilt Blocks class only going to be held once and will be a 6 hours class with a lot of designing and some English Paper Piecing in the second half. This class is all about creating unique blocks using special multiply techniques with a combination of foundational colors and basic blocks we all know and love. What block can you create? I'll bet you no two will be alike! Use class code DES014 to find it in the QuiltCon search bar. (Students will need a computer and the Adobe Illustrator program or something equivalent. For the computer portion, I will only be teaching with the Adobe Illustrator program and may not be able to provide instructions for programs I am not familiar with. However I will try to help find alternative solutions for other programs if time allows. Some prior knowledge of this program will be helpful). 

And last but not least is Designing Pixel to Patchwork in EQ8. I have loved the Electric Quilt Program since it came out for Mac computers and I love finding ways to expand my uses of the program to learn something new and create unique designs. This class will teach you how to take a design from pixel to patchwork in the EQ8 program with a little ingenuity and how to prep the file to get your measurements for your design. The Designing Pixel to Patchwork in EQ8 classes  (Friday 1:30 - 4:40pm, and Friday 6 - 9pm) are 3 hours each and also jammed packed with different techniques, tips and tricks! Use class code DES011 to find it in the QuiltCon search bar. (Students will need a computer and the Electric Quilt EQ8 program. For the computer portion, I will only be teaching with the EQ8 program and may not be able to provide instructions for similar programs I am not familiar with. However I will try to help find alternative solutions for other programs if time allows. Some prior knowledge of this program will be helpful). If you have not yet purchased the program, please click here: Electric Quilt EQ8 program (this is an affiliate link - if you purchase through this link, I may be compensated at no additional cost to you).

I love teaching all my tips, tricks and secrets to anyone that wants to learn. I do my best to provide classes that are great for all levels and ask students to come prepared with all the tools needed to make it most successful. I hope you'll join me if you want to level up your sewing and design games. 


Have any questions? Please let me know in the comments below or drop me a dm through Kid Giddy on Instagram. I'm happy to answer any questions prior to class! Huge thank you to all of you that have already signed up for my classes! We are going to have so much fun! Happy stitching as always everyone!


http://kidgiddy.us2.list-manage1.com/subscribe?u=9ea4c419178a2e61b529af8aa&id=975aef860e


Disclosure: This post contains affiliate links as noted and if you click on them and purchase products, I may be compensated at no additional cost to you. Thank you.


Saturday, May 12, 2012

Flower Pins Tutorial - DCC ImpressArt Blog Hop


Long time no post...right?! Well I'm excited today to share with you all a really sweet gift I made for all the teachers at my daughters Primary school for Teacher Appreciation week!

I received the set of ImpressArt Metal Stamps to use for this blog hop and needed to make something for the teachers this week, since I'm also on the PTA. I thought, why not combine the efforts? When my friend Nora came over to help make the flowers, I decided to they would look really cool with little metal discs in the center! I quickly ran out of metal discs as I was making at least 30, and turned to my box of wooden buttons. I wasn't sure if the ImpressArt Metal stamps would work on the wooden buttons, since I have never used these, but they came out so cute - they worked so well on the metal and wood! It was so much fun to play with everything, that I am now, totally addicted!

I took pictures while I made them, so you can make a few for gifts as lapel pins, hair bands, headbands, bracelets, necklaces, and every other option under the sun!

Here's what you'll need from ImpressArt:
-ImpressArt Alphabet Stamp Set, Set Name, Jeanie (lowercase)
-ImpressArt Design Stamp, Whimsy Flower, Whimsy Heart & Fun Star
-ImpressArt Metal Stamping Blank Discs (with 2 holes)
-ImpressArt Metal Stamping Hammer
-ImpressArt Steel Stamping Block
-ImpressArt Stamp Straight Tape (I didn't want mine straight, but you may, this helps!)

Here's what else you'll need to make the flowers:
- 5" Tulle roll (color is your preference, I used white)
-Linen Fabric
-Scrap Fabrics
-Wooden Buttons (optional)
-Flower Shape (either a machine cutter, your own simple pattern, or a pre-made flower template)
-Needle & Thread
-Scissors

If this is your first time using ImpressArt Metal Stamps, please be sure to check out their website and resources page. They even have a "viewer" so it can help you plan what you want to use and what it will look like!
Here's what you do:
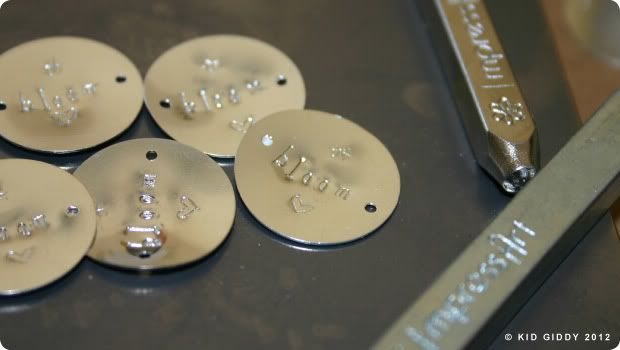
Decide what word and design you are going to use and stamp the discs. They puckered as I hammered, so I just flipped them over after and flattened them out a little. This is before I flattened them out. I used the word "bloom".
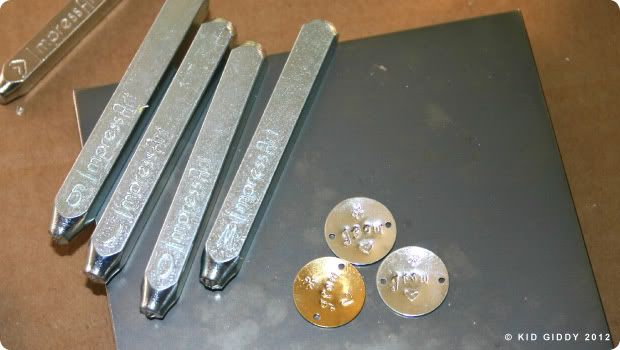
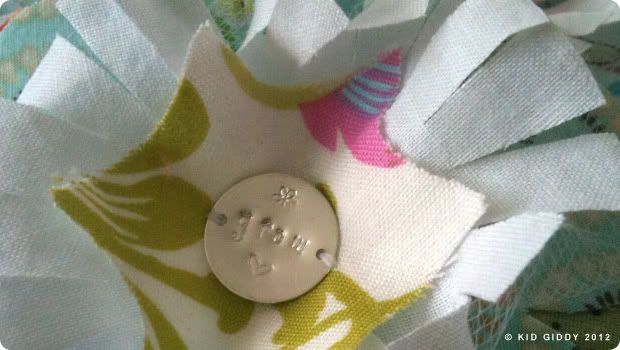
On the smaller discs I used the word "grow" (since that has to do with flowers also), and stamped the heart & flower.
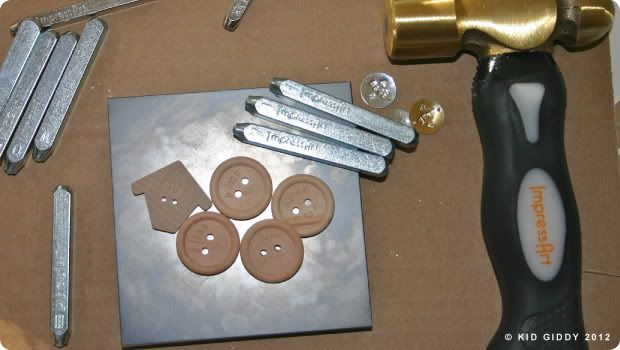
When I ran out of discs in the 9th hour, I turned to wood, it worked like a charm! I LOVE these tools!
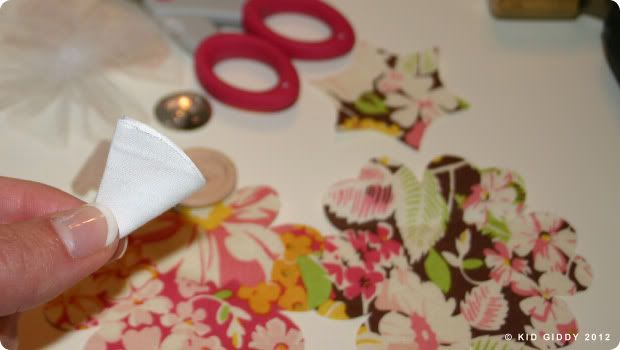
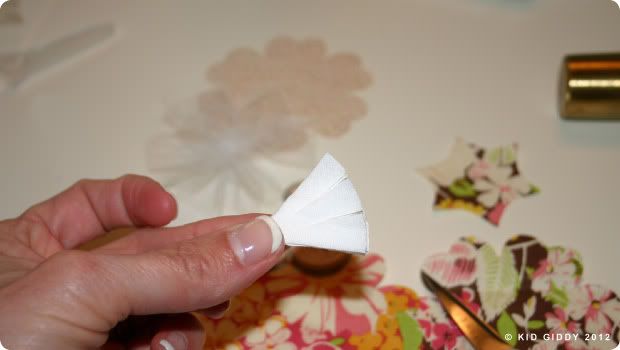
Cut out all your round circles. The circle should be approx. the same size if not a tiny bit smaller than the flowers. Fold the white round circle in half, 3 times. Cut the all the folded edges (leave a 1/2"- do not cut all the way to the center) 
Next cut 2 straight lines (again leave the 1/2" of the center protected and intact)
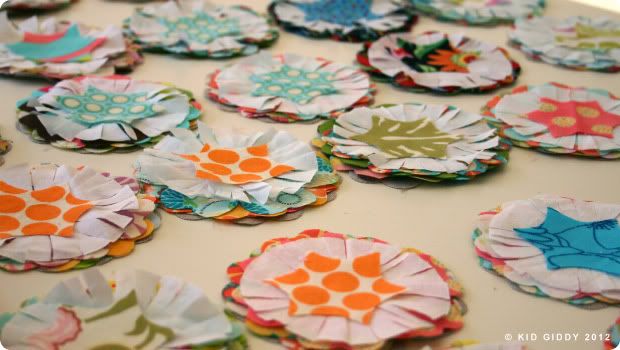
Cut all your flowers with your own template, or a purchased template or die cut. I cut one piece of Linen for the base, and 3 pieces of fabric for each flower. I also used one white circle and one tiny center scrap, but know that you can use as many as you want. It all depends on how fluffy you want your flowers to be. Once you have cut all your flowers from your scraps, and your white circles, you can pre-stack them to match them up. Don't they look so pretty? Thanks Nora!
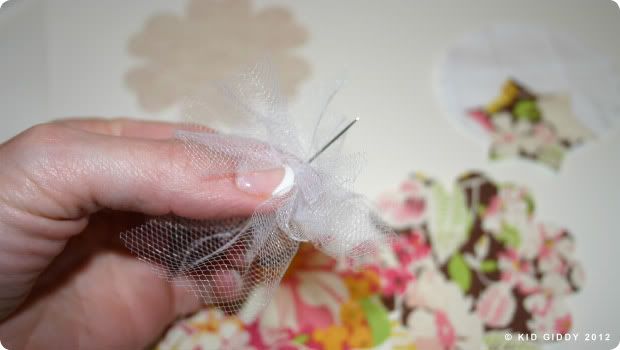
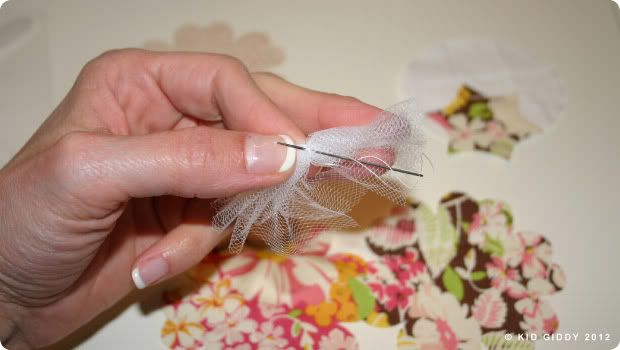
To fluff your flowers, cut a piece of the 5 1/2" width Tulle roll (approx 11" in length) and cut in half. Using one strip, thread your needle and at one end of the tulle (lengthwise) gather it with a running stitch 
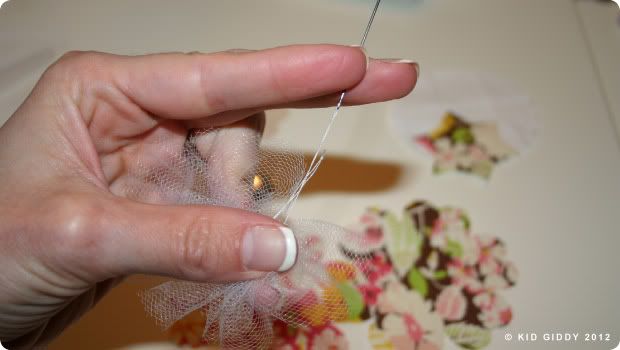
Before pulling the thread all the way though, loop your needle through the end and pull tight.
Wrap the thread around the gathered center a few times and then tie off with a double knot.
When all the pieces are ready for assembly, here is the order I used. I felt the tulle worked best under the white layer!
Once the pieces are layered, you can sew the pieces together. You can put a small pin in the back for a brooch, or sew an extra piece on the back to make it useful for a hair rubber band, or stitch it onto a headband, or even onto a beautiful ribbon to make a necklace. Make as many flowers as you'd like. But please do not sell them. Give them as gifts!


I really had so much fun using these ImpressArt Metal stamps! Sometimes I am so fearful of trying something new that I tend to shy away from it. But I jumped at the chance to try these out and was not disappointed. This is something I will use time and time again for gift tags, jewelry, and many other fun projects.

If you would like your own set of ImpressArt Metal Stamps, you can head over to the ImpressArt Facebook page to enter to win! The Grand Prize is valued at up to $120.00 and contains:
1- ImpressArt alphabet set of the winner's choice
1- ImpressArt Steel Stamping Block, small
1- ImpressArt Metal Stamping Hammer
1- ImpressArt Stamp Straight Tape
An Assortment of metal discs

After you enter to win your own set, be sure to hop around to see all the other folks that have joined in this hop and the fun projects they created for more ideas!


I know I have a few more of my own and look forward to making some truly one of a kind metal projects with these ImpressArt metal stamps! My sister wants to borrow them and make a few things too! (we are twins, we love the same stuff)! I hope you have a wonderful weekend! Thanks for hopping over here and adding more giddy to your life!


I did receive the ImpressArt Metal Stamp tools as listed above, to use for this tutorial at no cost to me. It does not have any effect on my opinions as set forth in this tutorial. The opinions here are my own. 

This tutorial is shared with you in the hopes that you will learn a new fun craft. Please do not use my tutorials for your own gain. Please do not use my photos without permission and please do not retake any photos to remake the tutorial for your own blog or another company. These photos and the text are copyright protected. Thank you for your cooperation.

Friday, June 3, 2011

Giddy Up Friday: Teacher Appreciation Gift Idea


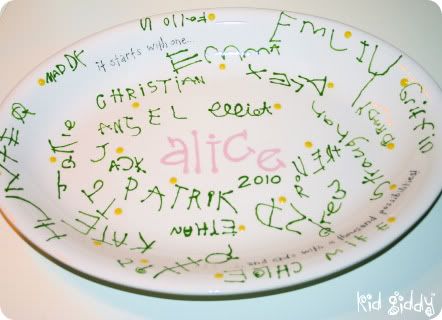
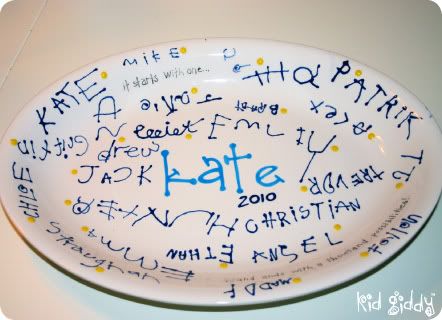
Last year I coordinated an end of the year teacher appreciation gift for all the teachers in my daughters preschool class. With the help of all the students, I made these platters at a local paint your own pottery studio (Glazey Days) for each teacher. First I found out their favorite color(s), for their name and the year, and a coordinating color for all the kids names!

I initially had the students write their names on each plate with a pencil - but that proved difficult as some wrote really huge and I saw we would quickly run out of room. I quickly switched gears and instead, had them write their name just once on a piece of paper, which I later traced onto the plates and then traced with the glaze.
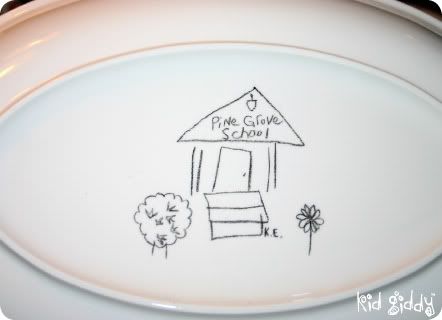
I added a quote "it starts with one....and ends with a thousand possibilities" which is from the Montessori philosophy and included one yellow dot for each childs name, to represent the concept of the the "golden beads". I also wrote all of the teachers names in a lowercase font - because that is the Montessori way of teaching the alphabet (only lowercase first). My daughter Elephant drew a sweet little picture of the school that I later traced onto the back of each plate.
 I thought it was a worthy keepsake and wanted to share the idea with all of you, in case any of you are looking for some ideas! You could easily do it on a much smaller scale on a mug orice cream bowl as well.

The last pic is one of the tags (I'm no scrapbooker - but I thought they came out pretty cute!) I made to include each child's name on the gift that participated in it, and each child/family was present to give the gifts to each teacher. I couldn't share this last year since it was done at the very end...and I'm not sure what we are doing this year - since I still have a couple of weeks remaining!

Have a great weekend!