Thursday, August 24, 2023

QuiltCon 2024 - I'm Teaching!

Hey everyone, I'm very belatedly sharing the big news that I'm teaching at QuiltCon 2024 in Raleigh, NC again and I would love for you to join me! I first taught at QuiltCon in 2022 and absolutely loved the amazing energy of all my students and the fun of sharing what I do. Are you coming? If so, here is some information about my classes so you can sign up for one, two or all three of them!

The Say it Ain't Sew Quilt classes are bound to be tons of fun. The messages you can create are endless and the font pattern is a mix of patchwork sewing, foundation paper piecing and curves. The pattern comes with all the details to create numbers and punctuations as well, which means you can use the patterns for memories, milestones and so much more! The pattern provides instructions for the regular font, and an elongated font as well. Say it ain't so? Oh yes, it's true! Bonuses galore! These Say It Ain't Sew classes (Thursday 6 - 9pm and Sunday 9 - 12pm) are 3 hours each, but we will stay busy with all the different techniques, tips and tricks! Use class code FPP003 to find them in the QuiltCon search bar. 

The Multiply Your Quilt Blocks class only going to be held once and will be a 6 hours class with a lot of designing and some English Paper Piecing in the second half. This class is all about creating unique blocks using special multiply techniques with a combination of foundational colors and basic blocks we all know and love. What block can you create? I'll bet you no two will be alike! Use class code DES014 to find it in the QuiltCon search bar. (Students will need a computer and the Adobe Illustrator program or something equivalent. For the computer portion, I will only be teaching with the Adobe Illustrator program and may not be able to provide instructions for programs I am not familiar with. However I will try to help find alternative solutions for other programs if time allows. Some prior knowledge of this program will be helpful)

And last but not least is Designing Pixel to Patchwork in EQ8. I have loved the Electric Quilt Program since it came out for Mac computers and I love finding ways to expand my uses of the program to learn something new and create unique designs. This class will teach you how to take a design from pixel to patchwork in the EQ8 program with a little ingenuity and how to prep the file to get your measurements for your design. The Designing Pixel to Patchwork in EQ8 classes  (Friday 1:30 - 4:40pm, and Friday 6 - 9pm) are 3 hours each and also jammed packed with different techniques, tips and tricks! Use class code DES011 to find it in the QuiltCon search bar. (Students will need a computer and the Electric Quilt EQ8 program. For the computer portion, I will only be teaching with the EQ8 program and may not be able to provide instructions for similar programs I am not familiar with. However I will try to help find alternative solutions for other programs if time allows. Some prior knowledge of this program will be helpful). If you have not yet purchased the program, please click here: Electric Quilt EQ8 program (this is an affiliate link - if you purchase through this link, I may be compensated at no additional cost to you).

I love teaching all my tips, tricks and secrets to anyone that wants to learn. I do my best to provide classes that are great for all levels and ask students to come prepared with all the tools needed to make it most successful. I hope you'll join me if you want to level up your sewing and design games. 


Have any questions? Please let me know in the comments below or drop me a dm through Kid Giddy on Instagram. I'm happy to answer any questions prior to class! Huge thank you to all of you that have already signed up for my classes! We are going to have so much fun! Happy stitching as always everyone!


http://kidgiddy.us2.list-manage1.com/subscribe?u=9ea4c419178a2e61b529af8aa&id=975aef860e


Disclosure: This post contains affiliate links as noted and if you click on them and purchase products, I may be compensated at no additional cost to you. Thank you.


Sunday, October 16, 2022

The Official Puppy Portraits Stitch-a-long Finish

Although the Puppy Portraits stitch-a-long is over, I wanted to share some of the finished puppies and share the overall design. I thoroughly enjoyed creating and stitching this project just in time during covid when I needed something good to focus on. 


If you are new to hearing about the Puppy Portraits stitch a long, you can find out more about it in the first June post...here and more about the Aurifil company. I also had a chance to talk to Erin a bit and shared a lot about this project and why I love Aurifil. You can read all about it over on their Auribuzz blog.


Since the close of the stitch-a-long, I'm excited to share that we all collectively donated $3015 to various charities and organizations. I have no doubt each donation made a difference for someone! Thank you so much to everyone that participated in this idea of mine and hope you'll continue to share your finished puppy portraits with me.


Did you missed the stitch-a-long? Don't worry...you can now purchase the pattern in my KidGiddy Etsy shop. You will receive a PDF that includes all of the frames numbered in the order in which the puppy portraits should be stitched.


If you'd like to order  the Puppy Portraits collection and your color choice of Lugana precut linen, you can also find it in my Kid Giddy Etsy shop. I have I have a few Puppy Portraits kits remaining in inventory. 


This Puppy Portraits cross stitch pattern includes 12 different puppies in various frames and the pattern comes with 3 different style counting cross stitch frames. The Aurifil Puppy Portraits Floss collection comes with 20 beautiful colors to assist you in getting all of the colors needed for the project.


Have any questions? Please let me know in the comments below or drop me a dm through Kid Giddy on Instagram. Thank you again to all that participated and a HUGE thank you to Erin at Aurifil for making this stitch-a-long happen! I could not have done it without her! Happy stitching as always everyone!


http://kidgiddy.us2.list-manage1.com/subscribe?u=9ea4c419178a2e61b529af8aa&id=975aef860e


Disclosure: There are no affiliate links. Thank you.

The 2022 Prom Dress

Back in April and May my daughter and I began to dive deep into making her Junior Prom dress. It was so much work, especially during finals, but so rewarding to see her twirling around and dancing in it. 

We live draped her dress to draft the pattern so it would fit her perfectly. 
She absolutely wanted the dress to have a circle skirt and wanted it in a light gold, champagne color. She wanted it to be a v-neck in both the front and back.

She also knew she wanted some kind of accessory but in the end we had two options, an over-skirt or a cape. Funny enough we couldn't settle on just one, so we made it interchangeable. If she wore it as a cape, she would hook the eye hooks under the shoulder seams. And I stitched tiny thread loops on the front so she could hook it as an over-skirt.

We had so much fun making her dress. I shared a video reel of it on my Instagram page if you'd like to see her prom dress twirling. Have any questions? Please let me know in the comments below or drop me a dm through Kid Giddy on Instagram. 


http://kidgiddy.us2.list-manage1.com/subscribe?u=9ea4c419178a2e61b529af8aa&id=975aef860e

A Semester of Textile Printing

As some of you know and others may not know, I decided last year to go back to school at MECA&D (Maine College of Art & Design) to finish the BFA degree I started a *very* long time ago. During my second semester I was able to take a Textile Printing class and really loved creating repeats and blocks with repetition. 
For my first repeat pattern, I created popcorn. It was the week of the Golden Globes, so I couldn't resist making a "golden" popcorn print. The lines were super fine, and the ink was super opaque and thick, so not every line came through, but it may still be my favorite repeat of the semester. 
Next up was the two color Strawberry print. I printed it two different ways. One was using alginate and a steaming process, leaving it as a softer coloring (reminding me of the original Strawberry Shortcake). I think it would make a sweet baby quilt.
The second Strawberry print was with regular opaque inks that were brighter and deeper. I didn't have to print it, but desperately wanted to see the difference. I can't wait to be inspired to create a quilt for this one too. 
The silhouette print above was a my test print before printing t-shirts for my daughters and other family members. It became our summer 2022 t-shirt and now summer t-shirts might have to be a new tradition. 
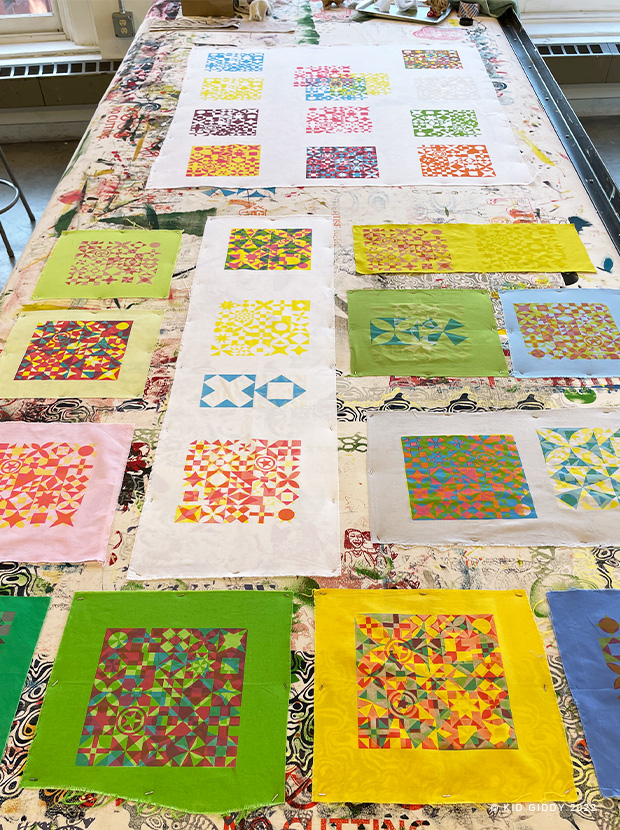
Last but not least, are my Repetition blocks. These were made for my final class project at the end of the semester. It reminded me of our DNA and family history. How we are all connected in so many ways (ways that we can see and not see). That we are all a bunch of layers. Depending on which color is printed first or second or which ever order, the print change and the colors change. It was a fascinating experiment. 
In the end I decided not to trim them all. I wanted each of them to stay imperfect, off centered and have the raw edges. I connected them with fishing line (because we can't always see our connections to each other and hung them floating away from the wall. 

I hope you enjoyed this look into my Textile Printing creations. Thanks so much for visiting! Please be sure to sign up for my newsletter below.


http://kidgiddy.us2.list-manage1.com/subscribe?u=9ea4c419178a2e61b529af8aa&id=975aef860e