Showing posts with label Holiday. Show all posts

Tuesday, November 1, 2016

Ugly Christmas Sweater Block Sew-a-long

Good evening everyone!

I know it's a bit late to get this Ugly Christmas Sweater sew along started - but it has to start today...I just can't wait anymore. Getting home from market and quilt market prep is causing a bit of chaos in my brain. I didn't have time to get the post all ready before I left and slept all the way home. But the wait is over.
Ready for all the details?
I want to make myself a Christmas quilt. I decided I wanted to make a slew of "Ugly Christmas Sweaters" after I designed this pattern last year, but haven't had the time to get started. I figured with the help of many good friends, and the accountability of everyone watching, I just might get it done. If you want to sew along with me, I would love that. Each of the designers will post a picture of their block on Instagram on their allotted day as I'll be posting mine too. You don't have to make an entire quilt, and it doesn't have to be Christmasy, I just hope you'll have fun.

There will be a weekly prize - a gift certificate to a different online fabric shop each week. Each day you post a picture of your sweater, you are entering for a chance to win the prize of the week. These are the awesome online shops:
Weekly Ugly Sweater Block Sponsors


At the very end of the sew along...there will also be a grand "present" generously provided by the many designers listed in the red present box below. Gifts may include physical items or digital downloads which means happy mail for days and days!

Each time you post a picture of your sweater, you are entering for a chance to win the prize of the week or the grand present at the end. The more times you post a picture of your sweaters on Instagram (tagging me, the designer of the day and the online fabric sponsor of the week) while also using the hashtags #uglysweaterblock and #kidgiddy, the more chances you have of winning. Winners will be chosen at random and chances of winning will depend on the total number of entries each week and at the end. ((No purchase necessary - for your chance to win without sewing, you can repost my sweater pic each day, tagging and giving credit accordingly))
UglySweaterBlocks sewn by @LiasHandmades on Instagram
If you don't already have the "Christmas Sweater" pattern - you can purchase it in my Kid Giddy Craftsy shop, or my Kid Giddy Etsy shop (please purchase from Etsy if you are international for VAT purposes). If there is anything I've missed, I will edit this post. My brain is still market mush - so my apologies in advance.

Thank you so much for joining in on the fun. I can't wait to see all of your #uglysweaterblock pics! If you have any questions - please let me know.


http://kidgiddy.us2.list-manage1.com/subscribe?u=9ea4c419178a2e61b529af8aa&id=975aef860e

Disclaimer: I received some fabric over the years and recently from various manufacturers as noted. Some fabrics are also my own. Opinions are my own, and there are no affiliate links. Thank you.

Monday, February 10, 2014

My Crafty Valentines

After a few months of pure stress, illnesses and so much other stuff, I decided to have some fun. Plain and simple fun, in the studio for a whole week. Now that it has passed, it doesn't sound like much, but it was exactly what I needed to do. I just may have to do it again, and next time I'll lengthen it to a whole month - who's going to join me?

For a few days, I worked on making some crafty Valentines, for all those crafty people in our lives. It all started with the Clover Wonder clips. I had this little note on repeat in my brain "you are so wonderful" and thought it would be fun to send some wonder clips with the note. Then the spark flew and ignited all these other crafty product ideas for Valentines. I just couldn't resist.

To print out these crafty valentine tags, click on the picture above (print on paper or card stock). They are 4" x 2" and will fit across a 4" candy bag. If you are making baggies, and want to use the tag as a tab top, print the tags on regular paper. Cut a plain white piece of 4" x 4" card stock, fold it in half, and glue the tag on the front side of the tab. When dry, staple it to the top of the bag. If the item is larger, print the tags on card stock so they are durable, punch a hole in the corner or center of the tag, and tie it to the product with a piece of ribbon.


Here's the master Crafty Valentine list and I'll add to it as I come up with more - or as you all add comments below:

Sewing, Scissors, Notions, Fabric:

  1. I wonder if you'll be my Valentine - Clover Wonder Clips
  2. I've always Felt you were the Valentine for me - Wool Felt (National Nonwovens)
  3. I'm strung out on you - Bakers Twine
  4. You're as cute as a button - Buttons Galore and More
  5. You turn me right round baby right round - Dritz Turning Tube set, and EZ-Pull Bodkin
  6. We're the perfect pair - Fiskars Dress Shears and a fabric Fat Quarter wrapped around them
  7. I would pick you any day to be my Valentine - Dritz seam ripper, Dritz assorted needle pack, Aurifil Gutterman or Coats & Clark Thread
  8. You are sew special to me - mini travel sewing kit
  9. I love you sew much - Go big.....go for a Sewing Machine
  10. You Rule Valentine - give with a new acrylic ruler for rotary cutting
  11. I'm stuck on you Valentine - Present with a box of pins
  12. You're a cut above the rest - Sizzix, Brother or Cricut cutting machine, or scissors and fabric fat quarters
Crafting:
  1. You can count on me when things get sticky - Phoomph and non stick Westcott Scissors (would also work well for Duck Tape and a pair of scissors).
  2. I'm stuck on you Valentine - Washi or Duck tape
  3. You're just ducky Valentine - Duck Tape minis
  4. You're just write for me - Copic, Microns anything you can write with and a cute Journal
Crochet/Knitting:
  1. I'm hooked on you Valentine - Crochet hooks, and Lion Brand BonBons (also looks like buoys)
  2. I can't resist your pull - Crochet hooks and yarn
  3. You light up my life - light up crochet hook

If you have some crafty people in your lives...which of My Crafty Valentines will you be giving out this year? Have any other crafty valentine ideas, please share them below!

I love you all - thanks for visiting my blog. To find out more about my book Sewing Tales to Stitch and Love, click the book link to the right. To sign up for my 'lovely' newsletters, click the link below. Happy Valentine's Day everyone!


http://kidgiddy.us2.list-manage1.com/subscribe?u=9ea4c419178a2e61b529af8aa&id=975aef860e

(Disclaimer:  some of this product was purchased by me at craft stores - because I craft and shop (shocker - I know). Some was given to me at trade shows, during one event or another from various companies. Some products are even left overs from previous blog hops. But none of that really matters since it's about the idea and sharing the idea with all of you. I was not paid to use these products, and do not serve as advertisements)


Monday, June 10, 2013

Baby Liberty - I Love the USA Blog Hop


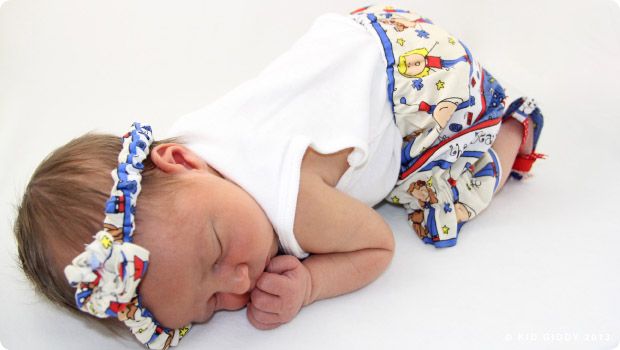
I was so excited when fellow Craft and Hobby Association Designers Laura Kelly and Jen Goode contacted me to participate in their "I Love the USA Blog Hop" to celebrate Laura's Patriotic "America the Beautiful" print that is in Joann stores now! I jumped at the chance, not just because I love a challenge, but because I thought it would be fun to make something patriotic this year, not to mention it's fun to support other amazing designers I have met within the industry!
The goodie box came a few weeks ago and my girls and I oooh'd and aaaah'd over everything red white and blue {from Coats & Clark: phoomph & threads, Buttons Galore & More: buttons, May Arts: ribbon, Plaid: infamous Mod Podge and Apple Barrel paints, Fiskars: scissors} and the candy that was gone in seconds. The possibilities were endless...my mind started spinning...and the first idea came to me minutes later! My only hold up...I just had to do my final book edits first. I was itching to make something and kept adding one idea after another - it was driving me crazy to not get started.

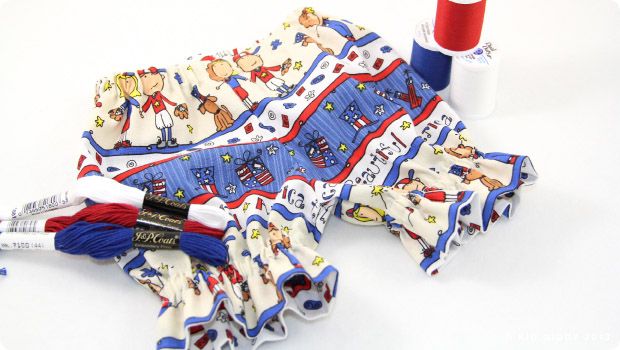
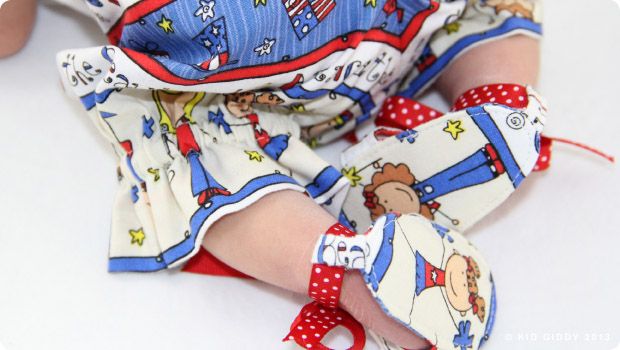
But when it was time....it started with the bloomers. 
 
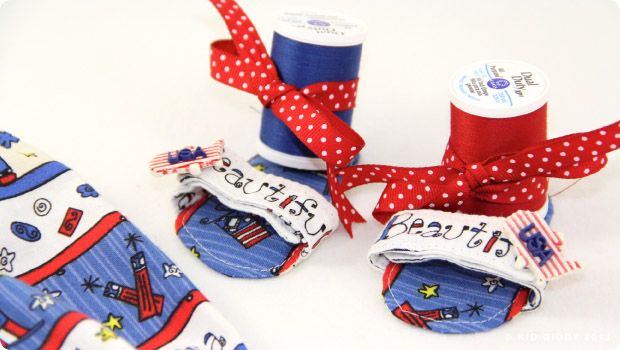
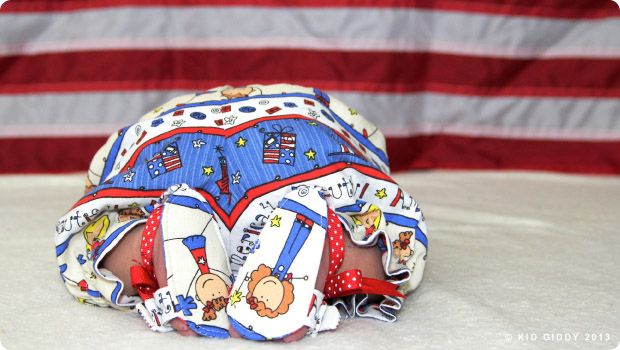
Then the sandals.

Which of course required some fun fussy cutting to have some little "peeps" on the soles and the word "beautiful" on the straps!
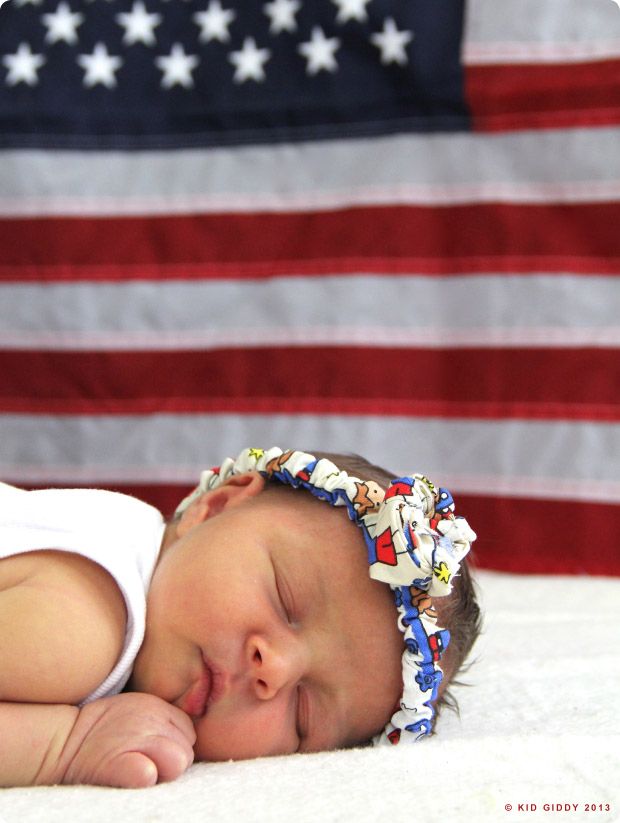
A little bonnet (which was a big enough for a one year old), so in comes the cute headband in 5 mins or less (can't make baby liberty wait - she might wake up)!
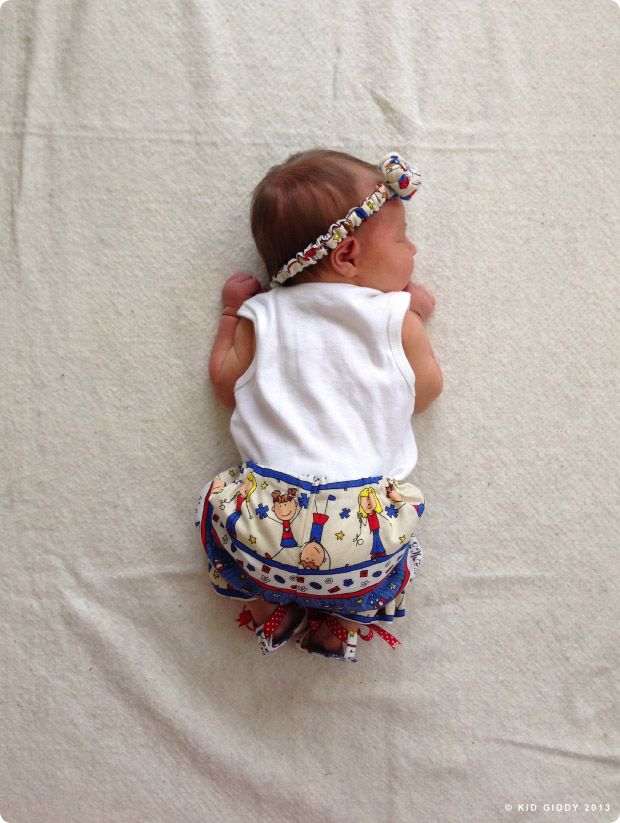
I had so much fun making this little newborn set with Laura's patriotic fabric and loved taking pics of this tiny "baby liberty". 
I got to photograph this adorable baby girl and hold her and cuddle her and even kissed her cheeks a few times (her grandma, my friend, said it was ok)! Have I told you lately I love my "job"?!
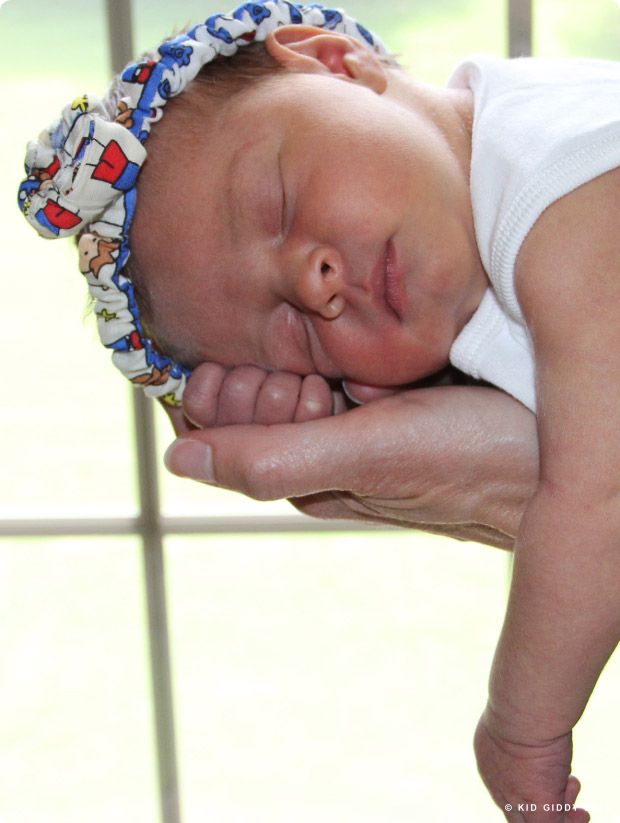
As I was moving baby liberty from the light box (yes - she fit inside my light box!) - she squirmed for a second, lost control of her arm, and laid quietly asleep in my hand...her grandma took this pic for me...
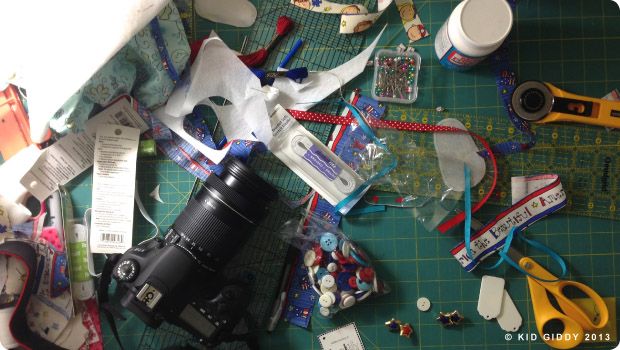
I'll be making some more stuff in the coming days before my studio move (or just after) - and I'll post the pics as I go along. I know my girls want to play too! When I was done with this one outfit...I went to bed with my craft table looking like this! (and it still does - i can't lie! lol!).
To get some of Laura Kelly's Patriotic "America the Beautiful" (Me & My Peeps) Fabric, you can purchase it in Joann Stores or click the link above. 
There is also an AWESOME giveaway and you can enter to win by adding your info to the rafflecopter link below..
a Rafflecopter giveaway

There were 25 designers included in this blog hop, that will go on throughout the week. Check out their designs too for some other fun crafts and ideas! You can find a full list on the 100Directions website, or click the blog hop image above!

Thank you to Laura and her co-host Jen for including me in the blog hop, for the fun fabric and awesome goodies from so many great manufacturers!

Have a great day all!


Although I was given free product, the opinions set forth in this post, are my own. Please do not use my photos without permission and please do not retake any photos to remake the post for your own blog or another company or in another language. These photos and the text are copyright protected. If you'd like to "Pin" the one finished project photo, please credit me by using "#kidgiddy". Thank you for your cooperation.
 <a href="http://www.bloglovin.com/blog/2330921/?claim=hemk6vwxh7s">Follow my blog with Bloglovin</a>

Saturday, March 9, 2013

Sunny Side Up Easter Eggs w/Buttons Galore and More

Good Saturday morning to you all! What's for breakfast at your house today? Over here we have made some sunny side up eggs just in time for Easter (or April Fools!).


A couple of months ago I agreed to do a fun blog hop with some other designers and the folks at Buttons Galore and More...Here's just a few of the buttons I got...and get to play with! The first thing I did was sort them all and played with them. As I look at them, I let the ideas come to the surface and the first project I knew I had to make was some eggs...sunny side up! It was the only thing I could think of when I saw these huge yellow, asymmetrical buttons...yolks! Does that make me weird? I think so! But fun. Always fun!


Here's what you'll need:
I used a natural wool felt for my base
I used a bright white wool yarn to make the egg whites.
You'll need needle felting tools (Mat, needles & brush (for cleaning the mat)
The "Buttons Galore and More" Yellow "Yolk" buttons
& a little Yellow yarn or ribbon for tying the yolk to the egg

(If you want to make these way easier - you can use bright white fleece and sew a couple of pieces right sides together, leaving open a small space for turning, sew on the buttons, and then close the opening with a ladder stitch.)

These would be great for Easter Egg Spoon Races - put them in a plastic Easter egg and off you go...if it drops and pops open, you've cracked the egg and have to start all over again. They would also be a lot of fun for April Fools...maybe on a slice of felted bread, with some felted bacon on the side?!

Be sure to check out all of the other designers today participating in the Buttons Galore and More blog hop! I hear you can also enter for your chance to win a Viewtainer, packed with buttons and ribbon, by simply entering a comment at this link here. Fun Fun Fun!

I hope you have a wonderful day! 


http://kidgiddy.us2.list-manage1.com/subscribe?u=9ea4c419178a2e61b529af8aa&id=975aef860e


Although I was given free buttons from Buttons Galore and More, the opinions set forth in this post, are my own. This tutorial is shared with you in the hopes that you will learn a new fun craft. Please do not use my tutorials for your own gain. Please do not use my photos without permission and please do not retake any photos to remake the tutorial for your own blog or another company or in another language. These photos and the text are copyright protected. If you'd like to "Pin" the one finished project photo, please credit me by using "#kidgiddy". Thank you for your cooperation.

Tuesday, November 15, 2011

Busy Monday: DCC Blog Hop - FlipPal Holiday Ornaments

It's beginning to feel a lot like Christmas....with these holiday ornaments hanging around....

As a member of the Designer Crafts Connection, I have the privilege to work with some really fun toys (aka products), sent to me from the manufacturers. I was grateful to be one of the 8 chosen to this month and was given a Flip Pal™ Mobile Scanner to play with and use at my discretion. Of course with Christmas on my mind already, I decided to deck the halls on this post! After all, it is my favorite time of year!

10 years ago, my husband and I got married. Just over 8 years ago we had our first baby. Almost 7 years ago we had our second, and in a few months, 7 years ago we got our first digital camera. It's so hard to believe that only 7 years ago I was still taking my "film to be processed and printed". Now with everything going digital the opportunities for creative endeavors are endless. I made some really fun ornaments with pictures I have been needing to scan, from my wedding and of my newborn babies! These ornaments are so quick and easy to make, and are great for gift giving!

Here's how to make your own:

What you'll need:
A Flip Pal™ Mobile Scanner
Inkjet Printable Fabric (please be sure to check your printer compatibility with any printing fabric you purchase!)
Ribbon (2 1/2" per ornament)
Holiday fabric of choice
Muslin Fabric
2" 3" and 5" circle die cut or templates
Fiberfill of choice
Needle & Thread

What you do:

1. Read all the instructions on the Flip Pal™ Mobile Scanner prior to using (so that you have enough batteries and can decide things like scanning at 300dpi or 600dpi). Scan all the photos or objects you'd like to use. If you don't want to purchase holiday fabric, you can make your own fabric, by scanning your favorite patterned sweater for a really great texture and printing that as well.

2. If you can't take the picture out of the book, or if you can't fit the object on top of the scanner, remove the cover, flip the scanner and scan the photo directly in the book, or directly over the item. I love this option, as it really gives you so many ways to use it while scanning a variety of things.

3. Using a die cut machine or template cut out three large circles (2 of your chosen fabric, and 1 Muslin) that are 5" in diameter, and one small 2" circle from a scrap of fabric.


4. Once you have scanned all of your photos, you can use the computer program of your choice, to prepare and crop them for printing. I placed each photo into a circle shape on my MAC program, to avoid using more ink than needed. You don't have to do it that way. You can just print each picture and crop during the sewing process. If you print them as circles, they should be no smaller than 3" in diameter. Peel the fabric, carefully, from the paper backing. Make sure you do not pull or distort the images by pulling too hard in one direction.


 5. Lay one of the holiday fabric circles right side up, and one piece of muslin on top of it. Fold it in half (as show on the left side of the group). Fold the smaller 2" circle scrap and center it. Cut out that half circle, so you have a 2" opening in the center of your ornament. Sew all the way around the center of the circle, using a 1/4" seam allowance (3rd photo from left). Now clip all the way around the inside edge of the circle, making sure to not cut the seam.

6. Once you have clipped the inside edge, flip the muslin inside through the center, and behind the front piece. This will give you the clean edge that you need in the center of your ornament. If you prefer a raw edge, you do not need to use the steps involving the Muslin. As pictured on the far right, place your photo underneath the ornament fabric.


7. Next, top stitch around the inside edge of the ornament. With raw edge to raw edge, place a piece of ribbon in the top, center of your ornament. Cover the ribbon, and front of the ornament, with the back piece of the ornament. Leaving the bottom open about 1", sew all the way around the outside edge, using a 1/4" seam allowance again.

8. Clip a notch (small triangles not shown) all the way around the edge of your ornament, again making sure not to cut the seam. Gently pull the ribbon out from the bottom opening, and turn the remainder of the ornament inside out. Gently stuff the ornament with desired fiberfill and stitch closed with a needle and thread.


These ornaments are so quick and easy to make, they would be perfect for gift tags and gift giving this holiday season. So you can make as many as you'd like. And now you'll have to hop around to see all the other amazing projects made with the FlipPal, and some other projects by the other members of the Designer Craft Connections Blog Hop (see the link below). Thanks for visiting and don't forget to click the follow button, on the right side, and sign up for the Kid Giddy email updates! After making some ornaments of your own, please feel free to share them and tag me on social media! Have a wonderful week!


http://kidgiddy.us2.list-manage1.com/subscribe?u=9ea4c419178a2e61b529af8aa&id=975aef860e

This pattern is copyright protected and is for home and personal use only. The opinions set forth regarding the FlipPal Mobile Scanner, and any other products, are my own opinions. 


Here's the awesome news for you:

You can participate too! The blog hop follower and participating Scan & Share Blog Hop designer that creates the most creative and productive ideas using a Flip-Pal™ mobile scanner will each win a Flip-Pal™ mobile scanner. Do you have a creative idea for using the Flip-Pal™ mobile scanner for a Scan & Share project? Enter your idea by clicking this link here. Entries are due by Dec 15th, 2011. A team from Flip-Pal™ mobile scanner will choose the winners—who will be announced on Monday, December 19, 2011


And there's more...The Flip-Pal™ mobile scanner team is also offering a coupon for 10% off the purchase of a Flip-Pal™ mobile scanner or a Flip-Pal™ mobile scanner Creative Suite—with Craft Edition DVD. To receive a coupon code click here. The coupon is valid from Nov 15 - Dec 14, 2011 or while supplies last!


Monday, September 12, 2011

Busy Monday: Reversible PumpKat Softies


Boo,

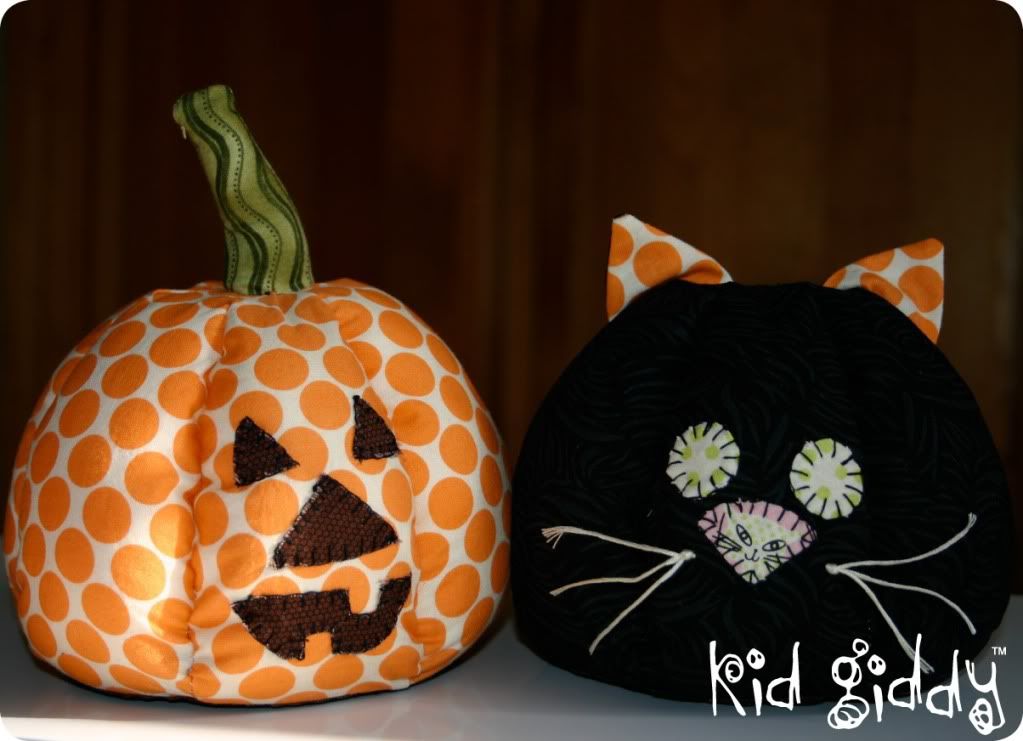
Hope this little PumpKat didn't scare you! Get your copy before it's gone!  The latest issue (Sept/Oct 2011) of Crafts 'n things Magazine is out on stands...or sold out - so run don't walk to get your copy now!

This year for halloween I couldn't decide if I wanted the pattern to be a Jack-o-Lantern or a Black Scaredy Cat! So it became a little of each! Just like some years...most years, my girls can't decided what they want to be for Halloween...until the last minute! Yikes!

By following the simple, sew as you go, concept in the instructions, you can to make this reversible PumpKat for your fall festive table decorations this year! Give them faces or let the fabric do all the talking. Make just one, or make as many as you please. You can even enlarge it to make a really bold...huge statement! No matter what you do...have fun and enjoy the fall season that is quickly approaching!

When you are done making your PumpKat, please head on over to my Kid Giddy Flickr group and post your pictures for all to share. I'm going to start highlighting some of you crafty folks that are posting in there! Please let me know if you have any questions putting yours together! Have an awesome week!

Thursday, March 10, 2011

Throw-Back Thursday: Ribbon Barrettes

I've been thinking of this post for a long time. My girls love their hair accessories so I started thinking about what I used in my hair when I was little. The memories of my childhood came flooding back and instantly I thought of these ribbon barrettes and had to make them some.

 
Yesterday when my girls got home their eyes lit up with pure excitement that I could make these barrettes for them. They started talking about more colors and immediately wanted to wear them. They couldn't believe I actually could buy barrettes like these when I was little, that - it's just the way it was. I have so many more things to share, photos & tutorials of my past. So many that I got a little over-excited and created a new "day" of the week to focus on it! It's called "Throw-Back Thursday" and I hope you'll come back to visit every week and share some memories with me!


OK - I digress...Here's your step by step photo tutorial to help you make some fun barrettes in any color combination and ribbon style to suit your fancy! Enjoy!


You will need : 2 large barrettes and 2 pieces of ribbon 21" long for each barrette. Flat & Ric-Rac or all flat.

Start by placing the ribbons under the top hook of the barrette and tie once.

 
Immediately begin to criss-cross and weave the ribbons through the center space

Continue to the very bottom of the barrette, scrunching up the ribbon to the top, to make sure you really weave and fill in as much as you can as it curves underneath

Once the weaving is completed, tie the ends right over left and let over right into a knot.

Now grab both ribbons and tie them into a single knot together to ensure it won't loosed over time.

I hope you'll come back to visit soon. I'd love to know what you think of Throw-Back Thursday, please leave a comment below! Thanks so much for stopping by! Have an awesome day!


http://kidgiddy.us2.list-manage1.com/subscribe?u=9ea4c419178a2e61b529af8aa&id=975aef860e