Showing posts with label DIY. Show all posts

Tuesday, January 26, 2016

Bubbles the Paperie Doll and her tiny CoPilot Bag

I'm so excited to finally share what Amy Sinibaldi's Paperie fabric inspired me to make. Little Bubbles has been fluttering around my house for the past month, as my daughters have snuck in a few cuddles with her here and there. She's in a new spot everyday. I was thrilled Amy asked me to be a part of her blog hop because I knew her fabrics would make the cutest little doll. I didn't skimp on this and kinda broke the mold on her. If you are familiar with my Sizzix Doll dies, you'll notice her arms and legs are not the same as the ones on the doll die. These arms and legs are from the Sizzix Fox die. The pieces are all interchangeable - she's my first bit of proof.
For her outfit - I made Bubbles a little "bubble dress" with puffy sleeves. It was easy to make and looks really cute with a little tulle underneath (my daughter took the tutu from my ballerina doll and added it underneath at one point. It's not shown here - but I'll share that pic when I post the dress tutorial tomorrow). I also decided to give her sweet little capris with some lace detailing) same as on the sleeves). I finished off her dress with two beautiful buttons designed by Jane from "Quilt Jane". Because she lives in Maine - Bubbles clearly needed her own little infinity scarf to keep her warm.
Bubbles is quite unique as you can see from her pink hair and dual hair buns on top. She loves to knit in her free time and travel. Beside her is her little Mini Co-Pilot bag - she loves a good adventure - that word has become her middle name. The word 'adventure' and the bag fit her perfectly.She ven brings her scissors along for some crafty traveling.

Info on making the bag MINI: I made this mini bag for her using Sara Lawson's Co-Pilot pattern from her new Windy City book. I took Sara's bag measurements and divided them by 4. I then took the pattern piece for this bag and shrunk it down to 25% of the original size. Because I changed the size - the seam allowance was no longer the same as required. To fix this - I cut off the seam allowance and added an accurate allowance back on. This kept the pattern 100% accurate in shape and dimensions. This is something I always recommend to people using my patterns (or anyone's patterns) if they make them smaller or larger than advised. I used some Soft and Stable from Patterns by Annie (only one layer for the bottom and sides) to give it body, and of course had to add a little scissor tag to the zipper pull.

If you would like a chance to win a charm pack of Amy's new Limited Edition Paperie fabrics from Art Gallery Fabrics - please leave a comment below (OR on my instagram pic of Bubbles). I'll pick a winner and advise next Tuesday. (EDIT: Thank you to everyone for entering the giveaway here and on my IG feed. Congrats to Kimberly R for winning).
Thanks so much for stopping by and thank you Amy for letting me play with your fabrics. Please sign up for my emails to get info about new patterns, new dies, future sales and other fun stuff. I have yet to send out my first one - but I will soon and will surely include something fun.


http://kidgiddy.us2.list-manage1.com/subscribe?u=9ea4c419178a2e61b529af8aa&id=975aef860e


Disclaimer: I received some fabric from Amy to use for this blog post. I also received a copy of Sara's book and some Soft and Stable since I hadn't ever used it before, as well as the buttons all the way from Australia from Jane. All of the opinions are my own and none of the links above are affiliate links because Maine is crazy like that. Any knitting featured in this story was created by one of my talented daughters.

Monday, April 15, 2013

Mini Felted Cherry Blossom Tutorial

DIY Cherry Blossom Tree Craft Felted Flowers by Kid Giddy photo DIYCherryBlossomTreeByKidGiddy1_zpsad5b4e54.jpgIt's no secret, I live in Maine. I live far far away from the March/April beauty of the southern Cherry Blossom trees that everyone post pics about and talks about all over Facebook and Instagram. About two weeks ago I saw so many cherry blossom tree pics, that I decided to make a little one for myself to enjoy.
DIY Cherry Blossom Tree Craft Felted Flowers by Kid Giddy photo DIYCherryBlossomTreeByKidGiddy8_zpsb9cd4052.jpg
Since I can't have the real thing this will have to do, until it's warm enough here in Maine for all of our flowering trees and bushes to pop! I used an old pink wool sweater that I previously cut apart for this Hexagon Ball tutorial, but you can buy some 100% wool felt from your nearest craft or fabric store if you don't, as I used here for the white flowers. You'll also need some basic needle felting supplies, a hot glue gun and a branch that looks like a mini tree.

Tuesday, March 26, 2013

What's in My Craft Room - My Photo Set-Up

I love seeing other peoples crafty spaces. I love getting ideas from all the pictures and feel inspired to keep my space as organized as I possibly can. I am fortunate to have my girls sharing a large room, so I can use the small room as "my craft room". However, they are growing, and so am I, so we are currently in the midst of renovating (finishing) the space above our garage to become my "studio space". And I couldn't be more excited.

I thought I would share a few pics of my own crafty space and the light box that became my best friend while working on my book. It looks pretty clean here - but that's only because I would work on one chapter for the book (about 4 patterns), clean it all up, and then get working on the next chapter. So I snapped the pictures in between chapters. Cheating? I think so! I didn't take pics of my fabric stash or my knick-knacks - but will do that when they are all unpacked!

A few people have also asked (as well as my offering) what my photo set up is like. So I'm going to share that too.

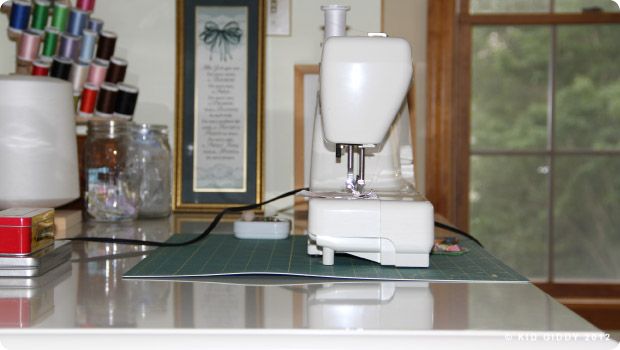
This is my trusty Kenmore sewing machine. I do hope to get a Bernina soon, a Juki someday, and a baby lock as well...but until then, this workhorse has been so good to me. It currently sits on the Porter Desk (from Pottery Barn). The drawer underneath is awesome - but the weight of my machine is proving to be too heavy for the top, and is beginning to sag! *cringe*. So I will have to switch things up when I move up to the studio and will most likely put my computer on this desk instead.

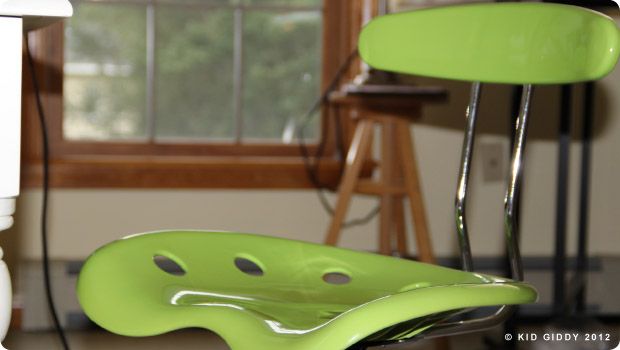
My awesome green chair is from my husband. It was my birthday gift a few years ago and he picked out my favorite color.

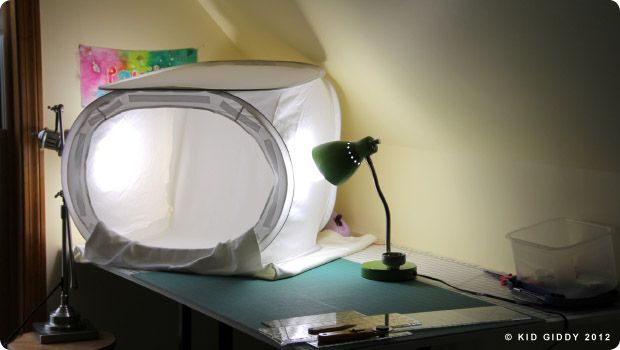
Here is my photo box. It's actually a light tent and can fold up into a little pouch. I know it's quick and easy to make a cardboard photo box - but this is a great investment since it's about $60. You can't put the cardboard one away and hope that it survives. This one is great for using, traveling, and storage! That's totally my opinion and I'm not being paid to say that. I will say though - that I had to by some white fabric to hang & lay inside, because the material it is made with is very wrinkled and not seamless. I bought some bright white velour material at Joann's. You can ask them if they would recommend anything in particular - but this white material is great because it doesn't show everything (like wrinkles). Keep a sticky roll next to the light box though - you'll need it once in a while to remove threads and fiber specs. I pinned the fabric up in the back at the top, so it drapes nicely and doesn't create a shadow.

To make this box or any box work right - you also need the right lighting. The awesome thing I was told at a photo store nearby - was to use photo bulbs in a regular desk lamp - saves you a ton of cash! The bulbs (added a pic of the packaging below) will run you about $15-$20 and the desk lamp can be purchased at Target or anywhere for $10! That is - if you don't already have one! I used 2 that I already had - and they have both been great. You can use up to 4, both sides, top and back. I only have 2. And it works fine. The green one was from target years ago and the other one is adjustable up down and every which way. That helps too.

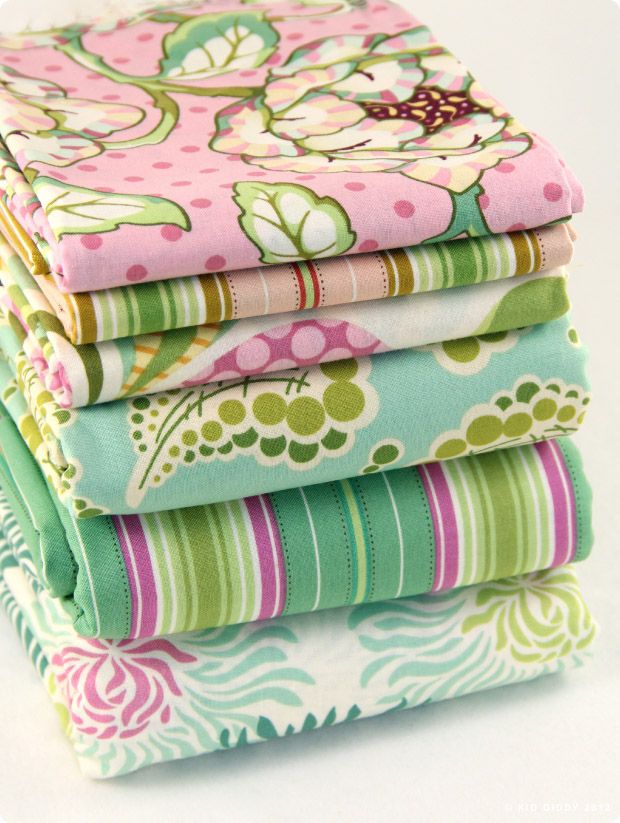
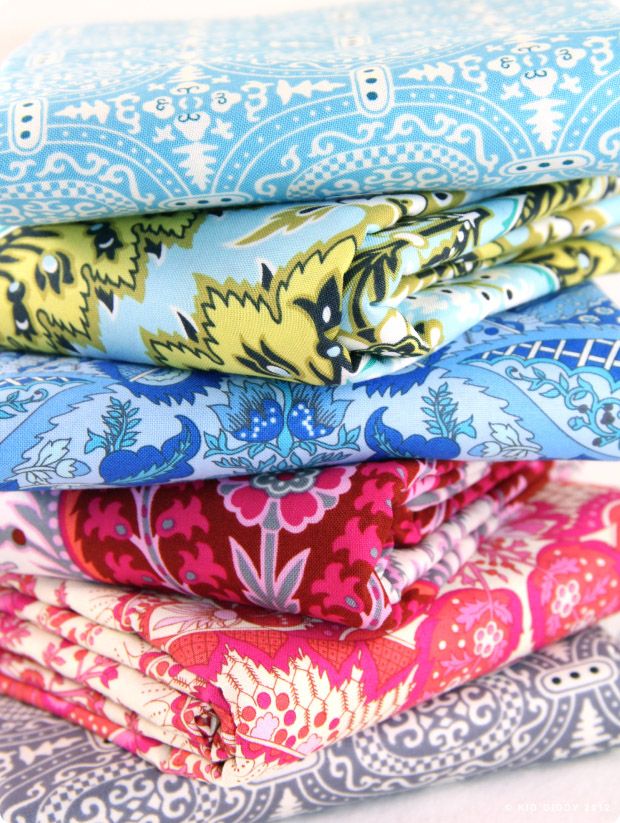
I took a few pics of some Heather Bailey and Amy Butler fabric in the light box, and some little lavender stems in an old ink jar.


If you have any questions for me let me know. You can leave me a comment below - and I'll reply as soon as I can. Just so you know - I didn't use any filter effects on any of the pics. It was a while ago - but I did change the saturation levels on the flower image - it was fun playing with these flowers in the light box. Thanks for visiting and I hope you all have a great time creating in your space.

Saturday, January 12, 2013

Here a Leaf, There a Leaf - A Sewing Tutorial

So it's that time of year again....I spent the last 2 weeks getting ready for CHA (Craft and Hobby Convention in CA.) and deciding what I wanted my designer showcase to look like...I really love what I do. It really does make me happy (when things are working out right and my family is happy)! I have gone to CHA twice now and have been so blessed because of it! You can read about my trip in 2011 and last year in 2012. Because of CHA, I have had the great opportunity to work with Anna Griffin, Inc and designed some patterns for her, and just last year signed with F+W Media to write my first book (which is done and due out Sept this year).

For my table this year....I decided I wanted to make these HUGE leaves and grabbed all the Amy Butler green/blue fabrics I've been hoarding forever, and made 11 of them for my table. They are approx. 12" without the stem...and maybe 15" with. All you need is a ton of fabric (doesn't have to be leafy colored), and some natural cotton batting, and pipe cleaners as I still call them...despite everyone calling them chenille sticks now. I used 5 pipe cleaners per leaf (how many you use, depends on the size of your leaf).

Here's what you do if you want to make some of your own..

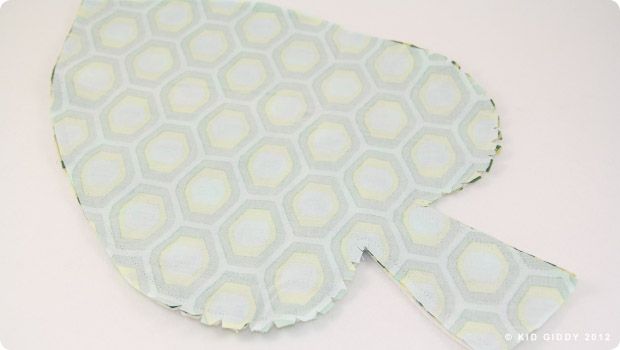
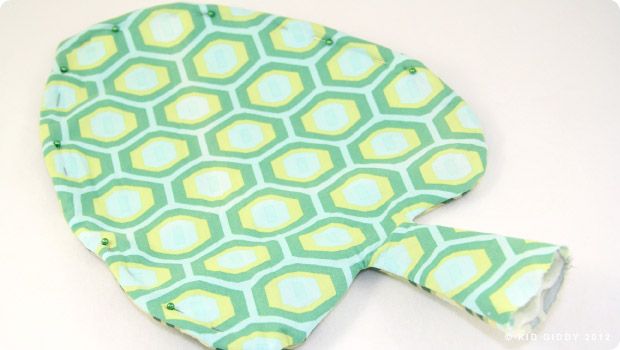
Sew the leaf all the way around from one corner on the stem, to the other, leaving the end open for turning. Notch the rounded edges to reduce bulk once turned right side out.
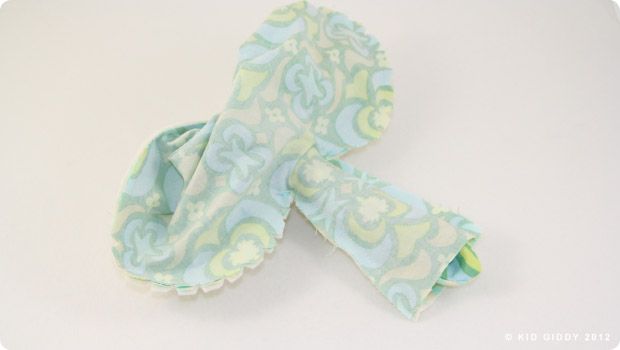
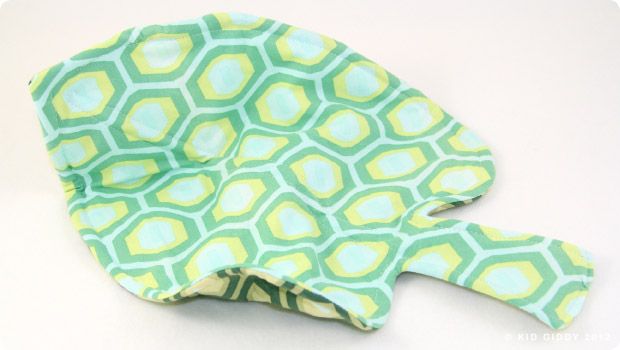
Carefully turn the leaf right side out, pulling the tip through, and supporting the skinniest part of the stem to avoid it ripping or tearing at the seams.

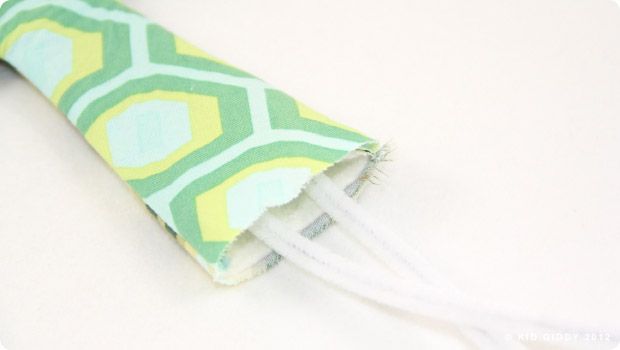
Once turned out, prepare the pipe cleaners by connecting two together at the very end 1/2". Twist them together (pliers work) so they lay flat, not twisted together straight up. Connect 4 pipe cleaners together for each leaf (approx). Insert the center of the pipe cleaners into the stem opening, all the way up to the tip of the leaf.

As you push the pipe cleaners to the edge, pin it in place to prevent shifting.
Place a smaller pipe cleaner up into the stem, and pin it in place to appear as the center vein (be sure to curl the very tip of the pipe cleaner and flatten it, to prevent it from poking through or snagging the fabric. Tuck the edge of the stem inward, and pin in place.
Carefully sew all the way around the leaf edge to sew the pipe cleaner into place. Then sew a very long skinny oval around the center vein. Be careful not to accidentally sew the pipe cleaner. If the needle hits it just right, it will break it and then the leaf will be floppy.
Thanks for coming by my blog. I can't wait to show you all the fun and gorgeous stuff from CHA! When I get home I will also post a pic of all of the leaves so you can see them all together and get an idea of what you can use them for! Don't forget to post pics of your kid giddy projects in the flickr group, for possible feature on my blog.


Monday, July 2, 2012

Beat the Heat This Summer Frozen Washcloths Craft - DCC Blog Hop

The heat waves are upon us folks...or they are coming soon, and I've got a great way to beat the heat this summer. Get your craft on with me, and make some awesome, freezing cold washcloths to keep you as cool as a cucumber!

I don't remember everything from when I was little. My memories are spotty at best, as if I took one photo out of an entire album to keep, and lost all the rest. One of the fondest memories I do have though, of my Grandma Pratt was of her packing up wash clothes for a day on the golf course.

The night before her golf day, she would get her stash of washcloths, dunk them in cool water, wring them out and package them in small sandwich baggies (or maybe it was just saran wrap?), then pop them in the freezer. The next morning, she would grab all the washclothes from the freezer and pack them in the cooler with a couple of ice packs on top.

She was a confident woman. I always felt that way about her. That she knew who she was and didn't let anyone walk all over her. She was also brilliant. She explained to us that she used these washclothes on really hot days on the golf course to keep her cool. She said when she got hot, she'd lay one on the back of her neck or wrap it around her wrist and that would help cool her body temp down. Or she would simply 'dab' (because ladies didn't 'wipe') the sweat from her brow. lol! I've never forgotten these washcloths.

They are really easy and fun to make for all ages!


Here's what you need:
A pack of (inexpensive) plain washcloths - I used white (as did my grandmother, you can use any color you'd like)
Fabric Markers - I used Marvvy Uchida Fine Tip Fabric Markers
Embossing Heat Tool - I used the Marvvy Uchida model #2500 (this will help set each color so it doesn't bled through or blend with each color. It also sets it prior to washing)
Cardboard to lean on

Here's what you do:
1. Set your cardboard on your table top.
2. Place the corner of a washcloth in the center of the board.
3. With an idea already in mind, begin your design by dotting with the Fine Tip fabric marker as you go along. I found dotting to be easier and more effective on terry cloth than drawing, as it helps get further down, and gives you a richer color.
4. After each color, set with the Embossing heat tool. Be sure to read all the manufacturers instructions prior to using. It can get very hot and should be used with care.
5. Once your design is completed, finish it with the embossing heat tool again to set the design prior to washing. You can also throw it in the dryer.
6. Once they are set, you can give them a quick wash.
7. Don't dry them, but add a little more water too them (not dripping) and place them in the freezer folded in 3's or in quarters, in separate baggies. Do not put them in touching the side of the freezer or an ice cream maker bowl. Certain things will cause it to stick and not release. (may also depend on how much water is in the washcloth).

My girls made their own too and had a lot of fun! My only recommendation when deciding what design to put on your washcloths, is to only outline. Trying to fill it all in can use up your marker quickly and again it's difficult on terry cloth. On the thermometer design, I dotted it a little to looked filled in, but when you look closely at it, it's really not.

Here are some ways you can use them:

  • On any hot summer day - This may be at home, or at the beach, during the day or at night - no matter when - it's a great way to cool off!
  • Lunch Surprise - for a little refresher after lunch or recess - pack a frozen washcloth in your child's lunch bag, with a small ice pack to keep it really cold! My girls love this, and their friends are jealous! I've wanted to bring in tons for the classroom - but I wasn't allowed.
  • Sick Days - when the girls get really sick, it helps keep their core temp down to avoid tons of meds when it's just not that bad! It also helps with the stomach bug and they heat up quickly!
  • I Workout - no matter what sport you play (for my Grandmother it was Golf, for me it's Karate and Insanity workouts, for my husband it's Tennis) we can all use them to stay cool while we get our workouts done!
There are so many ways to benefit from these washcloths and beat the heat! Make one, make a ton, either way - it will be fun and cool this summer with your new frozen washcloth! (I will post a pic of my grandmothers cloths later...I can't locate the pics - so I'll take new ones. She did sailboats!)

Thanks for stopping by and crafting with me. If you'd like to see more vacation crafts, please hop around through the Designer Crafts Connection Blog Hop to check out what the other designers have come up with!


http://kidgiddy.us2.list-manage1.com/subscribe?u=9ea4c419178a2e61b529af8aa&id=975aef860e


This tutorial is shared with you in the hopes that you will learn a new fun craft. Please do not use my tutorials for your own gain. Please do not use my photos without permission and please do not retake any photos to remake the tutorial for your own blog or another company. These photos and the text are copyright protected. If you'd like to "Pin" one of the photos, please credit me by using "#kidgiddy". Thank you for your cooperation. Although I was given Marvvy Uchida products free for my use, the ideas and opinions are my own.


Saturday, April 2, 2011

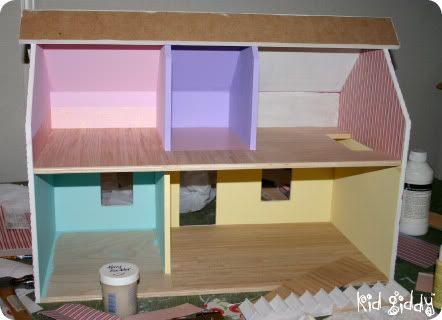
Giddy-Up Friday: Doll House Update

Yep - it's Saturday...I'm not going crazy - well maybe in my own way right now I am...but I know it's Saturday and not Friday! I just wanted this post to be a part of Giddy-Up Friday as the original Doll House post is/was!

A blog reader was just asking for photos of my daughter's doll house that I started ages ago...and have yet to finish. But I do have some photos to share!
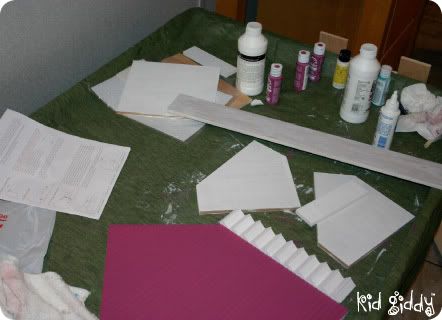
Now that everything is painted - let's get started!
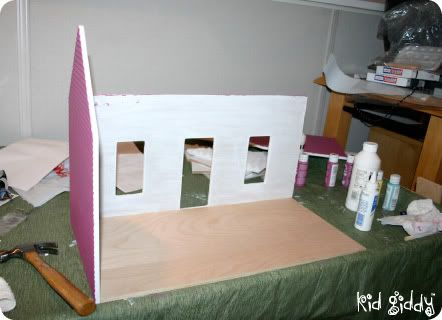
And we have walls...
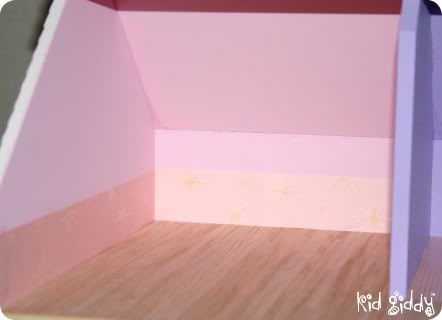
Using Cherry Scrapbook paper and it's coordinating pattern for the "play room"
Sparkling scrapbook paper works wonders on walls!
We love multi-colored stairs! (and a shingled roof!)
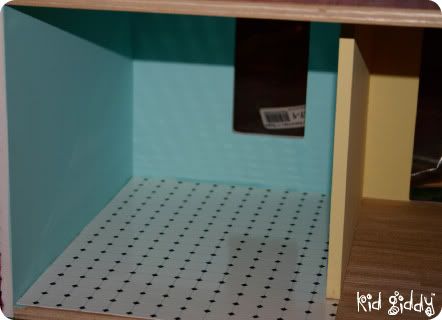
The Kitchen tiles are in. (Tile - it's one big sheet!) lol!
I'm sure when I have a moment to breathe again - I will finish it. Hopefully she won't be full grown by then with children of her own to play with it! : (

If you are looking to buy your own doll house kit and DIY, you should totally check out Earth & Tree Miniatures! They have so many to choose from and are in NH! That's where I've gotten both of my girls houses. This one up above is called the "Littleton" for your reference. The guy there makes all the designs and cuts them and packages them next door to the shop! If you are ever near by...you should stop in and visit them! Tell them Kid Giddy sent you (no not really - but it was fun to say)! Have an awesome "conference" weekend!