Showing posts with label Printables. Show all posts

Wednesday, October 15, 2014

More Sudoku Puzzles

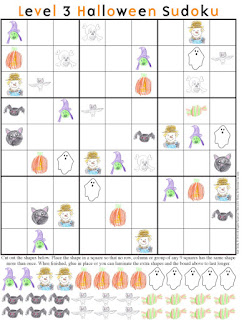
Quite a few years ago I started creating many Sudoku puzzles for my daughters and the Montessori school they attended. Since then they have been downloaded numerous times and shared via Pinterest countless times. I had gotten a request the other day for a basic Level 3 puzzle. I whipped one up really quick, sent it off via email, and decided I should share it here as well. This is an easy Level 3, but I have also a harder version (naming it Level 4). It's the same answer key, I just took more pieces off.You can download the Level 3 and 4 answer key here.


Pin It

When I am creating a new puzzle, I don't use a Sudoku book and follow one of their puzzles, I make my own. I love the challenge and occasionally have to have one of my daughters check my work to make sure I am not missing something. After a while, my eyes stop seeing the color and shapes, so I may miss a mistake here or there. Eventually, I get it and it works, which is always a relief.

While creating these new levels, I decided to challenge you. Can you put your own sudoku puzzle together? Begin by placing all of one shape in random boxes, still following the rules of - each shape can only appear in the column, row and box group once. Then repeat the same process with all of the other shapes. As you get to the last two shapes, you may find it more difficult to keep the rules, so you will have to start strategically placing the shapes where you need to, and moving others around. It is a challenging game to play, but can be more challenging to create your own puzzle. Give it a try.
For Level 1 Sudoku, choose 4 shapes and use 4 of each shape. For Level 2 Sudoku, choose 6 shapes, and use 6 of each shape. For Level 3 Sudoku, use all 9 shapes and all 9 of each shape. The shapes can be enlarged a bit for the first and second levels if needed, and the boards and pieces can be laminated and reused numerous times. If you are homeschooling or teaching at a school, you can also create some answer keys of your own, take some pieces off and photocopy partial puzzles as a class project.

If you are new to my blog, here are some quick links so you can find my other puzzles: Sudoku Levels 1 and 2, Valentine Sudoku (Levels 1 and 2), and my Halloween Sudoku (Levels 1-3). I'm sure there will be more to come.

If you'd like to share some pics, you can do so on my facebook page, as well as tag me @kidgiddy (and hashtag #kidgiddysudoku) on instagram. Please do not copy these game boards, or puzzles pieces for your own blog or monetary use. These are not created for mass production, and are for home, personal, or classroom use.


http://kidgiddy.us2.list-manage1.com/subscribe?u=9ea4c419178a2e61b529af8aa&id=975aef860e


Monday, February 10, 2014

My Crafty Valentines

After a few months of pure stress, illnesses and so much other stuff, I decided to have some fun. Plain and simple fun, in the studio for a whole week. Now that it has passed, it doesn't sound like much, but it was exactly what I needed to do. I just may have to do it again, and next time I'll lengthen it to a whole month - who's going to join me?

For a few days, I worked on making some crafty Valentines, for all those crafty people in our lives. It all started with the Clover Wonder clips. I had this little note on repeat in my brain "you are so wonderful" and thought it would be fun to send some wonder clips with the note. Then the spark flew and ignited all these other crafty product ideas for Valentines. I just couldn't resist.

To print out these crafty valentine tags, click on the picture above (print on paper or card stock). They are 4" x 2" and will fit across a 4" candy bag. If you are making baggies, and want to use the tag as a tab top, print the tags on regular paper. Cut a plain white piece of 4" x 4" card stock, fold it in half, and glue the tag on the front side of the tab. When dry, staple it to the top of the bag. If the item is larger, print the tags on card stock so they are durable, punch a hole in the corner or center of the tag, and tie it to the product with a piece of ribbon.


Here's the master Crafty Valentine list and I'll add to it as I come up with more - or as you all add comments below:

Sewing, Scissors, Notions, Fabric:

  1. I wonder if you'll be my Valentine - Clover Wonder Clips
  2. I've always Felt you were the Valentine for me - Wool Felt (National Nonwovens)
  3. I'm strung out on you - Bakers Twine
  4. You're as cute as a button - Buttons Galore and More
  5. You turn me right round baby right round - Dritz Turning Tube set, and EZ-Pull Bodkin
  6. We're the perfect pair - Fiskars Dress Shears and a fabric Fat Quarter wrapped around them
  7. I would pick you any day to be my Valentine - Dritz seam ripper, Dritz assorted needle pack, Aurifil Gutterman or Coats & Clark Thread
  8. You are sew special to me - mini travel sewing kit
  9. I love you sew much - Go big.....go for a Sewing Machine
  10. You Rule Valentine - give with a new acrylic ruler for rotary cutting
  11. I'm stuck on you Valentine - Present with a box of pins
  12. You're a cut above the rest - Sizzix, Brother or Cricut cutting machine, or scissors and fabric fat quarters
Crafting:
  1. You can count on me when things get sticky - Phoomph and non stick Westcott Scissors (would also work well for Duck Tape and a pair of scissors).
  2. I'm stuck on you Valentine - Washi or Duck tape
  3. You're just ducky Valentine - Duck Tape minis
  4. You're just write for me - Copic, Microns anything you can write with and a cute Journal
Crochet/Knitting:
  1. I'm hooked on you Valentine - Crochet hooks, and Lion Brand BonBons (also looks like buoys)
  2. I can't resist your pull - Crochet hooks and yarn
  3. You light up my life - light up crochet hook

If you have some crafty people in your lives...which of My Crafty Valentines will you be giving out this year? Have any other crafty valentine ideas, please share them below!

I love you all - thanks for visiting my blog. To find out more about my book Sewing Tales to Stitch and Love, click the book link to the right. To sign up for my 'lovely' newsletters, click the link below. Happy Valentine's Day everyone!


http://kidgiddy.us2.list-manage1.com/subscribe?u=9ea4c419178a2e61b529af8aa&id=975aef860e

(Disclaimer:  some of this product was purchased by me at craft stores - because I craft and shop (shocker - I know). Some was given to me at trade shows, during one event or another from various companies. Some products are even left overs from previous blog hops. But none of that really matters since it's about the idea and sharing the idea with all of you. I was not paid to use these products, and do not serve as advertisements)


Friday, February 10, 2012

Giddy-Up Friday: Valentine Sudoku Printables

I am feeling the love tonight! Are you? If not, these Valentine Sudoku Printables by Kid Giddy can help you out with that!

I have made some other versions, the Basic Shape Sudoku and the Halloween Sudoku, and had to offer some some really cute "Conversation Heart" versions too. I didn't have a chance to get to the Level 3, but will do that soon.

So if you haven't done so already, click on the pictures to get to the google docs to print off the PDFs. Follow the directions and you're on your way to feeling the love! If you have any questions, let me know and I'll be sure to respond. Have a wonderful, LOVING weekend and Happy Valentine's Day next week!


Thanks for stopping by. Be sure to click that follow button, to stay up to date on all my happenings and awesome news, or the pin it button, to share the love (of course)!


Monday, July 25, 2011

Busy Monday: Laptop Greeting Cards & an Elmer's Giveaway

Hello crafters! I was contacted by Elmer's a couple of months back, to see if I would be interested in receiving a Kid's Summer Camp kit with tons of their products to make something with and blog about. I'm not a review blog and will not go into the "reviews" of each product they sent me, but I will instead share with you what you'll need, to make your own Laptop Greeting Card. And if you are the one lucky reader (that leaves a comment below) - you just might be the one to win a fun package of your own.


I'm happy to say, I finally got my girls and some of their friends together for an awesome craft session! I have been waiting weeks to share this Laptop Greeting Card idea with you all! The girls were so excited to crank the tunes and get to work, and I think the only thing I needed was more space!

It all started off with this awesome crate...I think my husband is jealous and I'm worried about leaving it alone for any extended period of time, as it may go missing and I may never get it back. 

Check out what was inside...The Host (or as I called it the "Mommy") kit!, 5 other kid crafter kits and a generous gift card for purchasing more supplies (like scrapbooking paper, etc).

Here's what the girls saw before the crafting madness started...A whole slew of goodies and bright colors! They too loved the burlap baggies, and were equally excited to be able to keep it and bring it home!

Here's one of my daughter's (Elephant), using a pair of Elmer's scissors for a fun edge effect!
This one's little boo-boo, didn't prevent her from gluing down her keyboard and having a blast...
Ladybug colored in her keyboard with heavy duty permanant markers!
Elephant begins to find the joy of her Elmer's Foam Core board creation and looks deep into the "laptop screen" allowing her imagination to run free!

My older daughter (Monkey) is finishing up the coloring in process on her last few key's, with her dual end permanent marker set. These dual end markers were a definite hit!
Mittens finished placing her gems and laptop "skins" by using the glue dots from her kit. The glue dots were my favorite! She also colored in some of her keys with the Gel pens! With just a hint of glitter they were a hit also!

So here's what you'll need for your Laptop Greeting Cards - or even just to make a laptop to play with and learn where all the keys are on the keyboard!

1 - 1 Elmer's Bi-Fold Foam Board - measuring 12 x 18 (when folded it's 12 x 9)
2 - 1 Box (per child) Elmer's Craft Bond Glue Dots - these are so stinkin' FUN!!! (but beware - if your little one drops them on the kitchen floor like mine did...you'll have to find them all the hard way! lol!)
3 - Elmer's Craft Bond Extra strength glue sticks (these are blue and dry clear!) These worked best for gluing the keyboard to the inside of the laptop.
4 - Elmer's Double Sided Tape dispenser (we picked this up with our gift card and i LOVED it! It was gone before the crafting session was over!) This double sided tape was the best for getting the thicker glitter scrapbook pages to stay down. We def needed more than one roll!

Some of the others you may want:
1 - Gel Pens,
2 - Project Popperz Markers - these were the dual ended markers (please use these with proper ventalation and supervision!), and of course...
3 - Glitter Glue that puff's up when dried!
4 - the X-ACTO rounded corner punch


Some of the other things you'll need:
1 - Scrapbooking paper...on cell phones and iPads, they call it skins...pick out your favorite scrapbooking papers to cover your laptop inside and out!

2 - Print out a copy of my Kid Giddy Keyboard for fun and learning!

3 - Dog Tags (if you want to use them as a mouse like my girls did - or if you want to put it on the front with a symbol like I did (see pic above)).

4 - Ribbon - If your child wants to use it like a real laptop, it will need to stay open...you can poke holes in the sides, about 3 inches from the fold, and 1/2" from the edge, using a screwdriver (on a rug or other soft surface). Put the ribbon through the inside of the hole, to the outside, and tie it in a double or triple knot to secure it. Then place the bottom of the same ribbon into the other hole from the inside, and tie knots on the outside also. Besure both sides are tied at an even length.
5 - Shower Curtain Liner - yep I said a shower curtain liner. Now for this project I used a brand new one! But for yours - you can get the one in your shower - replace it and use the very top of it and toss the bottom! The top is always clean as new and can totally be reused! I used the clear shower curtain liner for the "screen" part of the laptop and if you leave the top open, you can slide new messages in or new pictures. Then the liner makes the screen look more real!
6 - Imagination - you don't need tons of it...but a little will go a long way!

So here's the info about the giveaway....Your "Host" bag and the 2 "kid" bags will not be the exact same as the ones we received, but will have the same products. If you'd like a chance to win - please leave a sweet comment below. (PLEASE NOTE: Elmer's said the winners must be U.S. residents; & a gift card is not included in the prize pack). The winner will have to email me a ship to address and the product will be sent directly to you. Thanks for reading, commenting & entering....and good luck! Comments must be posted by Saturday July 30, 2011 11:59EST to be counted. Winner will be announced Monday! Thank you!

I hope you all enjoy making pretend laptops to play with or laptop greeting cards to send! Thank you Elmer's for sending me fun in a box! The girls had such a blast! Have an awesome week! I will have more exciting tutorials to come in the next couple of weeks...so please stay tuned!



Friday, July 15, 2011

Giddy Up Friday: Craft Cabinet Organization

My little girls love to create just as much as I do. My oldest daughter has been drawing since she was only 14 months old on a Magna Doodle, no joke! My youngest daughter caught wind of the fun and started, just around 2 years old. It's been non-stop creating ever since. We learned early on that we needed a place where they could keep their coloring books and crayons, magna doodles, etc.  A place they could easily get to, without getting into the wrong things or getting hurt! Enter in the creation of the "craft cabinet".
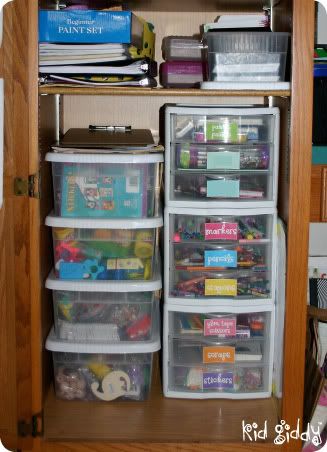
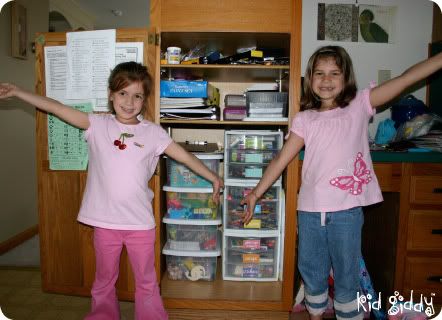
This is the finished result
Their "craft cabinet" has been a great source of inspiration and has always been filled to the brim. We have filled it, emptied it, cleaned it and reorganized it, over and over many times. Finally we came up with a much better system that has kept it cleaner more times than not. Everything has a place and everything must be in that place or there is weeping and frustration from all members of the family when something can't be found.

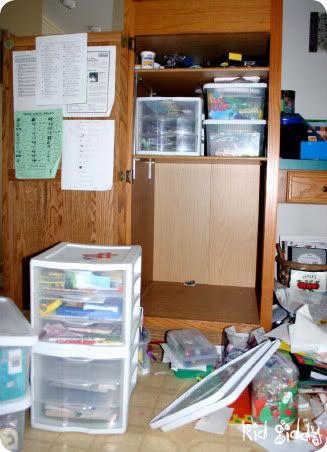
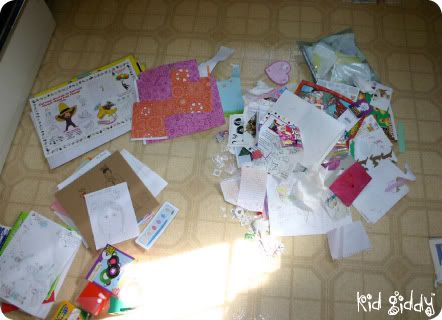
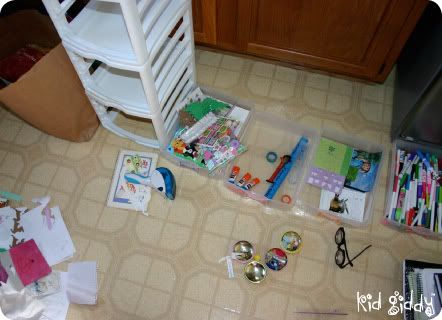
These photos document the clean out process from last year! It's a very "Clean Sweep" style of organizing. The cabinet (in our needing to be remodeled kitchen) is used for their crafting supplies and measures 22"W x 23"D x 38"H total. A small space, organized really well, can house a ton of craft supplies! I promise! So here goes....
Clean Sweep - take everything out first!
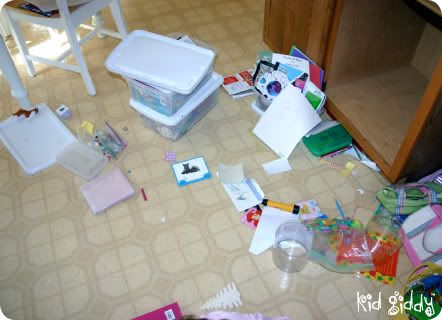
Here's the panoramic view of the mess we created...
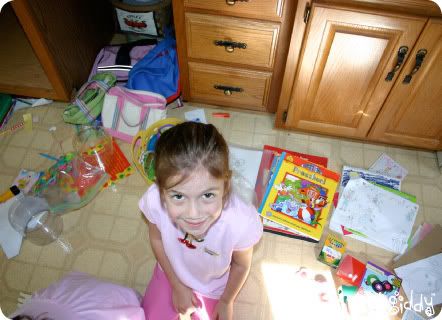
Here's Elephant joining in the sorting process!
I'm amazed at how much was eventually crammed in there!
All of the drawers were removed and emptied. Then sorted by labels.
Monkey & Elephant show off our amazing results!
We had the 4 larger bins already, as well as the 3 drawer pieces, but adding the labels, changing the layout a little and moving up the middle shelf level, helped tremendously. Although these pictures were from October of last year, I'm happy to say - it still looks this good!

In the bins, we have:
1) All play-doh
2) Coloring books (now for guests) or notebooks (which they use more often)
3) Wooden objects, googly eyes and other beading or fun kid projects
4) Felt, PomPoms, Pipe Cleaners, Foam stickers, etc.

The bins are standard plastic containers and the 3 Drawer units are 8 1/2 x 11. I have since bought them a standard 12 x 12 Scrapbooking tote, since the scrapbooking pads don't fit into either the bins or drawers.

I'm sharing the labels I made for the drawers, in a color version and in a black and white version (if you'd like to color your own). I used clear packing tape to "laminate" them and then stuck them to the inside of the drawers, where the handle of each drawer creates a curve. I only used 9, but I have added more so you can pick and choose which you need or prefer to use! Click on the image below to get to the Google Doc to download the PDF.


I hope you enjoy them. Let me know if I'm missing a really important label and I'll add some more later. Have a great weekend!

Friday, October 15, 2010

Giddy Up Friday: HALLOWEEN Sudoku - Printables

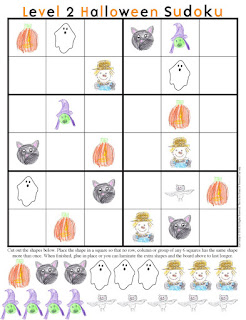
Boo Boo to all you ghosts and gobblins out there! (That's hello in halloween!). I have received a little help from my own little ghost and gobblin here in my house - to help bring you these really spooktacular Halloween Sudoku puzzles! This time - in 3 Levels, with Pumpkins, Black Cats, Scarecrows, Spiders, Bats, Ghosts, Green Witches, Skulls, and of course - Candy!
https://drive.google.com/file/d/0B6St72bEbLYhN2YwOTYwZTYtNGY0Yi00MTU3LWFjMDktMTY4MzgxN2NjNTFm/view?usp=sharing
As with the other puzzles, I would highly recommend you print them, cut out the images, trim up the board, and laminate them all, for more prolonged use! Before laminating it, you can put the puzzle board on a piece of colored construction paper or scrapbooking paper, and glue the answer key on the back so you don't lose it!
https://drive.google.com/file/d/0B6St72bEbLYhNmZlMGZiZjgtNzMyMi00NTcwLThlOTktZDBiMzNmZmY3OWU2/view?usp=sharing

My girls had so much fun making these drawings for you. They are not as brightly colored as the original Sudoku Puzzles I created for you on my computer, but these Halloween images were tailor made and are so fun (and so not scary! my girls don't draw scary - I even had to draw the skull! lol!)

https://drive.google.com/file/d/0B6St72bEbLYhNmE4ZGVjZTAtZGUxOS00NWI2LThjN2ItNjkyNWNhZDRmODBh/view?usp=sharing

If you print off the Level 3, you'll have to print off the 4th page (with the answer key) to have the remaining pieces for the game too.
https://drive.google.com/file/d/0B6St72bEbLYhYzA0NWYwNzYtZDQzOC00NWM0LTkwY2YtZjM5Zjg4Mzk3OGQ1/view?usp=sharing&resourcekey=0-Y8kaMbP2jSGm1Hrc2k5hsQ

Check back for even MORE holiday versions coming in early December! Thanks for reading and sharing a link, but please don't copy my work (and my daughter's works!).


http://kidgiddy.us2.list-manage1.com/subscribe?u=9ea4c419178a2e61b529af8aa&id=975aef860e

Friday, October 1, 2010

Giddy Up Friday: Sudoku - Printables

WOW - Happy October! It's been way too long since I've posted something. I've been so busy this month - almost on the verge of a mental breakdown. And most of it has to do with my "craft room" being taken over by fabric, poly-fil stuffing and thread tornadoes! And driving massive amounts of time for school.


Regardless, I whipped up these sudoku puzzles for my daughter's kindergarten class and wanted to share them with all of my awesome readers! There are 2 levels and an answer key for both levels.


I would highly recommend you print them, cut out the shapes and trim up the board, and laminate them for more prolonged use! Before laminating it, you can put it on a piece of colored construction paper or scrapbooking paper, and glue the answer key on the back so you don't lose it!


If you'd like a third level, drop me a line and let me know! Check back for more holiday versions coming soon! Thanks for reading and sharing a link, but please don't copy my work.

EDIT: 10.15.2014 - A 3rd Level has been requested. If you'd like the 3rd and 4th levels, as well as some blank boards and all the pieces, please visit the More Sudoku Puzzles post. 


http://kidgiddy.us2.list-manage1.com/subscribe?u=9ea4c419178a2e61b529af8aa&id=975aef860e

Friday, January 22, 2010

Giddy Up Friday: Getting Ready for School....

Every morning it's the same thing. "Girls - it's not time to play you need to get ready for school". "but mommy....we just want to play.", "yeah mommy, I don't even know what I'm supposed to be doing". WHAT - have we not done this everyday for the last 4 months????? Sound familiar?

Ready to Color in Chart
Well I couldn't take it anymore so I began the search - I can't seem to find a decent chart out there with all that I want/need on it - so I made my own. And I'm sharing them with you. I'm including one that includes the images in each box. They wanted to draw the pictures, so I filled in their words and left their images blank. Once they have drawn their pictures, then I'll have their pages laminated so they can use some washable crayons or dry erase markers....yep - crayons! Dry erasers - what was I thinking?!Then I made just this blank one. That way - if your child needs to feed a pet or does not like to eat breakfast...then you can make your own list. I have made them very simple. My daughters are artists - so they tend to doodle around the edges! Use stickers - use markers - whatever works - just use it! Feel free to share it - but don't use the files without my permission please!

Blank Chart
I'd love to see some finished pages. If you'd like to send me some - click the contact KG link above and send them my way. Have a great weekend! -kg