Showing posts with label Kids. Show all posts

Tuesday, December 31, 2013

Annual Time Capsules

It's the end of one year, and the start of the next. What will you remember most?


During our year long renovations last year, we found quite a few ways to leave "our mark" upon the house that we have called our home for 12 years already. As they tore down walls and built new walls, I decided to pull together a slew of items that if ever found, would give the new owners a sense of who lived here before them, and all the changes the house had been through.


I would have loved to find a time capsule in one of the torn down walls, but we didn't. Who knows - maybe there is still one in a different wall we didn't tear down? If there is, now there are two. We packed up all the things in the (picture up above) and watched Darold nail them in, and watched Steve seal it and paint over the seams. This is all the proof I have that it's there. Hoping that I live long enough to never see it again, but know that its here, hiding, waiting to be found.


We started making these other "Annual Time Capsules" earlier in the year, and put them in our ViewTainers. I only have a few things from my childhood to look back on endearingly, and have to search the web for things that happened, that I just might remember. I thought it would be a great opportunity to capture some of the items/toys and other things that my girls would want to remember and see in 10 or 20 years from now. I love the Viewtainers because they are not made of breakable glass, making them very kid friendly. You can seal them up at the end of the year with duct tape, silicone, or packed in a box and locked up, not to be opened for another 10 or 20 years, you decide.

Not sure what to include?

Here's what we put in some of the time capsules: Silly Banz for the 2011 container, because just two years ago, my girls were among the masses that wore quite a few on each wrist, and traded them on the playground (and now for 2013 it's the Rainbow Loom bracelets). A Twinkie (because everyone knows they last 20 years, and when they went bankrupt, I bought a few boxes too. It was all the rage). The duck tape craze and now washi tape madness that has swept the nation for the past couple of years, has reserved a place in one of these capsules too, among many other squinkies, trinkets and movie characters from cereal boxes.

I have also included a short list of facts from the past few years, things we will remember, or want to remember: Movies we saw, tragedies we witnessed, and triumphs in and around the world, etc. The ideas are endless, and the capsules can be personalized as well to include birthdays, celebrations, milestones, etc. The Project Life cards are perfect for this, and can even capture favorite family recipes and so much more. Write it down. Record it. Treasure it.

I hope you all have an absolutely amazing 2014, filled with joy, laughter, charity, hope and love. Thank you for reading my blog. Thank you for being a part of my life and journey. If you want to be in the know of all the fun things to come this year...click that link below and sign up to receive my newsletters. I have yet to send one out, so please know I won't spam you like crazy and send you an email every day or week! Happy New Year everyone!


Friday, December 14, 2012

Infinite Fun with Legos - A Cruise Ship

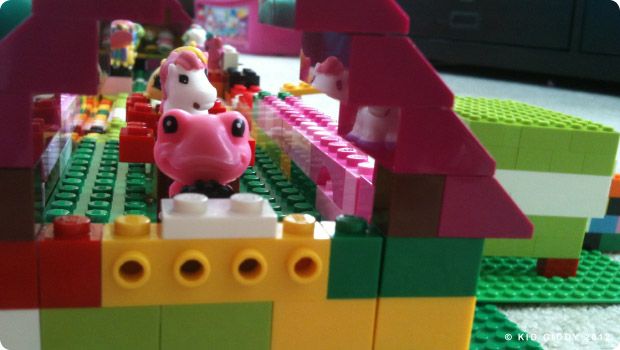
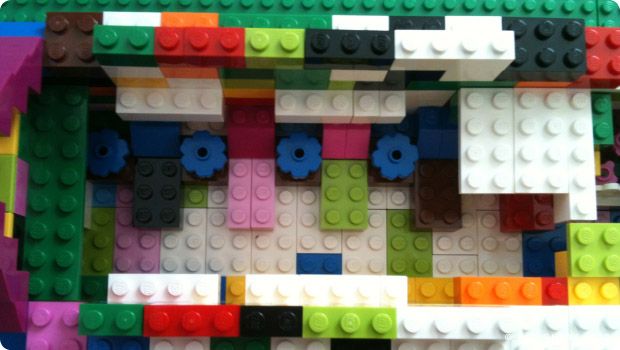
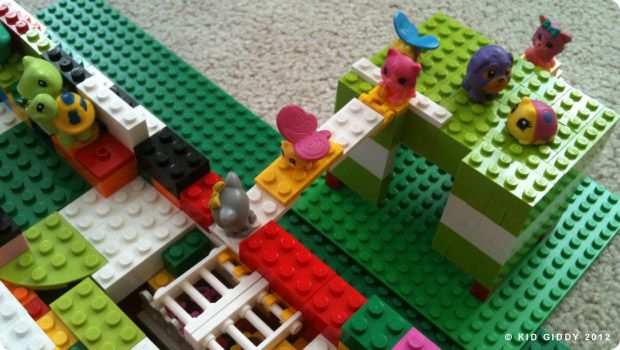
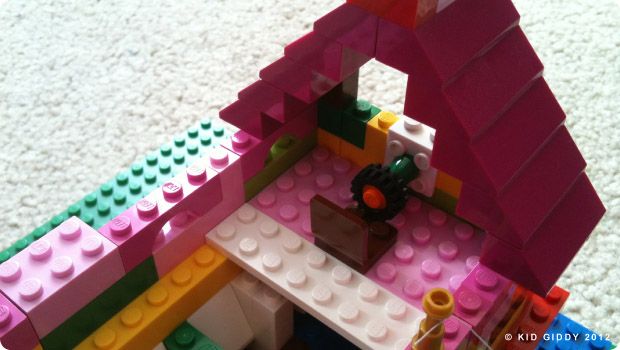
I had to share these pics of the Lego Cruise Ship my daughters created one day while I was working on my book. They actually started this masterpiece around 6:30 in the morning before I woke up, and took them about 3 hours. They wouldn't even stop for breakfast.
All aboard....the passengers leave the dock and board the ship prior to a prompt departure.
This is the ships wheel. The little pole on the bottom near the right is the anchors attachment.
This pink frog (squinkie) is one proud Captain.
The Cruise Ship leaves the dock and travels the charted waters with all passengers on board.
Below deck there is lots to see and explore. Not sure where the potty pic went...but here's the opposite side - the Sleeping Quarters, fully furnished with night tables! The beds are under the Captain's Office.
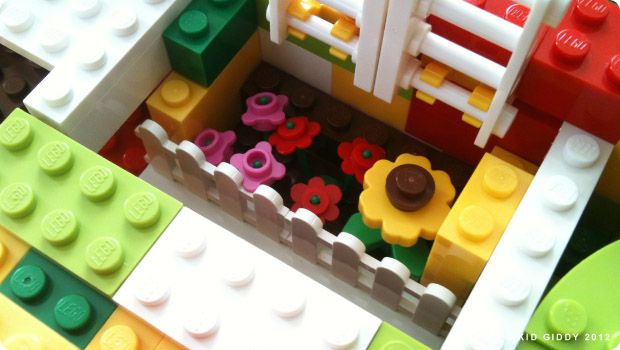
This is the ships garden, where they harvest all their flowers for the ship and the Chefs harvest veggies for the kitchen.


What will you make next with your Lego's?

I will have a fun wintery tutorial up next week - so keep your eyes peeled! Have a wonderful weekend!

Friday, January 20, 2012

Giddy Up Friday: Snow People Chess Set, Crafts n' things

Pin It

When I was younger, I remember going to visit my Great-Grandmother at her house. (I was young - I thought it was her house, but many years later found out it was not her house but my mother's Aunt's house). For the sake of the memory, I still call it her house. I remember in the front room a little table, with a checker board painted right on it. It was a small round table, just big enough for the board and some chess pieces (again from memory). I've always had a love of chess since learning it, but honestly don't play it all that often. I can beat my husband any time while playing Othello, but he often check mates me in Chess! Regardless of wether I win or lose, I still love the game. I love the pieces and I love the challenge and strategies.


When I went to visit my dad in Utah one summer, I went to his office at BYU and saw some chess pieces made from steel. There they were, lined up along the top of a desk or windowsill. They struck me as simple and beautiful, and I have wanted them ever since.


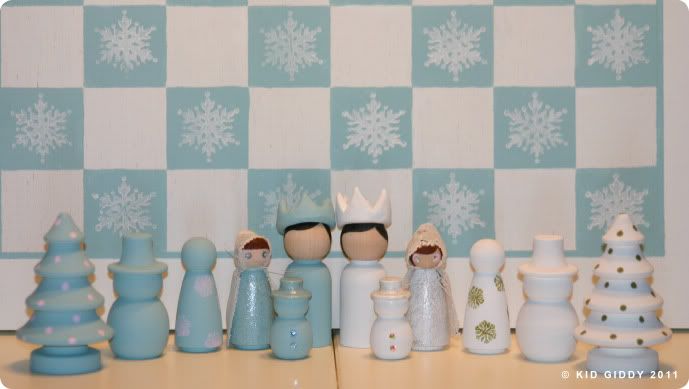
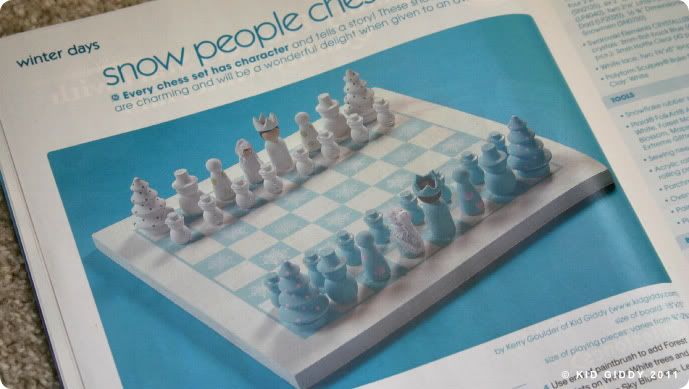
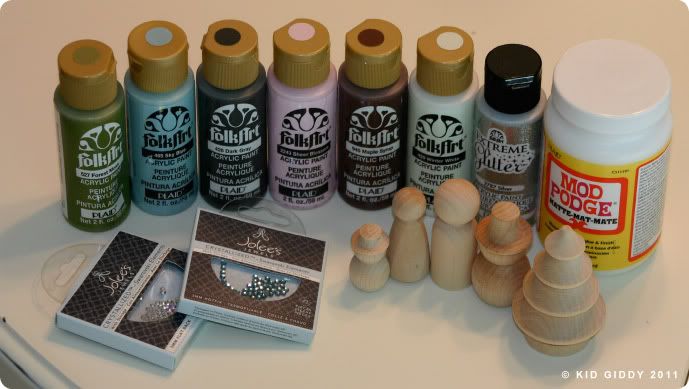
I don't have a machine that can turn a bar of steel into amazing chess pieces, but I had a vision of creating a kingdom of winter chess pieces with the wooden trees and snowmen that you'd find in any hobby store. I will be the first to admit that painting and stamping is not my go to medium, but once in a while I am smitten with an idea and must tackle it head on! You can find all the information for this project in the current Feb 2012 Crafts 'n things Magazine! (You'll even see it on the front cover in the top corner!) I hope you enjoy making your own set! If you have children, invite them to help or let them make their own! Here's what you'll need!...I bought all of my own supplies and got all the wooden pieces from a place online called craftparts.com. (I was not paid to say that)! Since crafts parts is no longer selling the tiny snowmen, you can also try this other website.

T-minus 5 days until I leave for the ever fun Craft and Hobby convention. Stress is high and there's still so much to do! Thanks for visiting, and it's almost time for that Anna Griffin pattern giveaway I mentioned last week! Be sure to keep your eyes peeled for that post!

Have a wonderful week and come find me if you are attending CHA, I'd love to meet you! You can tweet me @kidgiddy to find me!


(PS...have you seen what my twin sister Sue, has been up to lately? Here's her latest project featured in the beginning of the same issue! - it's only a sneak peak - so you'll have to get the copy and check it out!)

Friday, July 15, 2011

Giddy Up Friday: Craft Cabinet Organization

My little girls love to create just as much as I do. My oldest daughter has been drawing since she was only 14 months old on a Magna Doodle, no joke! My youngest daughter caught wind of the fun and started, just around 2 years old. It's been non-stop creating ever since. We learned early on that we needed a place where they could keep their coloring books and crayons, magna doodles, etc.  A place they could easily get to, without getting into the wrong things or getting hurt! Enter in the creation of the "craft cabinet".
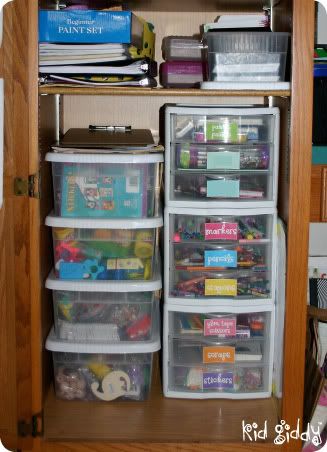
This is the finished result
Their "craft cabinet" has been a great source of inspiration and has always been filled to the brim. We have filled it, emptied it, cleaned it and reorganized it, over and over many times. Finally we came up with a much better system that has kept it cleaner more times than not. Everything has a place and everything must be in that place or there is weeping and frustration from all members of the family when something can't be found.

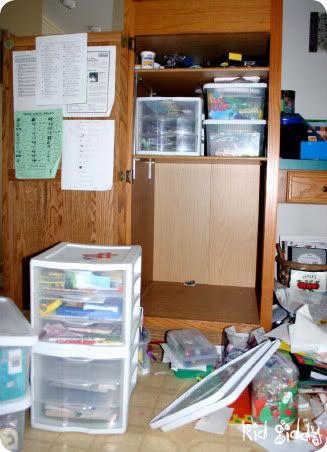
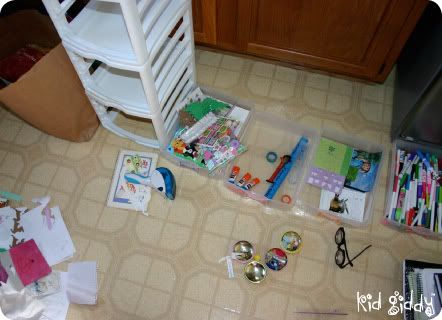
These photos document the clean out process from last year! It's a very "Clean Sweep" style of organizing. The cabinet (in our needing to be remodeled kitchen) is used for their crafting supplies and measures 22"W x 23"D x 38"H total. A small space, organized really well, can house a ton of craft supplies! I promise! So here goes....
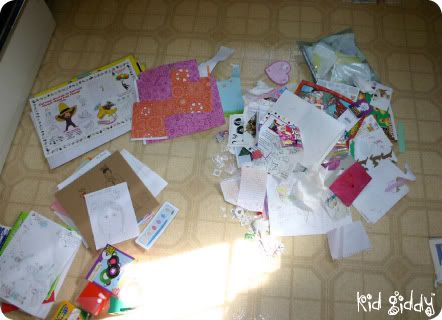
Clean Sweep - take everything out first!
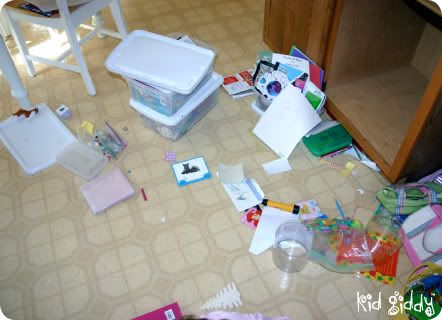
Here's the panoramic view of the mess we created...
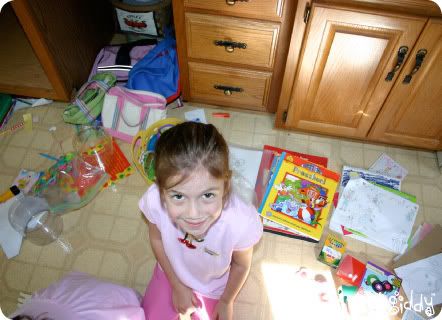
Here's Elephant joining in the sorting process!
I'm amazed at how much was eventually crammed in there!
All of the drawers were removed and emptied. Then sorted by labels.
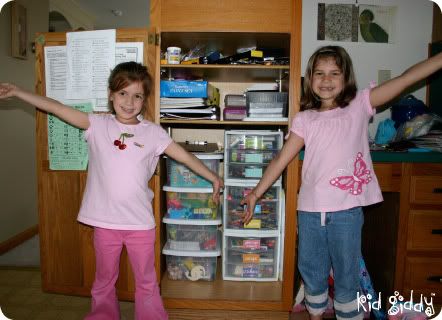
Monkey & Elephant show off our amazing results!
We had the 4 larger bins already, as well as the 3 drawer pieces, but adding the labels, changing the layout a little and moving up the middle shelf level, helped tremendously. Although these pictures were from October of last year, I'm happy to say - it still looks this good!

In the bins, we have:
1) All play-doh
2) Coloring books (now for guests) or notebooks (which they use more often)
3) Wooden objects, googly eyes and other beading or fun kid projects
4) Felt, PomPoms, Pipe Cleaners, Foam stickers, etc.

The bins are standard plastic containers and the 3 Drawer units are 8 1/2 x 11. I have since bought them a standard 12 x 12 Scrapbooking tote, since the scrapbooking pads don't fit into either the bins or drawers.

I'm sharing the labels I made for the drawers, in a color version and in a black and white version (if you'd like to color your own). I used clear packing tape to "laminate" them and then stuck them to the inside of the drawers, where the handle of each drawer creates a curve. I only used 9, but I have added more so you can pick and choose which you need or prefer to use! Click on the image below to get to the Google Doc to download the PDF.


I hope you enjoy them. Let me know if I'm missing a really important label and I'll add some more later. Have a great weekend!

Thursday, March 10, 2011

Throw-Back Thursday: Ribbon Barrettes

I've been thinking of this post for a long time. My girls love their hair accessories so I started thinking about what I used in my hair when I was little. The memories of my childhood came flooding back and instantly I thought of these ribbon barrettes and had to make them some.

 
Yesterday when my girls got home their eyes lit up with pure excitement that I could make these barrettes for them. They started talking about more colors and immediately wanted to wear them. They couldn't believe I actually could buy barrettes like these when I was little, that - it's just the way it was. I have so many more things to share, photos & tutorials of my past. So many that I got a little over-excited and created a new "day" of the week to focus on it! It's called "Throw-Back Thursday" and I hope you'll come back to visit every week and share some memories with me!


OK - I digress...Here's your step by step photo tutorial to help you make some fun barrettes in any color combination and ribbon style to suit your fancy! Enjoy!


You will need : 2 large barrettes and 2 pieces of ribbon 21" long for each barrette. Flat & Ric-Rac or all flat.

Start by placing the ribbons under the top hook of the barrette and tie once.

 
Immediately begin to criss-cross and weave the ribbons through the center space

Continue to the very bottom of the barrette, scrunching up the ribbon to the top, to make sure you really weave and fill in as much as you can as it curves underneath

Once the weaving is completed, tie the ends right over left and let over right into a knot.

Now grab both ribbons and tie them into a single knot together to ensure it won't loosed over time.

I hope you'll come back to visit soon. I'd love to know what you think of Throw-Back Thursday, please leave a comment below! Thanks so much for stopping by! Have an awesome day!


http://kidgiddy.us2.list-manage1.com/subscribe?u=9ea4c419178a2e61b529af8aa&id=975aef860e

Wednesday, March 17, 2010

Edible Wednesday: Fluffernutter Balls

Ever since I made my first fluffernutter ball in the second grade at GSS in Texas...with Mrs. R.B. - I have thought about them, remembered them, and have wanted to make them again.

I don't remember her smearing anything in my hands - but I remember rolling the mess together and forming a ball. I'm not even sure I remember eating them!? I think the freedom of this mixing sticky yummy stuff - was most of what stuck with me all these years (no pun intended!).
So we picked up some fluff at the grocery store the last time we were in there...and more peanut butter. While waiting for dinner to be ready, I decided to let the girls make some fluffernutter balls and have all the fun so I could take pictures! (You can mix them in a bowl....but kids will love this tactile experience!)
They thought the peanut butter felt different than the fluff and squealed with each one I put on their hands...and giggled often! As they began smooshing it, it took no time at all for them to begin forming a ball and peeling it off their hands. This isn't a totally clean activity - but it can be contained easily!
So get some fluff, peanut butter (or sunbutter or something else if you have nut allergies)...use equal amounts, and start mixing. After you've mixed it - you can roll the ball in crushed oreo's, coconut, melted chocolate or anything else you want for some simple truffles. Enjoy your edible wednesday! -kg

Friday, January 1, 2010

A New Year - What Motivates You?

So in my recent and numerous conversations with my twin sister - we have been talking about parenting techniques and finding ways to motivate our kids to make good choices instead of making a bad choice and having them be sad or frustrated or worse - have us be sad or frustrated. She's been reading her book, I've been reading mine, and the one word that continues to grab our attention is "Motivate". And so she asked me - what motivates me? Last night as I lay trying to sleep, I thought about that word over and over. I wondered what really motivates me to get up everyday. What motivates me to go to karate, to write this blog, to fill my Etsy shop with cute things....What motivates me period?

So - instead of a new years resolution that will soon be tossed out to the curb with the Christmas tree or the garbage....I thought I'd list the few things that I am motivated by and put the challenge out to all of you, to find out what motivates you? And maybe just maybe - it will make our 2010 that much more rewarding!

My children motivate me to get up. Everyday is different, every day is a challenge, but they change with the wind and the second. I don't want to miss anything and some day I don't want to wish they were 5 and 6 again because I missed it all. They make me laugh, cry (for good and bad)...and give me hope for a better world where everyone can be as a child...innocent and loving!

My 2 is Beautiful business motivates me to keep going everyday. I love coming up with new ideas and wonder what the world might think of them. When I opened up my KidGiddy.Etsy shop I was bummed everyday for 30 days until I got my first sale! By golly - people like my stuff! Sales aren't always easy on Etsy. There's a lot of hard work and networking involved. Unless you are already well established on Etsy - it can be tough getting noticed. I've had 13 sales to date and am grateful for each one. I have some big plans for my business this year and hope it will continue to grow with each new idea.

My karate motivates me - because it's so freakin' awesome and fun! It gets me working out 2 times a week (when I'm not sick) and I get to have stronger muscles and more self esteem than I've ever had in my whole life. I sitll look over my should when I'm alone or feeling vulnerable with my 2 little girls, but don't mess with me or them, 'cause I'll kick your butt! LOL!

I am motivated everyday by the people around me. My husband (he makes me want to be a better wife - designer - and tennis player)....members of my church (they make me want to serve more often and judge less)....my neighbors, my blog fans and facebook fans and twitter followers - even Joe at the Post Office - everyone seems to give me a reason to do something good today. That's motivation.

I am less motivated when it's cold wet, rainy and snowy - but am more motivated by blue skies and warm sunshine! So there it is - maybe not everything under the sun that motivates me - but it's enough to get me going and to get my new year started in a good way!

What motivates you? Feel free to share in the comments below! Happy New Year! -kg