Showing posts with label Christmas. Show all posts

Monday, July 5, 2021

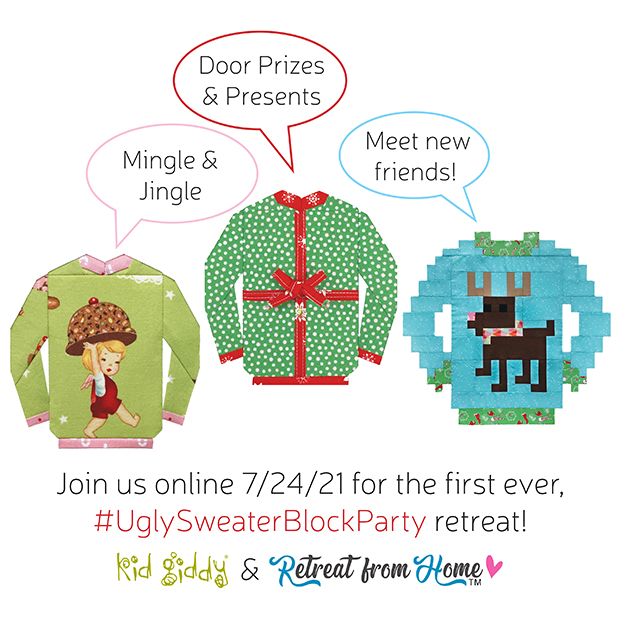
The First Ever Ugly Sweater Block Party

Two things I love in life...Christmas and crazy fun summer block parties...are coming together in just a couple of weeks in a whole new way! You know...all things jolly, the oh so swanky Ugly Sweaters, mistletoe and Santa!...and in the heat of the summer sun, those parties that shut down neighborhood streets, go all day long, and involve laughter and all the yummy foods the neighbors can bring?! Well it won't be in person and hopefully you have A/C and can crank it so high you legit have to wear an "ugly sweater"...but here's the deal...We are having a party and we want you there. Last year I couldn't celebrate the 5 year anniversary of the Original #UglySweaterBlock while making masks and sewing medical gowns during a pandemic, so I'm celebrating now and it just won't be as fun or the same, without you.


If you missed the news on Instagram - I have teamed up with Ebony Love over at
@retreatfromhome to host the very first super fun #UglySweaterBlockPARTY on July 24th! This will be an all out fun day online, meeting new friends during the mingle and jingle events, accessing the two exclusive event patterns (not available to the public until next year), TONS of prizes and AMAZING shopping discounts from our awesome sponsors.

There is also a special limited edition swag pouch for the first 200 attendees, and special goodies for the first 25, 50 and 100 attendees! You will not want to miss this opportunity to gather together for swapping fabrics, blocks and fun/ugly sweater tales while learning all my tips and tricks in my two live classes. Head over to

RetreatFromHome.com to sign up and then grab one of the “I’m attending” badges to share from my first #UglySweaterBlockPARTY post on IG or down below!

🌟If you refer a friend - make sure they tell us your name…we will be giving out a prize for the most referrals! Ok - ready - set - go! Registration closes on 🌟


We can't wait to party with you!


http://kidgiddy.us2.list-manage1.com/subscribe?u=9ea4c419178a2e61b529af8aa&id=975aef860e


Disclosure: There are no affiliate links. Thank you.

Tuesday, November 1, 2016

Ugly Christmas Sweater Block Sew-a-long

Good evening everyone!

I know it's a bit late to get this Ugly Christmas Sweater sew along started - but it has to start today...I just can't wait anymore. Getting home from market and quilt market prep is causing a bit of chaos in my brain. I didn't have time to get the post all ready before I left and slept all the way home. But the wait is over.
Ready for all the details?
I want to make myself a Christmas quilt. I decided I wanted to make a slew of "Ugly Christmas Sweaters" after I designed this pattern last year, but haven't had the time to get started. I figured with the help of many good friends, and the accountability of everyone watching, I just might get it done. If you want to sew along with me, I would love that. Each of the designers will post a picture of their block on Instagram on their allotted day as I'll be posting mine too. You don't have to make an entire quilt, and it doesn't have to be Christmasy, I just hope you'll have fun.

There will be a weekly prize - a gift certificate to a different online fabric shop each week. Each day you post a picture of your sweater, you are entering for a chance to win the prize of the week. These are the awesome online shops:
Weekly Ugly Sweater Block Sponsors


At the very end of the sew along...there will also be a grand "present" generously provided by the many designers listed in the red present box below. Gifts may include physical items or digital downloads which means happy mail for days and days!

Each time you post a picture of your sweater, you are entering for a chance to win the prize of the week or the grand present at the end. The more times you post a picture of your sweaters on Instagram (tagging me, the designer of the day and the online fabric sponsor of the week) while also using the hashtags #uglysweaterblock and #kidgiddy, the more chances you have of winning. Winners will be chosen at random and chances of winning will depend on the total number of entries each week and at the end. ((No purchase necessary - for your chance to win without sewing, you can repost my sweater pic each day, tagging and giving credit accordingly))
UglySweaterBlocks sewn by @LiasHandmades on Instagram
If you don't already have the "Christmas Sweater" pattern - you can purchase it in my Kid Giddy Craftsy shop, or my Kid Giddy Etsy shop (please purchase from Etsy if you are international for VAT purposes). If there is anything I've missed, I will edit this post. My brain is still market mush - so my apologies in advance.

Thank you so much for joining in on the fun. I can't wait to see all of your #uglysweaterblock pics! If you have any questions - please let me know.


http://kidgiddy.us2.list-manage1.com/subscribe?u=9ea4c419178a2e61b529af8aa&id=975aef860e

Disclaimer: I received some fabric over the years and recently from various manufacturers as noted. Some fabrics are also my own. Opinions are my own, and there are no affiliate links. Thank you.

Tuesday, November 15, 2011

Busy Monday: DCC Blog Hop - FlipPal Holiday Ornaments

It's beginning to feel a lot like Christmas....with these holiday ornaments hanging around....

As a member of the Designer Crafts Connection, I have the privilege to work with some really fun toys (aka products), sent to me from the manufacturers. I was grateful to be one of the 8 chosen to this month and was given a Flip Pal™ Mobile Scanner to play with and use at my discretion. Of course with Christmas on my mind already, I decided to deck the halls on this post! After all, it is my favorite time of year!

10 years ago, my husband and I got married. Just over 8 years ago we had our first baby. Almost 7 years ago we had our second, and in a few months, 7 years ago we got our first digital camera. It's so hard to believe that only 7 years ago I was still taking my "film to be processed and printed". Now with everything going digital the opportunities for creative endeavors are endless. I made some really fun ornaments with pictures I have been needing to scan, from my wedding and of my newborn babies! These ornaments are so quick and easy to make, and are great for gift giving!

Here's how to make your own:

What you'll need:
A Flip Pal™ Mobile Scanner
Inkjet Printable Fabric (please be sure to check your printer compatibility with any printing fabric you purchase!)
Ribbon (2 1/2" per ornament)
Holiday fabric of choice
Muslin Fabric
2" 3" and 5" circle die cut or templates
Fiberfill of choice
Needle & Thread

What you do:

1. Read all the instructions on the Flip Pal™ Mobile Scanner prior to using (so that you have enough batteries and can decide things like scanning at 300dpi or 600dpi). Scan all the photos or objects you'd like to use. If you don't want to purchase holiday fabric, you can make your own fabric, by scanning your favorite patterned sweater for a really great texture and printing that as well.

2. If you can't take the picture out of the book, or if you can't fit the object on top of the scanner, remove the cover, flip the scanner and scan the photo directly in the book, or directly over the item. I love this option, as it really gives you so many ways to use it while scanning a variety of things.

3. Using a die cut machine or template cut out three large circles (2 of your chosen fabric, and 1 Muslin) that are 5" in diameter, and one small 2" circle from a scrap of fabric.


4. Once you have scanned all of your photos, you can use the computer program of your choice, to prepare and crop them for printing. I placed each photo into a circle shape on my MAC program, to avoid using more ink than needed. You don't have to do it that way. You can just print each picture and crop during the sewing process. If you print them as circles, they should be no smaller than 3" in diameter. Peel the fabric, carefully, from the paper backing. Make sure you do not pull or distort the images by pulling too hard in one direction.


 5. Lay one of the holiday fabric circles right side up, and one piece of muslin on top of it. Fold it in half (as show on the left side of the group). Fold the smaller 2" circle scrap and center it. Cut out that half circle, so you have a 2" opening in the center of your ornament. Sew all the way around the center of the circle, using a 1/4" seam allowance (3rd photo from left). Now clip all the way around the inside edge of the circle, making sure to not cut the seam.

6. Once you have clipped the inside edge, flip the muslin inside through the center, and behind the front piece. This will give you the clean edge that you need in the center of your ornament. If you prefer a raw edge, you do not need to use the steps involving the Muslin. As pictured on the far right, place your photo underneath the ornament fabric.


7. Next, top stitch around the inside edge of the ornament. With raw edge to raw edge, place a piece of ribbon in the top, center of your ornament. Cover the ribbon, and front of the ornament, with the back piece of the ornament. Leaving the bottom open about 1", sew all the way around the outside edge, using a 1/4" seam allowance again.

8. Clip a notch (small triangles not shown) all the way around the edge of your ornament, again making sure not to cut the seam. Gently pull the ribbon out from the bottom opening, and turn the remainder of the ornament inside out. Gently stuff the ornament with desired fiberfill and stitch closed with a needle and thread.


These ornaments are so quick and easy to make, they would be perfect for gift tags and gift giving this holiday season. So you can make as many as you'd like. And now you'll have to hop around to see all the other amazing projects made with the FlipPal, and some other projects by the other members of the Designer Craft Connections Blog Hop (see the link below). Thanks for visiting and don't forget to click the follow button, on the right side, and sign up for the Kid Giddy email updates! After making some ornaments of your own, please feel free to share them and tag me on social media! Have a wonderful week!


http://kidgiddy.us2.list-manage1.com/subscribe?u=9ea4c419178a2e61b529af8aa&id=975aef860e

This pattern is copyright protected and is for home and personal use only. The opinions set forth regarding the FlipPal Mobile Scanner, and any other products, are my own opinions. 


Here's the awesome news for you:

You can participate too! The blog hop follower and participating Scan & Share Blog Hop designer that creates the most creative and productive ideas using a Flip-Pal™ mobile scanner will each win a Flip-Pal™ mobile scanner. Do you have a creative idea for using the Flip-Pal™ mobile scanner for a Scan & Share project? Enter your idea by clicking this link here. Entries are due by Dec 15th, 2011. A team from Flip-Pal™ mobile scanner will choose the winners—who will be announced on Monday, December 19, 2011


And there's more...The Flip-Pal™ mobile scanner team is also offering a coupon for 10% off the purchase of a Flip-Pal™ mobile scanner or a Flip-Pal™ mobile scanner Creative Suite—with Craft Edition DVD. To receive a coupon code click here. The coupon is valid from Nov 15 - Dec 14, 2011 or while supplies last!


Wednesday, December 16, 2009

Edible Wednesday: Gingerbread House Part 1

I'm off to a late start today. My daughter and I have been sick for the last few days, but on Saturday when I couldn't do much, I at least sat at my computer and got my Monday & Tuesday post ready and scheduled. That felt great. Yesterday when I started to feel a little better, I was busy cleaning house and unable to get going on today's post. But no worries - I've got it all under control!
Today I am sharing with you all the Gingerbread House Template my daughter's and I will be using to make our village this afternoon. If you haven't made one yet - this is for you too! Because blogspot won't let me upload a PDF file - I have inserted this as a JPEG. It will print nicely on an 8 1/2 x 11 - just check before you click print! It will be a small size Gingerbread house - so if you have a few kids, you'll have a village of gingerbread houses and not just one mansion! This is the recipe I plan on using from epicurious.com since I was not able to find the box gingerbread mix this year at my grocery store! They have all the instructions too - for mixing and baking after cutting out your pieces.

Oh - I can just smell it now....I'll post some more pictures later too of our house in progress...Tune in Friday for the decoration celebration, and have a great Wednesday!

Wednesday, October 14, 2009

Edible Wednesday: Cherry Salad

Cherry Salad - two words you might think don't belong together, make my heart sing!
Pin It
This recipe has been in our family for as long as I can remember. Every year for Thanksgiving and Christmas it would sit right on our dinner plates next to the turkey and mashed potatoes and gravy! Oh - no folks - it's not for dessert!!! It's part of dinner. I know that sounds crazy, but I think we all just couldn't wait for it and wanted to make sure we had some before our stomachs were full or overflowing! We didn't care much for the pies and ice cream! Thanksgiving and Christmas just weren't the same without Cherry Salad! I'm sure there was some justification on our parts because it had the word "Salad" in the title....but I can assure you, you've never had a salad like this!

So - without further adieu, here are the ingredients you will need:

1 can - Cherry pie filling (usually only comes as 24oz)
2/3 can of Sweetened Condensed Milk (usually only comes as 14 oz) (I use it all!)
1 can of Crushed Pineapple (usually only comes as 8 oz)
2/3 bag Mini Marshmallows
1 cup Chopped Pecans (optional)
16-24oz Cool Whip (personal preference richer flavor or stretch for more people)
You will need a large mixing Bowl and a spoon and a spatula (both for licking clean when finished)!

First, completely drain the crushed pineapple. I've tried this a few ways. The best way I have found is using a small wire mesh strainer and a spatula and pushing all the juice into a cup or bowl (to drink or discard). The more juice you drain the better or else it will cause separation. (Of course if you have Pineapple allergies - you can omit this ingredient too!)

Next combine all the ingredients except the cool whip and the cherry pie filling. Make sure to mix well. Then fold in the cherry pie filling and then fold in the Cool Whip. I say fold, because you don't want to crush all the cherries, and you don't want to flatten the cool whip.

The best way to eat it is to let it sit overnight. I personally cannot wait that long so I enjoy a little bowl right away and of course lick the spoons. If you are strong and let it sit overnight the marshmallows will absorb the juices and melt in your mouth. If you don't want to use all of it at right away, you can put some back into your cool whip containers and freeze them! This little trick was a whole new concept to my mom. I guess we ate it up too quickly to ever have any leftovers to freeze and scoop like ice cream! I hope you will give this recipe a try. And if you do, I hope you'll come back and drop a comment here letting me know what you thought!

Thanks! Kerry

ps...A very good friend of mine is very much Gluten free and LOVES this stuff. So if you are Gluten free too, and you check all your ingredients, enjoy!

EDIT:
Hello Pinterest lovers! I wanted to give a little shout out and say thank you for all the comments and love and pins...this post is currently at 450K + pins and I'm in shock! I've seen a lot of new blog posts popping up around the internet with this recipe and variations of it. Please be sure you are not copying my recipe and posting it as your own. I know it's not "original" but as seen in the comments below - you can tell we all have the ratios a bit different from how we grew up with it since the late 70's. If you'd like to share the recipe on your site - please only provide the link and not the recipe. 
Thank you again for all the love! Please visit some of my other commonly pinned sewing tutorials - the Modular Star, Flower Pins, Mini Tent, Grass Picnic Blanket and the Scrappy Owl. Come chat with me on Facebook and see a little bit of my world through Instagram!