Tuesday, November 15, 2011

Busy Monday: DCC Blog Hop - FlipPal Holiday Ornaments

It's beginning to feel a lot like Christmas....with these holiday ornaments hanging around....

As a member of the Designer Crafts Connection, I have the privilege to work with some really fun toys (aka products), sent to me from the manufacturers. I was grateful to be one of the 8 chosen to this month and was given a Flip Pal™ Mobile Scanner to play with and use at my discretion. Of course with Christmas on my mind already, I decided to deck the halls on this post! After all, it is my favorite time of year!

10 years ago, my husband and I got married. Just over 8 years ago we had our first baby. Almost 7 years ago we had our second, and in a few months, 7 years ago we got our first digital camera. It's so hard to believe that only 7 years ago I was still taking my "film to be processed and printed". Now with everything going digital the opportunities for creative endeavors are endless. I made some really fun ornaments with pictures I have been needing to scan, from my wedding and of my newborn babies! These ornaments are so quick and easy to make, and are great for gift giving!

Here's how to make your own:

What you'll need:
A Flip Pal™ Mobile Scanner
Inkjet Printable Fabric (please be sure to check your printer compatibility with any printing fabric you purchase!)
Ribbon (2 1/2" per ornament)
Holiday fabric of choice
Muslin Fabric
2" 3" and 5" circle die cut or templates
Fiberfill of choice
Needle & Thread

What you do:

1. Read all the instructions on the Flip Pal™ Mobile Scanner prior to using (so that you have enough batteries and can decide things like scanning at 300dpi or 600dpi). Scan all the photos or objects you'd like to use. If you don't want to purchase holiday fabric, you can make your own fabric, by scanning your favorite patterned sweater for a really great texture and printing that as well.

2. If you can't take the picture out of the book, or if you can't fit the object on top of the scanner, remove the cover, flip the scanner and scan the photo directly in the book, or directly over the item. I love this option, as it really gives you so many ways to use it while scanning a variety of things.

3. Using a die cut machine or template cut out three large circles (2 of your chosen fabric, and 1 Muslin) that are 5" in diameter, and one small 2" circle from a scrap of fabric.


4. Once you have scanned all of your photos, you can use the computer program of your choice, to prepare and crop them for printing. I placed each photo into a circle shape on my MAC program, to avoid using more ink than needed. You don't have to do it that way. You can just print each picture and crop during the sewing process. If you print them as circles, they should be no smaller than 3" in diameter. Peel the fabric, carefully, from the paper backing. Make sure you do not pull or distort the images by pulling too hard in one direction.


 5. Lay one of the holiday fabric circles right side up, and one piece of muslin on top of it. Fold it in half (as show on the left side of the group). Fold the smaller 2" circle scrap and center it. Cut out that half circle, so you have a 2" opening in the center of your ornament. Sew all the way around the center of the circle, using a 1/4" seam allowance (3rd photo from left). Now clip all the way around the inside edge of the circle, making sure to not cut the seam.

6. Once you have clipped the inside edge, flip the muslin inside through the center, and behind the front piece. This will give you the clean edge that you need in the center of your ornament. If you prefer a raw edge, you do not need to use the steps involving the Muslin. As pictured on the far right, place your photo underneath the ornament fabric.


7. Next, top stitch around the inside edge of the ornament. With raw edge to raw edge, place a piece of ribbon in the top, center of your ornament. Cover the ribbon, and front of the ornament, with the back piece of the ornament. Leaving the bottom open about 1", sew all the way around the outside edge, using a 1/4" seam allowance again.

8. Clip a notch (small triangles not shown) all the way around the edge of your ornament, again making sure not to cut the seam. Gently pull the ribbon out from the bottom opening, and turn the remainder of the ornament inside out. Gently stuff the ornament with desired fiberfill and stitch closed with a needle and thread.


These ornaments are so quick and easy to make, they would be perfect for gift tags and gift giving this holiday season. So you can make as many as you'd like. And now you'll have to hop around to see all the other amazing projects made with the FlipPal, and some other projects by the other members of the Designer Craft Connections Blog Hop (see the link below). Thanks for visiting and don't forget to click the follow button, on the right side, and sign up for the Kid Giddy email updates! After making some ornaments of your own, please feel free to share them and tag me on social media! Have a wonderful week!


http://kidgiddy.us2.list-manage1.com/subscribe?u=9ea4c419178a2e61b529af8aa&id=975aef860e

This pattern is copyright protected and is for home and personal use only. The opinions set forth regarding the FlipPal Mobile Scanner, and any other products, are my own opinions. 


Here's the awesome news for you:

You can participate too! The blog hop follower and participating Scan & Share Blog Hop designer that creates the most creative and productive ideas using a Flip-Pal™ mobile scanner will each win a Flip-Pal™ mobile scanner. Do you have a creative idea for using the Flip-Pal™ mobile scanner for a Scan & Share project? Enter your idea by clicking this link here. Entries are due by Dec 15th, 2011. A team from Flip-Pal™ mobile scanner will choose the winners—who will be announced on Monday, December 19, 2011


And there's more...The Flip-Pal™ mobile scanner team is also offering a coupon for 10% off the purchase of a Flip-Pal™ mobile scanner or a Flip-Pal™ mobile scanner Creative Suite—with Craft Edition DVD. To receive a coupon code click here. The coupon is valid from Nov 15 - Dec 14, 2011 or while supplies last!


Friday, November 4, 2011

Random thoughts

I've been sitting at my computer for way too long, doing absolutely nothing of worth. I feel like I'm toast. I've been sewing like crazy, to get my goods in a local shop, made some costumes (still need to post those pics) and volunteering at my daughter's schools.

Some days I have a blog post idea, but I know it will take at least an hour or longer, and then lose my motivation. Then there's the having to sew, in which case, I'd shut down my computer just to stay off of it! I have so much to share with you, and no time to do it. But have no fear, this weekend I will be going through much of my blog re-design process and hope it will be finished by Monday. I can't wait to show you what I've been up to lately, and hear your thoughts on the fresh, new, kid giddy blog look!

If you are here, reading any of my posts, won't you please leave me a little comment below. Sometimes I don't bother to post, because I feel like no one is reading. When I started this blog, I actually did it for my daughters. I wanted to share my life, talents, and accomplishments with them, because I don't journal enough. I figured this would act as my journal. I have to admit though, now, it would be lovely knowing others are reading it too, out of pure enjoyment and curiosity! So that's really it for today. No pictures. No flashy fonts and colors. Just thoughts. See you soon. I think I need a nap! -kg

Monday, October 10, 2011

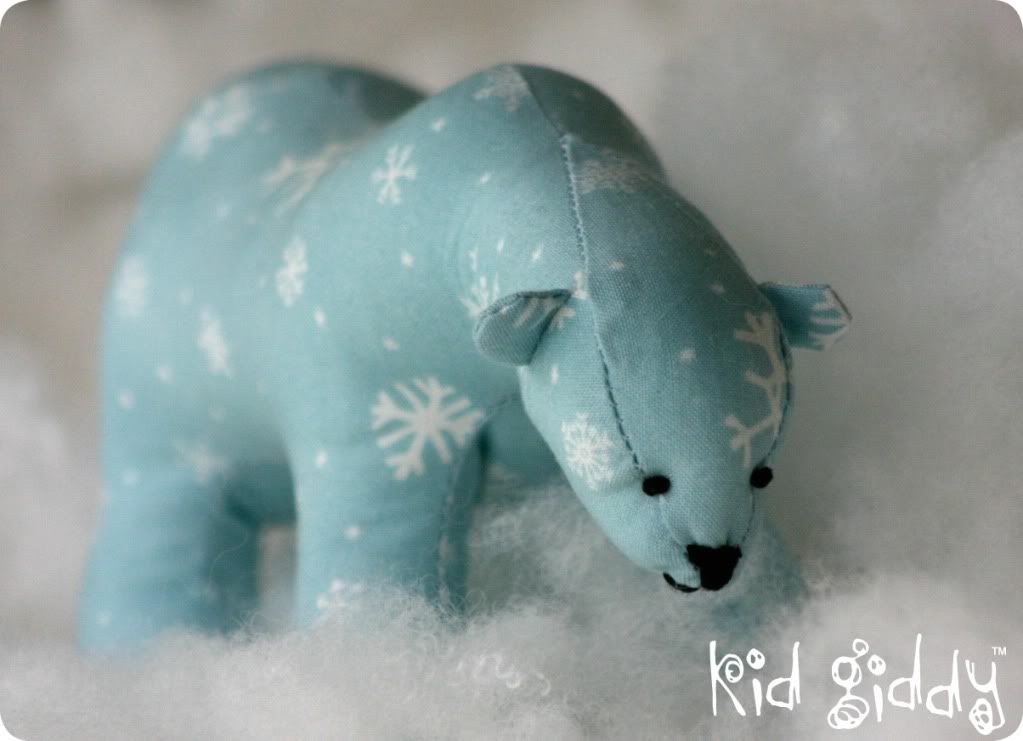
Busy Monday: Bits 'n Pieces Series - Teeko the Polar Bear Softie

Hello everyone,

It is late Monday night and I had to get this little Teeko the Polar Bear post up on my blog, before flying off to neverland! I still cannot believe the year I have had. This adorable little Teeko marks the end of the "bits 'n pieces" series! This latest holiday issue (Nov/Dec 2011) of Crafts 'n things Magazine is officially out on stands...and is as cute as can be! You won't want to miss it.

A year and a half ago, my life was totally different. I blogged feverishly, I struggled to sell anything on my Etsy shop, I took my girls to school, went to karate, ran, biked...did all the normal things I would - well - normally do! Then one day a friend told me to submit something to Crafts 'n things Magazine! I thought - there's no way I could do that. But I resisted the urge to run and hide, and contacted them immediately. To my surprise - they loved my work.

I found out what they were looking for and shot an email back only 10 minutes later. Then I got an immediate response - they loved my Owl. Now I was ready to run and hide again! I had never written a pattern up - at all! I thought it had to look, sound like, and be as confusing as the store bought patterns! lol! And I certainly didn't follow those - let alone know how to write one up for others to understand it! I worked really hard on it. I wrote some of it - and struggled to write the rest. I just didn't have the confidence. I still wanted to run and hide. Finally, the day before the due date - I convinced myself it's now or never, and did it! I did the same thing when I accepted the challenge to do an entire series for the magazine! I wanted to run and hide - but told myself - "it's now or never!" So I did it. And I couldn't be happier!

I don't know how many Crafts 'n things Magazine readers are reading my blog. I don't know how many people like or love my designs. All I do know, is that I stretched myself. I didn't run and hide - when Heavenly Father knows I could've! I dug deep and I climbed my mountain. I have learned so much from this series, this experience, and I sincerely hope you have all enjoyed the new plush friends we've made together: Heddy the Hedgehog, the Tufty Bird Family, Sammy the Seahorse, Carter the Crab, the Reversible PumpKat and now Teeko the Polar Bear! Eventually, when I get my act together and have less work to do - all of these patterns will be available as kits in my Etsy shop, or my own web store. But we have time!

Thank you for taking this journey with me! I now know a few of you, from the Kid Giddy Facebook page and the Kid Giddy Flickr group, from the pictures you have posted, and I am grateful! There will be more fun stuff on the horizon - but my lips are sealed! Thank you to Abby & Annie for this journey! I hope you all have a wonderful night! See you soon!


Monday, October 3, 2011

Busy Monday: Think Pink Handbag Designer Crafts Connection Blog Hop Sponsored by Westcott


I am so grateful for awesome companies that support great causes. Westcott Brand® is proud to be the official sponsor the October Designer Crafts Connection Blog Hop, and being that October is National Breast Cancer Awareness month, the theme of the project challenge was… PINK!

I wanted to design a number of things when I received the box of all things pink. I immediately thought of a huge ball gown type of skirt, but realized that would take too long. At the same time I was thinking about the skirt, I was thinking about a matching bag. It was exactly what I had in mind, and I'm so excited I got the results I was hoping for! This is by far the most Duck Tape I've used at once, and the most intricate. My daughter's and I crafted some little sandals this summer, but that's about it for my handling of DuckTape!

In the end, my hands were the stickiest thing in front of me. Not the scissors, blades, or cutters! I was very impressed and had to share that! Westcott Brand® Titanium Bonded Non Stick Scissors are the BEST Non Stick Scissors on the market that never get stuck and can easily cut through Sticky Back VELCRO®, Duck Tape and multiple layers of fabric and other materials!

My favorite product was the Westcott Brand® Cutting blade which was padded and ergonomic, a far cry different than my old solid steel shank with painful metal grip dots. This blade was awesome! It made crafting this bag, so much easier!

For your chance to win some awesome Westcott Brand® products, please visit the Westcott Blog and the Westcott Brand® facebook page!

Did I mention....you can click the Charity Wings image for your chance to win THIS 1 and ONLY (Think PINK Kid Giddy bag)
& other PINK goodies in the Charity Wings auction to benefit Breast Cancer Awareness.


Feel free to say hi here and leave me a little love in the comments below! (this does not increase your chance of winning the bid or the Westcott package, nor does it count as an entry - but leaving me a comment would be much appreciated!)

After you leave me a comment, you can click forwards or backwards on the blog hop link to see the other PINK projects! Have an awesome week!


http://kidgiddy.us2.list-manage1.com/subscribe?u=9ea4c419178a2e61b529af8aa&id=975aef860e


Disclosure: I received Westcott, Duct Tape & Velcro Brand products, to complete this project for Breast Cancer Awareness month. By having received these products, I have in no way altered my opinion of said products. This is not a review of the product but merely supporting products and companies that also support great causes. Opinions are my own.