Thursday, August 24, 2023

QuiltCon 2024 - I'm Teaching!

Hey everyone, I'm very belatedly sharing the big news that I'm teaching at QuiltCon 2024 in Raleigh, NC again and I would love for you to join me! I first taught at QuiltCon in 2022 and absolutely loved the amazing energy of all my students and the fun of sharing what I do. Are you coming? If so, here is some information about my classes so you can sign up for one, two or all three of them!

The Say it Ain't Sew Quilt classes are bound to be tons of fun. The messages you can create are endless and the font pattern is a mix of patchwork sewing, foundation paper piecing and curves. The pattern comes with all the details to create numbers and punctuations as well, which means you can use the patterns for memories, milestones and so much more! The pattern provides instructions for the regular font, and an elongated font as well. Say it ain't so? Oh yes, it's true! Bonuses galore! These Say It Ain't Sew classes (Thursday 6 - 9pm and Sunday 9 - 12pm) are 3 hours each, but we will stay busy with all the different techniques, tips and tricks! Use class code FPP003 to find them in the QuiltCon search bar. 

The Multiply Your Quilt Blocks class only going to be held once and will be a 6 hours class with a lot of designing and some English Paper Piecing in the second half. This class is all about creating unique blocks using special multiply techniques with a combination of foundational colors and basic blocks we all know and love. What block can you create? I'll bet you no two will be alike! Use class code DES014 to find it in the QuiltCon search bar. (Students will need a computer and the Adobe Illustrator program or something equivalent. For the computer portion, I will only be teaching with the Adobe Illustrator program and may not be able to provide instructions for programs I am not familiar with. However I will try to help find alternative solutions for other programs if time allows. Some prior knowledge of this program will be helpful)

And last but not least is Designing Pixel to Patchwork in EQ8. I have loved the Electric Quilt Program since it came out for Mac computers and I love finding ways to expand my uses of the program to learn something new and create unique designs. This class will teach you how to take a design from pixel to patchwork in the EQ8 program with a little ingenuity and how to prep the file to get your measurements for your design. The Designing Pixel to Patchwork in EQ8 classes  (Friday 1:30 - 4:40pm, and Friday 6 - 9pm) are 3 hours each and also jammed packed with different techniques, tips and tricks! Use class code DES011 to find it in the QuiltCon search bar. (Students will need a computer and the Electric Quilt EQ8 program. For the computer portion, I will only be teaching with the EQ8 program and may not be able to provide instructions for similar programs I am not familiar with. However I will try to help find alternative solutions for other programs if time allows. Some prior knowledge of this program will be helpful). If you have not yet purchased the program, please click here: Electric Quilt EQ8 program (this is an affiliate link - if you purchase through this link, I may be compensated at no additional cost to you).

I love teaching all my tips, tricks and secrets to anyone that wants to learn. I do my best to provide classes that are great for all levels and ask students to come prepared with all the tools needed to make it most successful. I hope you'll join me if you want to level up your sewing and design games. 


Have any questions? Please let me know in the comments below or drop me a dm through Kid Giddy on Instagram. I'm happy to answer any questions prior to class! Huge thank you to all of you that have already signed up for my classes! We are going to have so much fun! Happy stitching as always everyone!


http://kidgiddy.us2.list-manage1.com/subscribe?u=9ea4c419178a2e61b529af8aa&id=975aef860e


Disclosure: This post contains affiliate links as noted and if you click on them and purchase products, I may be compensated at no additional cost to you. Thank you.


Sunday, October 16, 2022

The Official Puppy Portraits Stitch-a-long Finish

Although the Puppy Portraits stitch-a-long is over, I wanted to share some of the finished puppies and share the overall design. I thoroughly enjoyed creating and stitching this project just in time during covid when I needed something good to focus on. 


If you are new to hearing about the Puppy Portraits stitch a long, you can find out more about it in the first June post...here and more about the Aurifil company. I also had a chance to talk to Erin a bit and shared a lot about this project and why I love Aurifil. You can read all about it over on their Auribuzz blog.


Since the close of the stitch-a-long, I'm excited to share that we all collectively donated $3015 to various charities and organizations. I have no doubt each donation made a difference for someone! Thank you so much to everyone that participated in this idea of mine and hope you'll continue to share your finished puppy portraits with me.


Did you missed the stitch-a-long? Don't worry...you can now purchase the pattern in my KidGiddy Etsy shop. You will receive a PDF that includes all of the frames numbered in the order in which the puppy portraits should be stitched.


If you'd like to order  the Puppy Portraits collection and your color choice of Lugana precut linen, you can also find it in my Kid Giddy Etsy shop. I have I have a few Puppy Portraits kits remaining in inventory. 


This Puppy Portraits cross stitch pattern includes 12 different puppies in various frames and the pattern comes with 3 different style counting cross stitch frames. The Aurifil Puppy Portraits Floss collection comes with 20 beautiful colors to assist you in getting all of the colors needed for the project.


Have any questions? Please let me know in the comments below or drop me a dm through Kid Giddy on Instagram. Thank you again to all that participated and a HUGE thank you to Erin at Aurifil for making this stitch-a-long happen! I could not have done it without her! Happy stitching as always everyone!


http://kidgiddy.us2.list-manage1.com/subscribe?u=9ea4c419178a2e61b529af8aa&id=975aef860e


Disclosure: There are no affiliate links. Thank you.

The 2022 Prom Dress

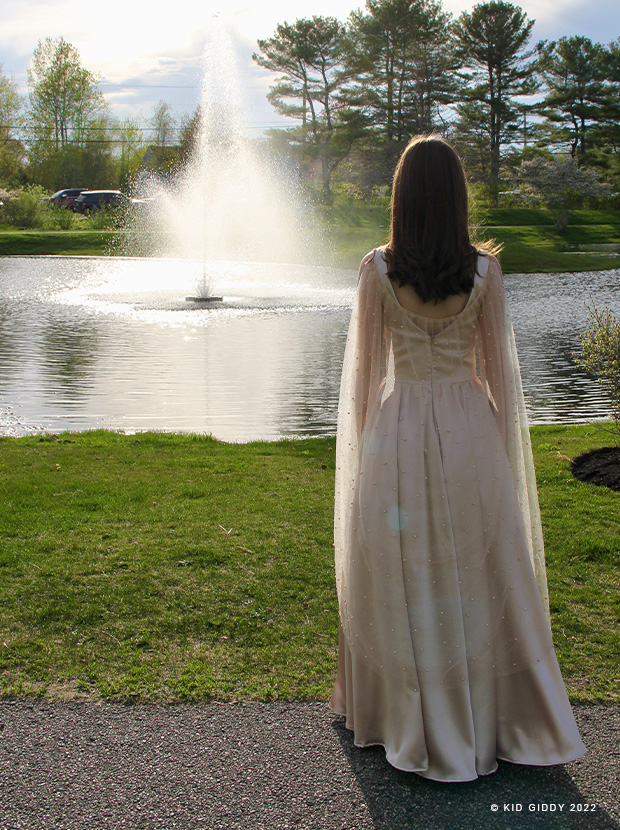
Back in April and May my daughter and I began to dive deep into making her Junior Prom dress. It was so much work, especially during finals, but so rewarding to see her twirling around and dancing in it. 

We live draped her dress to draft the pattern so it would fit her perfectly. 
She absolutely wanted the dress to have a circle skirt and wanted it in a light gold, champagne color. She wanted it to be a v-neck in both the front and back.

She also knew she wanted some kind of accessory but in the end we had two options, an over-skirt or a cape. Funny enough we couldn't settle on just one, so we made it interchangeable. If she wore it as a cape, she would hook the eye hooks under the shoulder seams. And I stitched tiny thread loops on the front so she could hook it as an over-skirt.

We had so much fun making her dress. I shared a video reel of it on my Instagram page if you'd like to see her prom dress twirling. Have any questions? Please let me know in the comments below or drop me a dm through Kid Giddy on Instagram. 


http://kidgiddy.us2.list-manage1.com/subscribe?u=9ea4c419178a2e61b529af8aa&id=975aef860e

A Semester of Textile Printing

As some of you know and others may not know, I decided last year to go back to school at MECA&D (Maine College of Art & Design) to finish the BFA degree I started a *very* long time ago. During my second semester I was able to take a Textile Printing class and really loved creating repeats and blocks with repetition. 
For my first repeat pattern, I created popcorn. It was the week of the Golden Globes, so I couldn't resist making a "golden" popcorn print. The lines were super fine, and the ink was super opaque and thick, so not every line came through, but it may still be my favorite repeat of the semester. 
Next up was the two color Strawberry print. I printed it two different ways. One was using alginate and a steaming process, leaving it as a softer coloring (reminding me of the original Strawberry Shortcake). I think it would make a sweet baby quilt.
The second Strawberry print was with regular opaque inks that were brighter and deeper. I didn't have to print it, but desperately wanted to see the difference. I can't wait to be inspired to create a quilt for this one too. 
The silhouette print above was a my test print before printing t-shirts for my daughters and other family members. It became our summer 2022 t-shirt and now summer t-shirts might have to be a new tradition. 
Last but not least, are my Repetition blocks. These were made for my final class project at the end of the semester. It reminded me of our DNA and family history. How we are all connected in so many ways (ways that we can see and not see). That we are all a bunch of layers. Depending on which color is printed first or second or which ever order, the print change and the colors change. It was a fascinating experiment. 
In the end I decided not to trim them all. I wanted each of them to stay imperfect, off centered and have the raw edges. I connected them with fishing line (because we can't always see our connections to each other and hung them floating away from the wall. 

I hope you enjoyed this look into my Textile Printing creations. Thanks so much for visiting! Please be sure to sign up for my newsletter below.


http://kidgiddy.us2.list-manage1.com/subscribe?u=9ea4c419178a2e61b529af8aa&id=975aef860e

Tuesday, August 17, 2021

Sewing an Installation Art Piece

I had a very unique opportunity back in Feb-March of 2016 to sew 35 painted portraits together for John Coleman, a local Portland, Maine artist. It was so incredibly difficult to be responsible for these works of art, but also, so humbling and exciting to be engaged in such a unique opportunity. If you are interested in reading the whole story he allowed me years ago to share the pics but I held on to it longer and just saw it in my drafts...so take a step back in time...don't mind the tense - I wrote this post later that year, but won't go back in and change the tense.
("The Funny Thing about Time" - 35 black and white portraits, 34 of which have their eyes closed, are all of John's family and closest friends, one of which has eyes opened, the artist.)

I actually knew John because my husband worked with him when my husband first moved to Maine many, many years ago. One random day I was flying home and saw John in the airport and happened to be sitting next to him on the flight home. We got to talking and the conversation led to an old sewing machine he inherited and John wanting to learn how to sew because of some art pieces he wanted to hang for a show. He didn't know what to do and was stuck. I offered to teach him and met him weeks later at A Gathering of Stitches in Portland, Maine (which has since closed). I figured if he had future projects, he would have a place to go the next time, because Samantha has tons of room for him to sew his large canvas pieces. When all was said and done, he was leaving with his artwork exactly as he wanted it.

Months later, John emailed with another project "The Funny Thing About Time". One that was too big for him to take on himself, and asked if I was willing to accept the challenge. We met and went over all the details of the project and next thing I know - I was helping him carry rolls of painted canvas to my car in the snow, more nervous than ever before. What if I dropped them in the muddy snow? What if I cracked the paint? I was a mess. Gratefully I got them home and laid them in the studio. Then I stared at them for a day or two - nervous again to do anything to them. As an artist myself with oil paintings from my college years - I couldn't imagine something happening to them while in the hands of another.
(This is the artist himself, John Coleman. The only portrait with eyes opened.)
First thing was first - I had to trim every single painting so each face was relatively in the vertical and horizontal centers. The only way to do this was to create a template. I trimmed each one and was supposed to leave the far left edge of the left column and far right edge of the right column alone, as well as the top edge for the hems, and the bottom edge of those respective rows to keep raw. All was going well until the last painting on the bottom. I cut off the edge. My heart sank knowing this was going to be the double rolled hem allowance I wanted and I just cut it off. Luckily I still allotted a 1" border for seam allowance on all sides of every piece so I sucked it up and kept going.
(Samantha had the best machines at A Gathering of Stitches in Portland, Maine!)

I finished cutting half of them and took them back to Samantha's place and used her TacSew machine to sew these pieces together. (This machine is a serious beast and I actually miss sewing with it - just saying.) I sewed a whole row together correctly.
(This was my first finished row.)

Then the second row I got two mixed up and had to take them apart. No harm no foul. Since those went together pretty easy, I went back home and finished trimming all the other paintings.
(This is the center row, with the artist's wife in the forefront, and his children if I recall correctly, above him.)

Eventually I had all of the columns sewn, and it was time to sew them all together. I asked John to meet me at AGOS knowing the columns were going to get too heavy for me to safely lift on my own, which worked out to be spot on. Even with the two of us - it was a serious workout.
(I'm pretty sure this is the largest "quilt" Samantha has ever seen in her studio space.)

John recently sent me pictures of the finished project hanging in all it's glory and I just had to share (with his permission of course).
(This is how you would see it if you were at the gallery walking around looking at all of the art.)


I hope to get a blurb from John about the meaning of this project. He told me - but it's been a while and I don't want to botch it. What I got from it was that we have to work really hard to maintain the relationships around us, money isn't everything, and time is fleeting. Eventually we will loose the people around us that we love dearly and we will be left alone.
(Money bags are attached to the top corners to make it even harder to pull open - just like trying to gain financial status can make it harder to keep the relationships around us)
It really was amazing and scary to work on such a HUGE installation piece, but I tried to be intentional with every single point and didn't royally mess anything up. As he helped with the larger sections - he said he didn't realize I was being so careful with lining things up, or that it needed to be. As all of the points and corners came together - he realized the benefit and importance of being precise. Thanks heaven's for the template to cut each one out, and the blue tape on the TacSew for seam guidance.

If you would like to see the video of John opening (and closing) the whole piece you can by clicking the link. Thanks for stopping by.


http://kidgiddy.us2.list-manage1.com/subscribe?u=9ea4c419178a2e61b529af8aa&id=975aef860e

Thursday, August 12, 2021

The Puppy Portraits Cross Stitch SAL: French Bull Dog

I know I'm not supposed to pick favorites - so I won't - but I have loved this one from the very beginning and hope you will too. This little dapper dog has a sweet little bow tie and a very elegant, very "old fashioned frame" with an enormous bow. I'm so excited to introduce you to the second puppy in the Puppy Portraits cross stitch a long. It's the ever loving, small - but mighty, French Bull Dog!


If you are new to the Puppy Portraits stitch a long, you can find out more about it in the first June post...here and more about the Aurifil company. I also had a chance to talk to Erin a bit and shared a lot about this project and why I love Aurifil. You can read all about it over on their Auribuzz blog. If you haven't signed up yet, it's never too late. You can sign up now. Reserve/purchase your patterns by filling out the Puppy Portraits Google form linked via the button below.

Just a reminder: We are not charging for this event in the traditional sense. Rather, we simply ask that participants make a donation to a charity that is close to theirs hearts or homes to offer passionate and targeted support to those in need. The signup form will require the following details:

— When and where a donation was made (donations must be dated June 10, 2021 or later)
— Donation amount (minimum of $12)
— Screenshot or other proof of donation

We’re excited to be tracking all donation totals as well as the charities, organizations, and foundations that you all have chosen to donate to. To date we have raised well over $2500! We’ll share all the details at the end of the stitch-a-long. Participant names and individual donation amounts will not be shared and will remain anonymous.

Upon signup, your name will be added to our pattern distribution list and you’ll receive a PDF download with the stitch-a-long frames. Because the registrations are being confirmed manually, the first email won't go out the second you sign up. All "FIRST" emails will only be sent on Friday mornings. If you register Friday night or Saturday morning, you may not get the first email until the following Friday. We appreciate your patience. All subsequent portraits will be arriving on the 2nd Thursday of each month for the remainder of the 12 months. The frames are numbered in the order in which the puppy portraits will arrive, so please be sure to stitch them in order as noted if you want to get ahead. When you finish your new ‘puppy of the month’, you can then continue working on the frames.

If you'd like to order the Puppy Portraits collection and your color choice of Lugana precut linen (mushroom is shown above), you can find it in my Kid Giddy Etsy shop. I currently have stock of three different linen fabrics but quantities are limited. Once they sell out it will be considered a pre-order and will ship when more product arrives. We appreciate your patience!

To all that have joined us thus far, we are so excited to have you. To those still deciding or just finding out, we can't wait to have you join the party! We truly hope you will stitch-a-long with us over this next year and feel good about being a part of this special project.


http://kidgiddy.us2.list-manage1.com/subscribe?u=9ea4c419178a2e61b529af8aa&id=975aef860e


Disclosure: There are no affiliate links. Thank you.

Thursday, July 29, 2021

The Puppy Portraits SAL: Mini Poodle

It's still month two (albeit late) so I'm going to share the first puppy release with you before the second one comes out in August! We released the Frames to get you started back in June. Who's the first out of the gate? None other than the Mini Poodle...the youngest and smallest of the bunch. He hasn't grown into his full color yet, but he's still as cute as can be. 

If you are new to the Puppy Portraits stitch a long, you can find out more about it in the first June post...here and more about the Aurifil company. I also had a chance to talk to Erin a bit and shared a lot about this project and why I love Aurifil. You can read all about it over on their Auribuzz blog. If you haven't signed up yet, it's never too late. You can sign up now. Reserve/purchase your patterns by filling out the Puppy Portraits Google form linked via the button below.
Just a reminder: We are not charging for this event in the traditional sense. Rather, we simply ask that participants make a donation to a charity that is close to theirs hearts or homes to offer passionate and targeted support to those in need. The signup form will require the following details:

— When and where a donation was made (donations must be dated June 10, 2021 or later)
— Donation amount (minimum of $12)
— Screenshot or other proof of donation

We’re excited to be tracking all donation totals as well as the charities, organizations, and foundations that you all have chosen to donate to. To date we have raised well over $2000! We’ll share all the details at the end of the stitch-a-long. Participant names and individual donation amounts will not be shared and will remain anonymous.

Upon signup, your name will be added to our pattern distribution list and you’ll receive a PDF download with the stitch-a-long frames. Because the registrations are being confirmed manually, the first email won't go out the second you sign up. All "FIRST" emails will only be sent on Friday mornings. If you register Friday night or Saturday morning, you may not get the first email until the following Friday. We appreciate your patience. All subsequent portraits will be arriving on the 2nd Thursday of each month for the remainder of the 12 months. The frames are numbered in the order in which the puppy portraits will arrive, so please be sure to stitch them in order as noted if you want to get ahead. When you finish your new ‘puppy of the month’, you can then continue working on the frames.

If you'd like to order the Puppy Portraits collection and your color choice of Lugana precut linen (mushroom is shown above), you can find it in my Kid Giddy Etsy shop. I currently have stock of three different linen fabrics but quantities are limited. Once they sell out it will be considered a pre-order and will ship when more product arrives. We appreciate your patience!

To all that have joined us thus far, we are so excited to have you. To those still deciding or just finding out, we can't wait to have you join the party! We truly hope you will stitch-a-long with us over this next year and feel good about being a part of this special project.


http://kidgiddy.us2.list-manage1.com/subscribe?u=9ea4c419178a2e61b529af8aa&id=975aef860e


Disclosure: There are no affiliate links. Thank you.
Monday, July 5, 2021

The First Ever Ugly Sweater Block Party

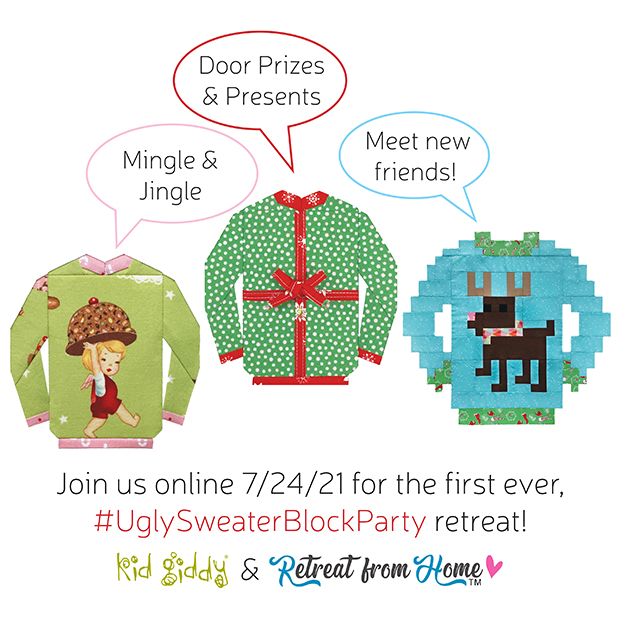
Two things I love in life...Christmas and crazy fun summer block parties...are coming together in just a couple of weeks in a whole new way! You know...all things jolly, the oh so swanky Ugly Sweaters, mistletoe and Santa!...and in the heat of the summer sun, those parties that shut down neighborhood streets, go all day long, and involve laughter and all the yummy foods the neighbors can bring?! Well it won't be in person and hopefully you have A/C and can crank it so high you legit have to wear an "ugly sweater"...but here's the deal...We are having a party and we want you there. Last year I couldn't celebrate the 5 year anniversary of the Original #UglySweaterBlock while making masks and sewing medical gowns during a pandemic, so I'm celebrating now and it just won't be as fun or the same, without you.


If you missed the news on Instagram - I have teamed up with Ebony Love over at
@retreatfromhome to host the very first super fun #UglySweaterBlockPARTY on July 24th! This will be an all out fun day online, meeting new friends during the mingle and jingle events, accessing the two exclusive event patterns (not available to the public until next year), TONS of prizes and AMAZING shopping discounts from our awesome sponsors.

There is also a special limited edition swag pouch for the first 200 attendees, and special goodies for the first 25, 50 and 100 attendees! You will not want to miss this opportunity to gather together for swapping fabrics, blocks and fun/ugly sweater tales while learning all my tips and tricks in my two live classes. Head over to

RetreatFromHome.com to sign up and then grab one of the “I’m attending” badges to share from my first #UglySweaterBlockPARTY post on IG or down below!

🌟If you refer a friend - make sure they tell us your name…we will be giving out a prize for the most referrals! Ok - ready - set - go! Registration closes on 🌟


We can't wait to party with you!


http://kidgiddy.us2.list-manage1.com/subscribe?u=9ea4c419178a2e61b529af8aa&id=975aef860e


Disclosure: There are no affiliate links. Thank you.