Hey everyone,
It's that time of year. The sun's coming out, the sand is burning the bottom of my feet and the grass is soft to the touch and it's time to get the flip flops out! So every year - my girls and I set out and find new fun things to paint on our nails...I still have to take a picture of my Polka Dot toes..but here are some others to check out and try for yourselves...
But first - here's what you'll need:
1. Tub or soapy basin for washing
2. Nail Clippers
3. Nail File
4. Foot Shaver/File/Egg
5. Baby Wipes (these are seriously a Top Secret Secret! - They wipe off mistakes in an instant!)
6. Base Coat (that doubles as a Top Coat!) (I love Nail Tek II - not a paid endorsement - it really is my favorite!)
7. Nail Color of choice - you don't have to buy O.P.I. to get a good polish - N.Y.C. at Target works grat and last long!
8. Get nail art polish (I use the tall skinny bottles from Sally Beauty Supplies) or nail art pens if you want flowers, polka dots or anything else fun!
9. Get a magazine to read while you're drying (and the phone so you don't have to get up!)
Here's what you do:
1. Wash your feet! No really - soak them long and good in nice warm soapy water...really long - you deserve it!
2. Get one of those callus removers or egg type "shavers"...and shave your feet. Get the dead skin cells off - and smooth your feet so you don't look you've been walking on the streets or the farm or in the mall without boots or shoes for years...White cracked heels are a big no-no! Unless of course you are really wearing white heeled shoes!
3. Clip your nails. Not down to the nail bed - but nice and simple. File if necessary.
4. Scrape away dead skin cells from around your cuticles and simultaniously pushing back your cuticle to prolong the polish!
5. Wipe them clean and dry.
6. You start with a base coat. By the time you get from one foot to the next the base coat is already dry.
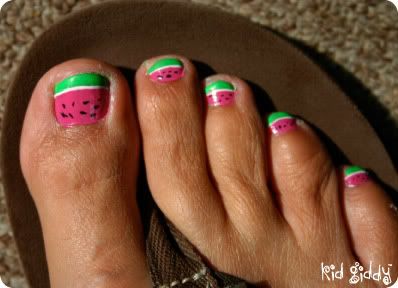
7. For the Watermelon: Apply your pink (melon) color coat. Apply 2 if it is a transparent polish, or is very streaky. A second coat evens it out! Otherwise - 1 coat is just fine!
8. Then use an awesome green (rind) to just paint the tip.
9. Once that is dry use a white "nail paint" nail polish and gently, carefully throw in a line of white between your pink and green.
10. Then get the black and paint your (seeds) randomly on the pink area.
I got so many compliments when I painted my nails this way. And it was always fun to look at! This summer I'll try some others - strawberry, oranges, lemon & lime...it's so much fun!
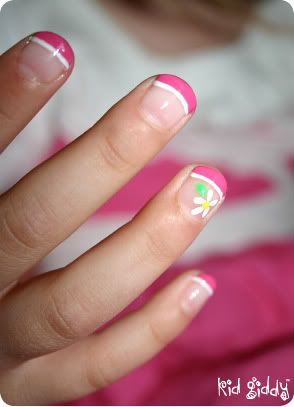
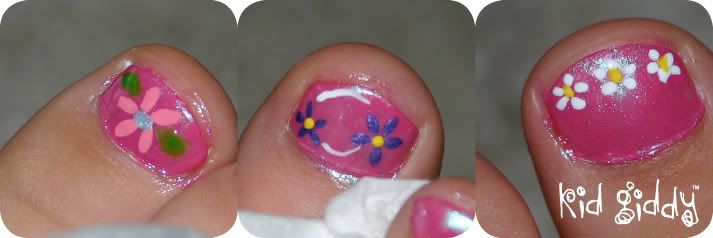
If you like flowers, here are some different option for 1, 2, or 3 flowers, with or without leaves.
If you are interested in some detailed tutorials - leave me a comment and let me know - I'll be happy to take some detailed pictures and provide the step by step descriptions with each photo!
Some other tricks...you can use toothpicks or use a very thin paint brush. They also sell nail art brushes too in beauty supply shops. Not only can you use the brush hairs, but you can also use the other end of the nail brush for making perfect dots. Just be sure to clean your brush very well so it can be used again.
Have fun painting your nails and be sure to take the Summer Sandal Oath: "When my nail polish starts to chip and come off, it's time I clean them off and paint them again, because it's better to have no polish than chipped polish." Who needs a $40 pedicure every week? Sure it feels great - but so does a week long vacation next year because you've saved up all that money and painted your nails yourself!