Thursday, July 31, 2014

Camp Doll Diaries - Cooking Up Fun in the Sewing Studio

This tutorial has been a long time coming. I first designed this quick chef hat pattern for all the young women at my church to make for girls camp. I wanted to post a tutorial, and then decided to write a book instead. Many months later since then, the folks over at Doll Diaries, contacted me and wondered if I wanted to share a tutorial for all their doll diaries fans. I have two American Girl Doll fans right here in my own home, so technically, we all jumped at the chance to participate in their 2014 Camp Doll Diaries event this summer. If you are coming from the Doll Diaries site - welcome to my Kid Giddy blog. This post will show you how to make the Chef hat. If you have come to my site first - you can make your hat and then visit my Apron post on the Doll Diaries site.
Hi everyone, I'm so excited you are here. We love cooking in the kitchen, but we also love to sew. Today we are going to sew this cute chef hat, and matching apron, so pick out some cute fabric you love and let's get started.

These chef hats and aprons are fairly quick and require a little bit of previous sewing skills, or the help of someone who already sews. The cost of making your own hat and apron will be approximately $3-$5 if you already have the basics, and I will share below some many options to personalize your hat and apron.

What you'll need:
2 fat quarters (your choice of fabric - it can be white or printed) (for beginners I recommend felt for the apron, as it is easier to hand sew, and less flimsy)
2-4 buttons
36" (or 1 yard) of grosgrain ribbon (satin is not recommended)
Basics: Pencil, paper, scissors, needle, thread, pins, sewing machine (helpful but is not necessary if you can and are willing to hand sew), and an iron.

What you'll do:
Step 1: Cut your chef hat band piece to 12.5" x 3". Fold it in half lengthwise, right sides together, and sew along the short raw edge, using a 1/4" seam allowance (green band). Open the band into a circle and press open the sewn seam (purple band). Fold the band in half so the right sides are facing outward and press (blue band).
Step 2: Press the band flat with the seam at one end (green band). Fold the band in half, and each half in half again (purple band). Press the whole band (blue band) to create crease marks for ease of use in later steps. Your band should look like the navy band above. Set the band aside.
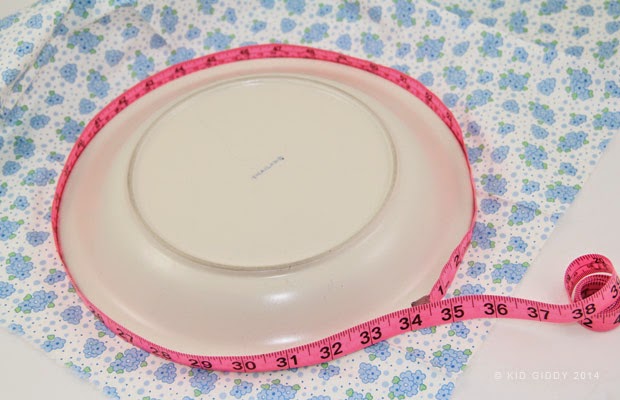
Step 3: Cut out the chef hat top using any dinner plate that is approx 34" around. If you have a circle cutter or special ruler, maybe even a protractor - by all means use what you have that is easiest. I also recommend tracing on a piece of paper first to use as a template.
Step 4: Fold the top piece in half, and then each half in half again. Press all folds so you have crease marks to match up to the bands.

Note: These next steps (5-8) will be the most challenging as it requires a lot of pins. If you have wonder clips, those may work better for younger children, as will skipping steps 5-8 and start at 10.
Step 5: Open up the top circle piece and lay it right side up. Place the band in the center, with the raw edge up, and begin to line up the crease marks on the circle to the marks on the band. Begin with both sides, the top, and bottom.
Step 6: Pin the crease marks that are in between the sides, top and bottom that you just pinned. You should now have 8 pins (or clips).
Step 7: There are now 8 sections that are going to be divided once more. Pull each section to the sides to find the center and pin in place. Repeat this step to the other 7 sections.
Your chef hat should look like this, and have 16 sections.
Step 8: Option 1 - flatten and accordion each section in the center to create a box pleat.
Your chef hat would look like this.
Step 8: Option 2 - fold over each section to the right to create a knife pleat.
Your chef hat would look like this, and would have a sort of spiral effect.
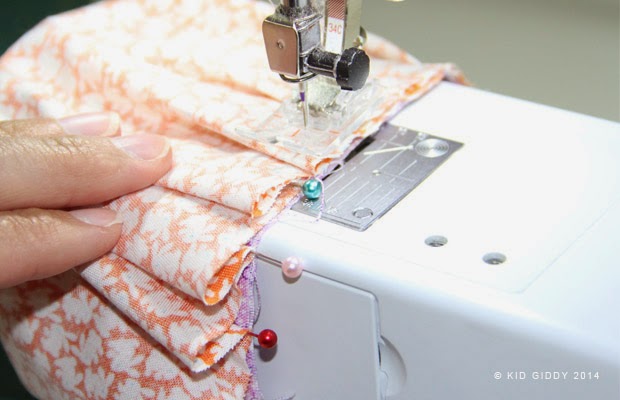
Step 9: Once you have decided which way you want to finish your hat, place the hat around the arm of the machine and stitch the raw edges of the top and the band using a 1/4" seam allowance.
Step 10: If you do not want to pleat your hat at all, and would prefer to gather the edge for a completely different look, switch your machine to a larger stitch length. Leave a good 3" of thread on the beginning and stitch all the way around the top using a 1/8" seam allowance, and leave a 3" tail at the end too. Gently pull on one thread at time to find the piece that will cause it to gather. One will and one won't.
Step 11: Continue to gather the top piece from both ends of the thread, and space the gatherings evenly all the way around as best you can.
Step 12: Pin the band to the inside using the crease marks as your guide (same as steps 5, 6)
Step 13: Sew the raw edge all the way around using a 1/4" seam allowance, and remove the gathering stitch to finish.
Your chef hat will look like this and have a gathered fluffy look.

If you'd like to personalize the hat or apron you could add the following:
1. Name or initials
2. Pocket on the apron (2.5" x 3")
3. Applique shapes
4. Embroidery details
5. Fabric markers, paint or tie dye
6. Felt flower embellishments

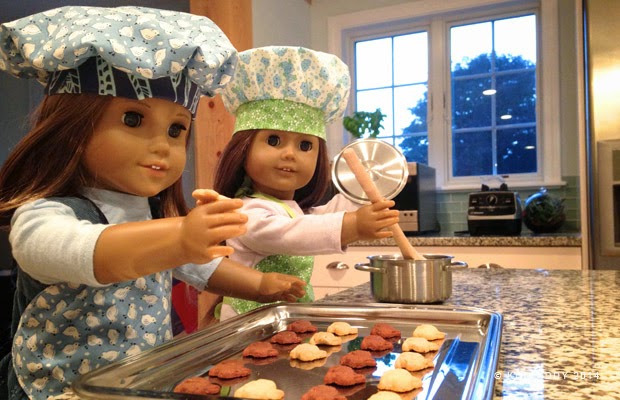
Now that you have finished sewing your hats and aprons, it's time to get cooking in the kitchen. Some of our most favorite recipes are Cherry Salad (which is Gluten free!!! and has been pinned like crazy on pinterest), Wonton Soup, and my childhood memory Fluffernutter Balls!

There are so many ways to make this chef hat and apron set just the way you want it and yummy things to whip up. I would love to see your creations, and hope you'll share them with me. Please follow and tag me on Instagram and on Twitter @kidgiddy, or visit my Kid Giddy Facebook page to post a picture of your doll's new chef attire and be sure to use the #kidgiddydolldiaries hashtag. I can't wait to hear what's cooking in your kitchen. As for ours, it's smoothies galore these days, and a few bunny grahams. Be sure to check out the other Camp Doll Diaries events to see what other fun things there are to do this summer, for all your doll fans.

Thanks so much for visiting and sewing with me. If you are new to my blog, please be sure to click the follow button on the right, sign up for my emails (clicking the link below), and all that good stuff. Happy sewing!


Friday, May 30, 2014

A Little Sleep and Fun with Podcasts

The last two weeks have been full of after market sleep recovery, spending time with my amazing husband for our very own staycation, and these two fun podcasts.


This week I spoke to Stephanie Kendron from Modern Sewciety and had so much fun. I actually had a hard time keeping my southern Texas accent at bay and enjoyed hearing hers! It brought back a flood of memories.


Last week I had fun talking with Mark Lipinski on his Creative Mojo podcast and somehow missed seeing him at quilt market. He just might come up to Maine and come sew with me. Hopefully Stephanie will too.

I hope you'll give them both a listen - there are some other fun guests on these episodes as well. Thank you Stephanie and Mark for having me on your shows - I had such a great time chatting with you both!

 hope you all have a great weekend. I'll be playing with my new EQ7 software and can't wait to share what I come up with.


http://kidgiddy.us2.list-manage1.com/subscribe?u=9ea4c419178a2e61b529af8aa&id=975aef860e

Monday, May 12, 2014

Giveaway Day with Kid Giddy

Hey everyone - this post is going up pretty late. I've been prepping for Quilt Market and it was only on my radar as of last week - when I saw the gals at SewMamaSew post their giveaway image on instagram. Never-the-less, I had to get this up and join in the fun as I have in the past.

So I'm giving away the following:

1) A signed copy of my book Sewing Tales to Stitch and Love: 18 toy patterns for the storytelling sewist

2) My May 2014 Quilt Market swag:  2 - 1.25" pins and 2 - 8.5" squares of limited edition fabric - one each of my turtle, and one each of my lobster. You can finish the edges to make them into a hanky, or use them for a cute mini quilt, or anything else your heart desires

3) Dritz Sewing Notions: Quick Turn tools, Mark-B-Gone, Assorted Craft Needles, Doll Needles, Pearlized Pins, Seam Ripper, EZ Pull Bodkin, Point Turner & Presser

If you'd like to win a this fun kit and caboodle - please leave a comment below and follow the info in the rafflecopter. As always - thanks for stopping by and sign up for my newsletters using the link below. I have some really awesome news I can't wait to share, and my newsletters peeps will be the first to know! Good luck everyone!


http://kidgiddy.us2.list-manage1.com/subscribe?u=9ea4c419178a2e61b529af8aa&id=975aef860e

a Rafflecopter giveaway

Monday, April 21, 2014

Sewing Tales with Felt

Do you sew with felt? I don't normally. I love quilters cotton - the feel, the smell (you know you do too) and all the bright amazing colors and patterns just can't compare. The durability is great too - so that is what I have always loved to create with. Finally I decided to step out of my self made comfort box and have some fun sewing with felt. The verdict - I'd do it again.


A while ago I contacted National Non-Wovens (not an affiliate link) for some color samples of their felt. I had randomly used their felt in the past, that I had purchased at a craft store. This time I wanted make some Sewing Tales projects from my book, as well as bonus projects like the Canoe, and try out the feel of their wool and bamboo blends too. This is not a review of the wool and is not a sponsored post. They sent me some samples and I love working with it. I enjoyed working with good quality felt so if you haven't tried it yet - you should. It's good to break out of our boxes - right?


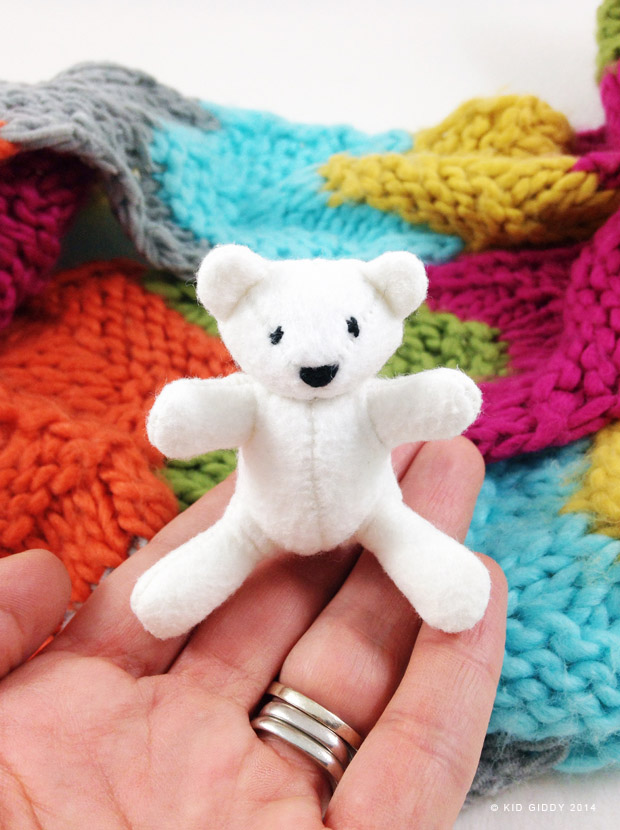
The polar bear cub was made with the Xotic Felt (bamboo/rayon blend) which feels amazing (again just my opinion) my girls want a bigger cub in this felt to cuddle with. I cut out the tiny pieces and began to sew it together. By the time I had gotten to needing the ears and the tail I realized I wouldn't be able to move the pieces under the foot to stitch the curve because the ears were all the way under the foot.


I cut some little rectangle pieces longer than needed and stitch the ears and tail. After sewing it as a larger piece, I was able to cut it out and turn the pieces right side out so much easier. 

The little teeny tiny bump on the left - is the same size as the piece from the pattern - so you can see it was impossible to get a usable ear from it. I actually felt like a dork for not realizing sooner that would happen - but oh well. The ears worked so much easier sewn longer and then cut down to size.


If you don't have turning tools - there's no way you'll be able to turn it right side out. I actually had to say quite a few prayers and probably had a few beads of sweat above my brows thinking it was too small to turn or I'd rip the fabric. I only went through the seam once (but it was actually in between stitches) whew!

Before attempting the tiny polar cub - I tested the same felt with a somewhat larger project (the Edie the Light Bulb from my book (still using the pattern size as printed in the back [not enlarged]). The white one went together really well. I'm still working on the other colors - so I'll post more pics once I finish the project for quilt market.

After working with felt - for these Sewing Tales projects - I almost had a desire to write a whole book with some fun felt projects. Almost. Not yet though. I will def stew on it and see what comes to mind. Until then - if you are going to try sewing some projects from Sewing Tales with yummy wool and bamboo(blend) felt - have fun - and please share some pics.

Have a wonderful week and thanks for stopping by.


http://kidgiddy.us2.list-manage1.com/subscribe?u=9ea4c419178a2e61b529af8aa&id=975aef860e